Android Date - Time - Tabs
Tài liệu này được dịch và làm lại trên slide dạy Android của Đại học Cleveland. DATE Android hỗ trợ những widget (DatePicker, TimePicker) và những dialog (DatePickerDialog, TimePickerDialog) để hỗ trợ user nhập vào ngày, tháng, năm, thời gian. DatePicker và DatePickerDialog cho phép bạn đặt ...
Tài liệu này được dịch và làm lại trên slide dạy Android của Đại học Cleveland.
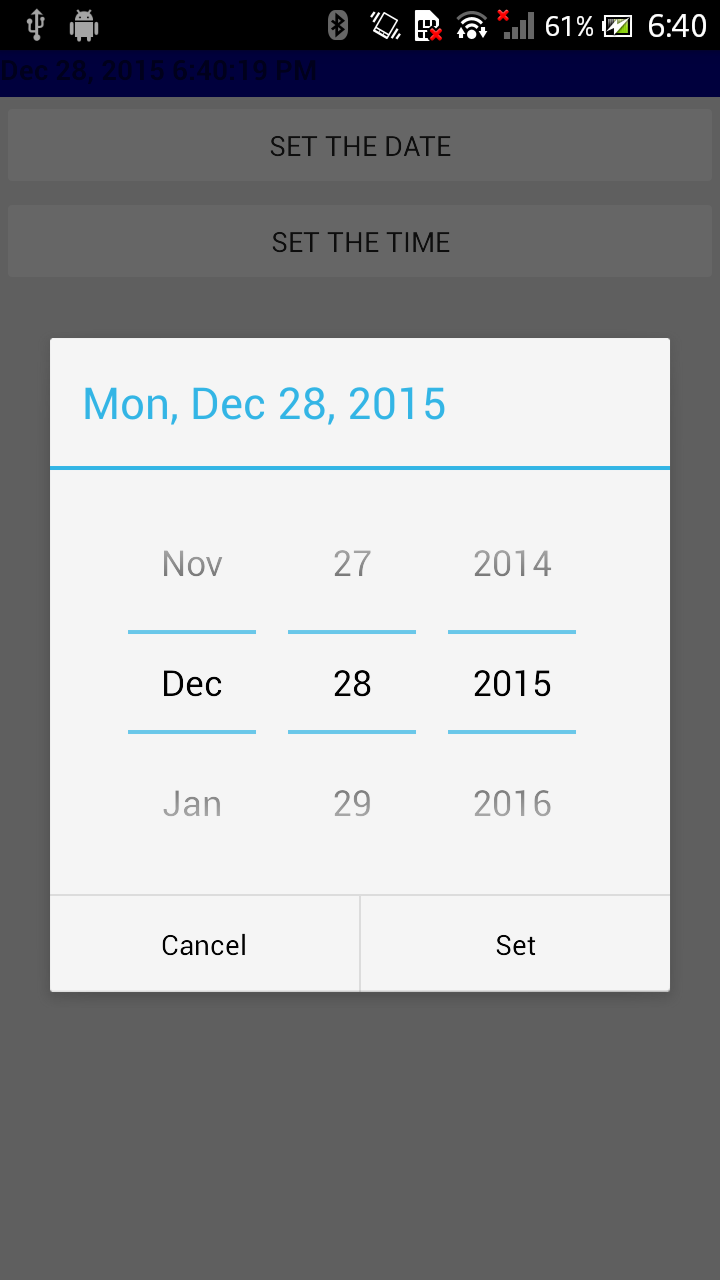
DATE
Android hỗ trợ những widget (DatePicker, TimePicker) và những dialog (DatePickerDialog, TimePickerDialog) để hỗ trợ user nhập vào ngày, tháng, năm, thời gian.
DatePicker và DatePickerDialog cho phép bạn đặt 1 ngày thắng năm defaut bắt đầu trước khi user select giá trị.
Giá trị của month sẽ từ 0 là tháng một đến 11 là tháng 12.
Mỗi wigdet sẽ có 1 callback object (OnDateChangedListenter hoặc là OnDateSetListener) để lắng nghe việc user thao tác thay đổi giá trị ngày, tháng năm.
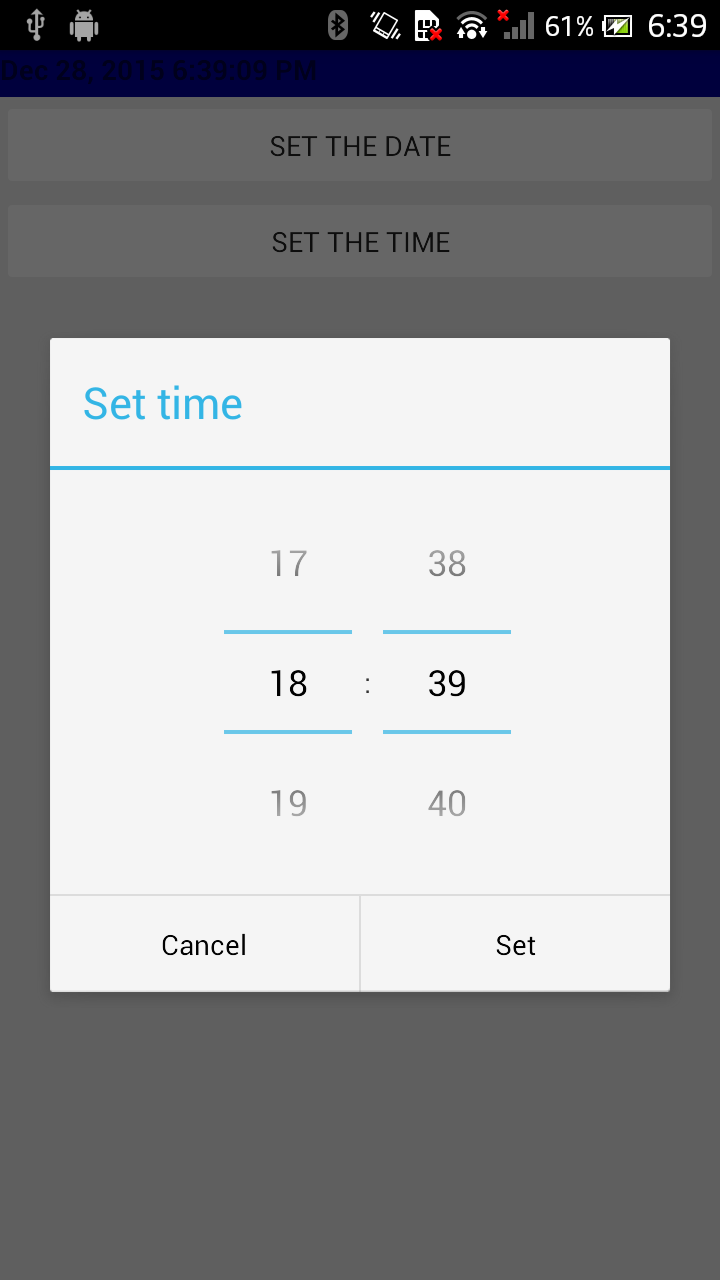
TIME SELECTION
TimePicker và TimePickerDialog sẽ có những thuộc tính như sau :
- cũng cấp các giá trị hour (từ 0 đến 23), minute (0 đến 59)
- selection có thể thuộc 12-hour mode hoặc 24-hour mode
- callback (OnTimeChangedListener hoặc OnTimeSetListener)
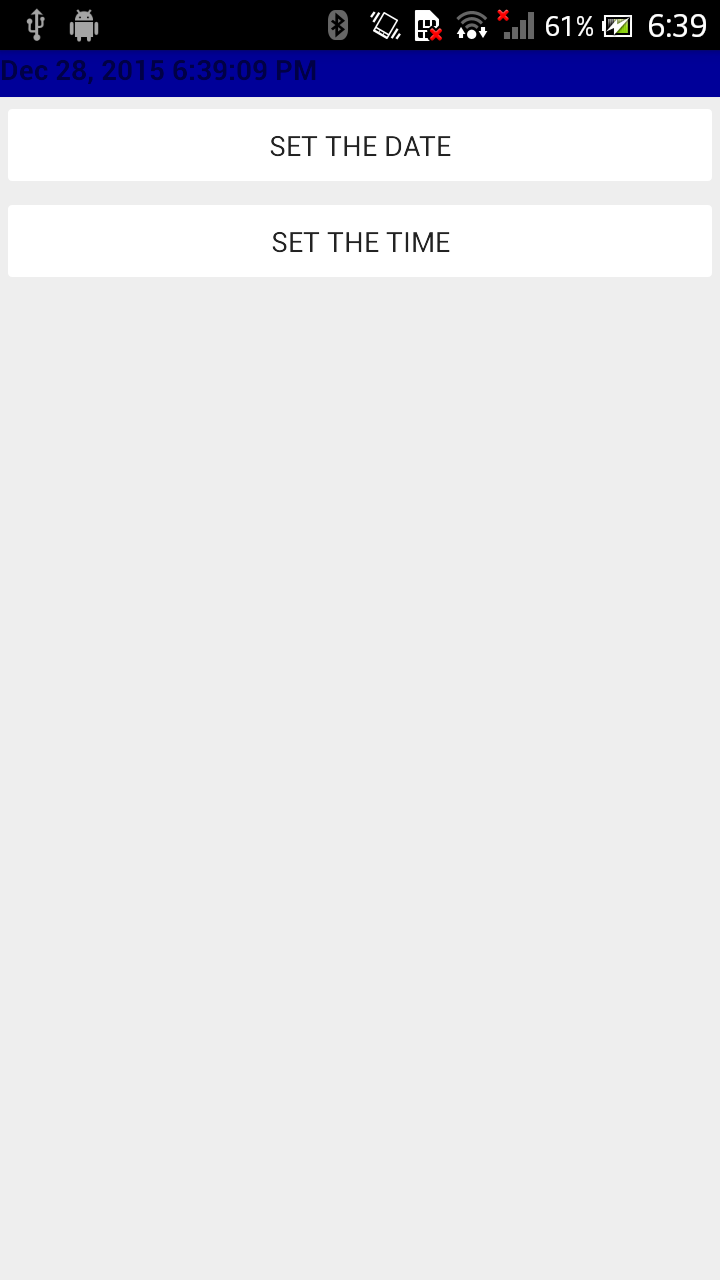
EXAMPLE
Ở đây sẽ là 1 layout ví dụ cho việc tạo ra 2 button cho phép user có thể setting Date cũng như Time.
<?xml version="1.0" encoding="utf-8"?>
<LinearLayout
    android:id="@+id/widget28"
    android:layout_awidth="fill_parent"
    android:layout_height="fill_parent"
    android:orientation="vertical"
    xmlns:android="http://schemas.android.com/apk/res/android"
    >
    <TextView
        android:id="@+id/lblDateAndTime"
        android:layout_awidth="fill_parent"
        android:layout_height="47px"
        android:background="#ff000099"
        android:textStyle="bold"
        >
    </TextView>
    <Button
        android:id="@+id/btnDate"
        android:layout_awidth="fill_parent"
        android:layout_height="wrap_content"
        android:text="Set the Date"
        >
    </Button>
    <Button
        android:id="@+id/btnTime"
        android:layout_awidth="fill_parent"
        android:layout_height="wrap_content"
        android:text="Set the Time"
        >
    </Button>
</LinearLayout>
Và đây là đoạn code xử lý trong MainActivity.
package com.example.duongichi.helloworld2;

import android.app.Activity;
import android.os.Bundle;
import android.view.View;

import android.app.DatePickerDialog;
import android.app.TimePickerDialog;
import android.widget.Button;
import android.widget.DatePicker;
import android.widget.TimePicker;
import android.widget.TextView;

import java.text.DateFormat;
import java.util.Calendar;

public class MainActivity extends Activity {
    DateFormat fmtDateAndTime = DateFormat.getDateTimeInstance();
    TextView lblDateAndTime;
    Calendar myCalendar = Calendar.getInstance();
    DatePickerDialog.OnDateSetListener d = new DatePickerDialog.OnDateSetListener()
    {
        public void onDateSet(DatePicker view,
                              int year, int monthOfYear, int dayOfMonth) {
            myCalendar.set(Calendar.YEAR, year);
            myCalendar.set(Calendar.MONTH, monthOfYear);
            myCalendar.set(Calendar.DAY_OF_MONTH, dayOfMonth);
            updateLabel();
        }
    };
    TimePickerDialog.OnTimeSetListener t = new TimePickerDialog.OnTimeSetListener()
    {
        public void onTimeSet(TimePicker view, int hourOfDay, int minute) {
            myCalendar.set(Calendar.HOUR_OF_DAY, hourOfDay);
            myCalendar.set(Calendar.MINUTE, minute);
            updateLabel();
        }
    };
    private void updateLabel() {
        lblDateAndTime.setText(fmtDateAndTime.format(myCalendar.getTime()));
    }
    @Override
    public void onCreate(Bundle icicle) {
        super.onCreate(icicle);
        setContentView(R.layout.activity_main);
        lblDateAndTime = (TextView) findViewById(R.id.lblDateAndTime);
        Button btnDate = (Button) findViewById(R.id.btnDate);
        btnDate.setOnClickListener(new View.OnClickListener() {
            public void onClick(View v) {
                new DatePickerDialog(MainActivity.this, d,
                        myCalendar.get(Calendar.YEAR),
                        myCalendar.get(Calendar.MONTH),
                        myCalendar.get(Calendar.DAY_OF_MONTH)).show();
            }
        });
        Button btnTime = (Button) findViewById(R.id.btnTime);
        btnTime.setOnClickListener(new View.OnClickListener() {
            public void onClick(View v) {
                new TimePickerDialog(MainActivity.this, t,
                        myCalendar.get(Calendar.HOUR_OF_DAY),
                        myCalendar.get(Calendar.MINUTE), true).show();
            }
        });
        updateLabel();
    }
}
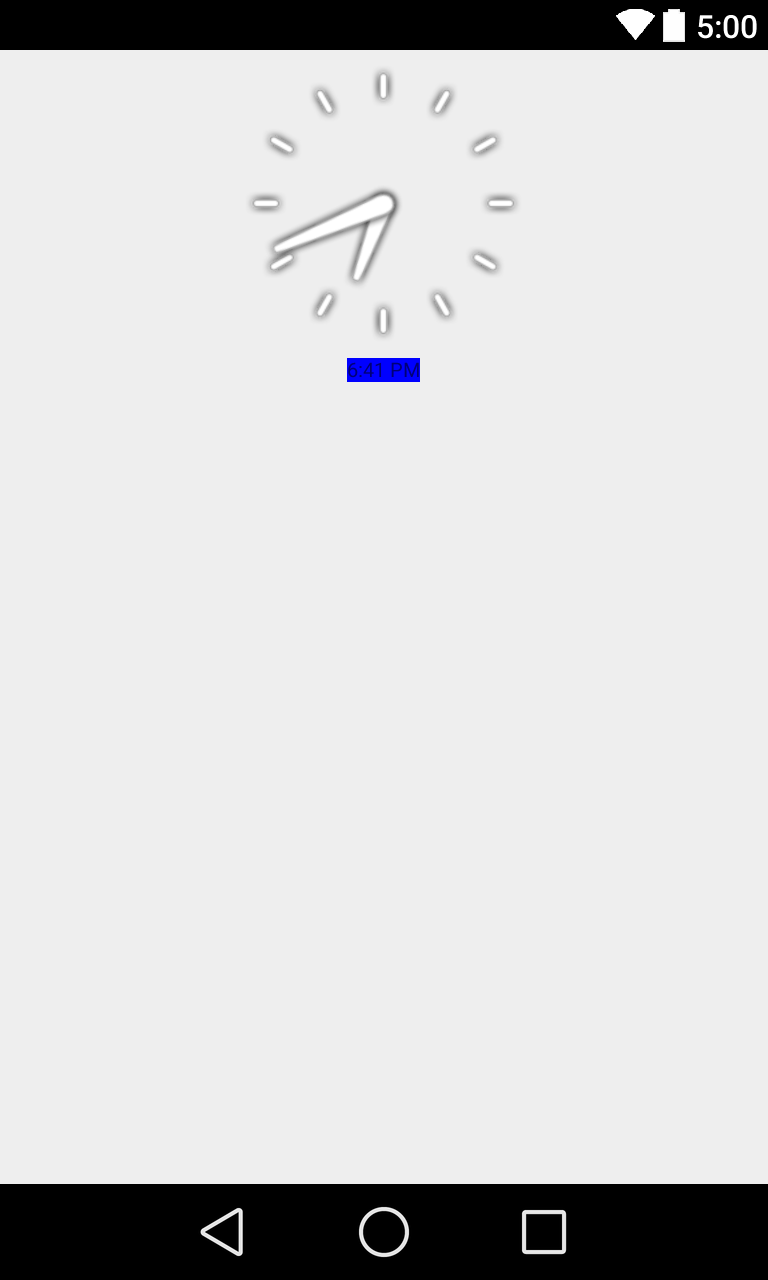
Những WIDGET TIME khác##
Android cũng cung cấp cho bạn DigitalClock và AnalogClock. Những clock này sẽ tự động cập nhật time ( tất nhiên là với điều kiện user ko có can thiệp vào)
<?xml version="1.0" encoding="utf-8"?>
<RelativeLayout
    android:id="@+id/widget34"
    android:layout_awidth="fill_parent"
    android:layout_height="fill_parent"
    xmlns:android="http://schemas.android.com/apk/res/android"
    >
    <DigitalClock
        android:id="@+id/digital"
        android:layout_awidth="wrap_content"
        android:layout_height="wrap_content"
        android:background="#ff0000ff"
        android:textSize="20px"
        android:layout_below="@+id/analog"
        android:layout_centerHorizontal="true"
        >
    </DigitalClock>
    <AnalogClock
        android:id="@+id/analog"
        android:layout_awidth="fill_parent"
        android:layout_height="wrap_content"
        android:layout_alignParentTop="true"
        android:layout_alignParentLeft="true"
        >
    </AnalogClock>
</RelativeLayout>
Tab SELECTOR
-
Android UIs nên được thiết kế thật đơn giản
-
Khi có quá nhiều thông tin được hiển thị trên 1 app, Tab Widget sẽ có thể giúp cho user có thể nhận biết được các phần của thông tin, ngoài ra người thiết kế cũng ko cần thiết phải show hết thông tin ra trên 1 màn hình vào 1 thời điểm.
Tabs - Components
Có 1 vài widget và container bạn cần phải sử dụng để tạo thành một view được chia thành nhiều tab con.
-
TabHost là main container cho các tab nút bấm và tab nội dung
-
TabWidget sẽ thực thi các hàng của tab nút bấm, trong này sẽ chưa các text label và icon.
-
FrameLayout là container cho các tab nội dung.
Component
Bố trí sẽ là TabHost bao gồm TabWidget và FramgeLayout
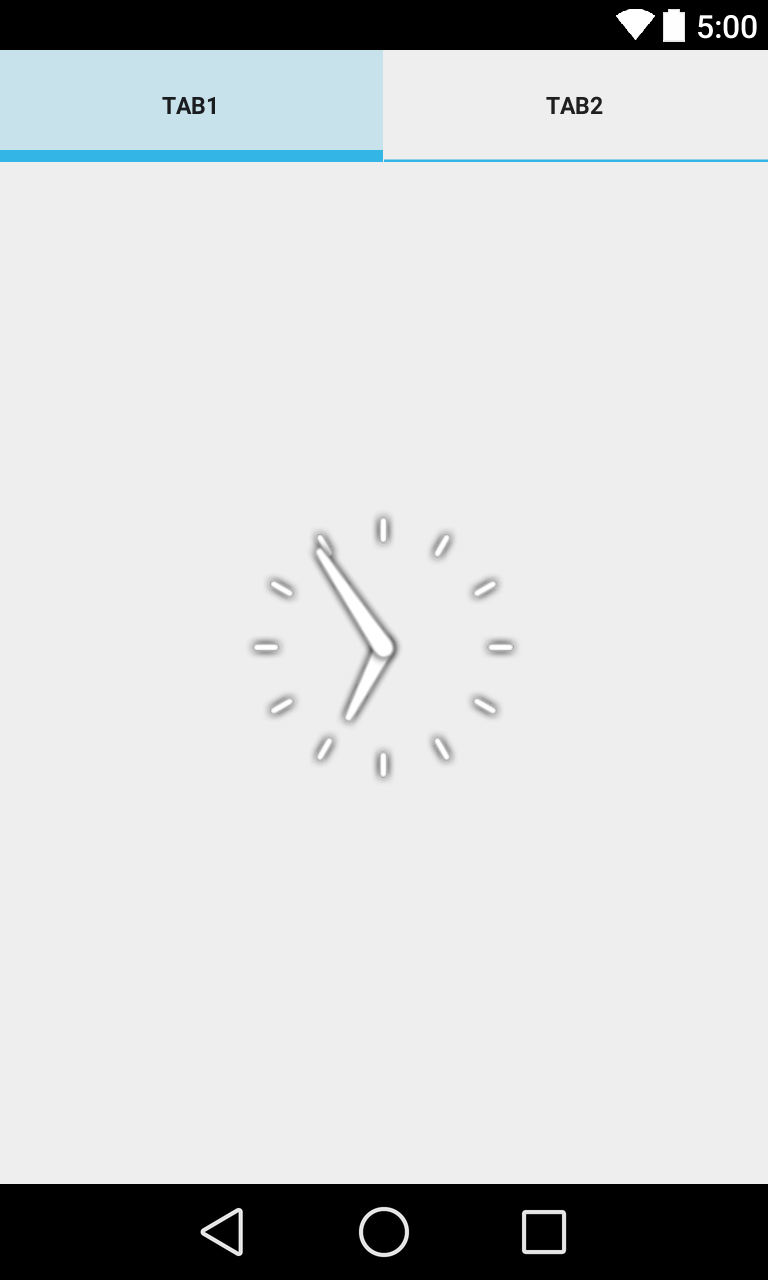
Example
Phần PUT HERE FrameLayout1 và PUT HERE FrameLayout2, bạn có thể cho vào những layout cụ thể hoặc có thể sử dụng <include> để refer đến một layout nào đó ngoài và tích hợp nó vào trong xml file.
<?xml version="1.0" encoding="utf-8"?>
<LinearLayout xmlns:android="http://schemas.android.com/apk/res/android"
    android:orientation="vertical"
    android:layout_awidth="fill_parent"
    android:layout_height="fill_parent">
    <TabHost android:id="@+id/tabhost"
        android:layout_awidth="fill_parent"
        android:layout_height="fill_parent">
        <TabWidget android:id="@android:id/tabs"
            android:layout_awidth="fill_parent"
            android:layout_height="wrap_content"
            />
        <FrameLayout
            android:id="@android:id/tabcontent"
            android:layout_awidth="fill_parent"
            android:layout_height="fill_parent"
            android:paddingTop="62px">


        </FrameLayout>
    </TabHost>
</LinearLayout>
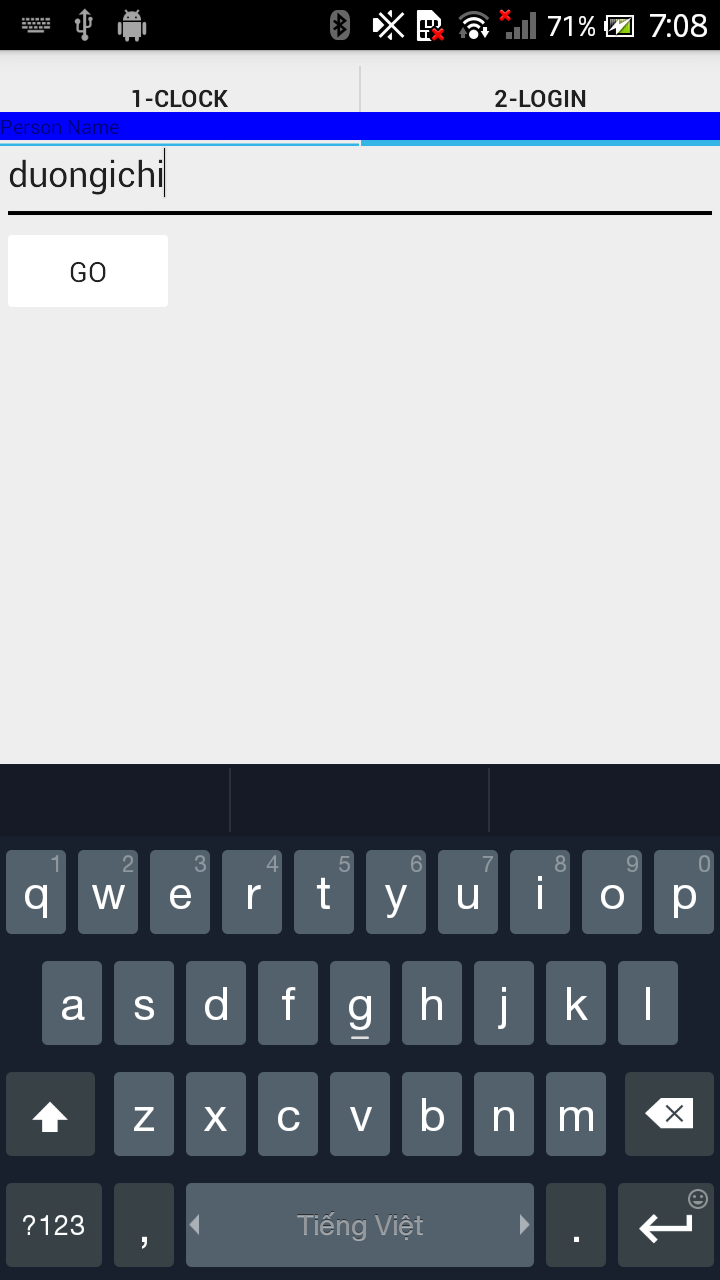
Ở đây mình sẽ thêm vào phần FrameLayout1 là một analog đồng hồ. Và FrameLayout2 sẽ là một label, button và textBox.
<?xml version="1.0" encoding="utf-8"?>
<LinearLayout xmlns:android="http://schemas.android.com/apk/res/android"
    android:orientation="vertical"
    android:layout_awidth="fill_parent"
    android:layout_height="fill_parent">
    <TabHost android:id="@+id/tabhost"
        android:layout_awidth="fill_parent"
        android:layout_height="fill_parent">
        <TabWidget android:id="@android:id/tabs"
            android:layout_awidth="fill_parent"
            android:layout_height="wrap_content"
            />
        <FrameLayout
            android:id="@android:id/tabcontent"
            android:layout_awidth="fill_parent"
            android:layout_height="fill_parent"
            android:paddingTop="62px">


            <AnalogClock
                android:id="@+id/tab1"
                android:layout_awidth="fill_parent"
                android:layout_height="fill_parent"
                android:layout_centerHorizontal="true"
                />


            <LinearLayout
                android:id="@+id/tab2"
                android:layout_awidth="fill_parent"
                android:layout_height="fill_parent"
                android:orientation="vertical"                    xmlns:android="http://schemas.android.com/apk/res/android"
                >
                <TextView
                    android:id="@+id/caption1"
                    android:layout_awidth="fill_parent"
                    android:layout_height="wrap_content"
                    android:background="#ff0000ff"
                    android:text="Person Name"
                    android:textSize="20px"
                    >
                </TextView>
                <EditText
                    android:id="@+id/txtPerson"
                    android:layout_awidth="fill_parent"
                    android:layout_height="wrap_content"
                    android:text="txtPerson"
                    android:textSize="18sp"
                    >
                </EditText>
                <Button
                    android:id="@+id/btnGo"
                    android:layout_awidth="wrap_content"
                    android:layout_height="wrap_content"
                    android:text="Go"
                    >
                </Button>
            </LinearLayout>

        </FrameLayout>
    </TabHost>
</LinearLayout>
package com.example.duongichi.helloworld2;

import android.app.Activity;
import android.os.Bundle;
import android.view.View;

import android.view.View.OnClickListener;
import android.widget.Button;
import android.widget.EditText;
import android.widget.TabHost;

public class MainActivity extends Activity {
    @Override
    public void onCreate(Bundle icicle) {
        super.onCreate(icicle);
        setContentView(R.layout.activity_main);
        TabHost tabs=(TabHost)findViewById(R.id.tabhost);

        tabs.setup();

        TabHost.TabSpec spec;

        spec =tabs.newTabSpec("tag1");
        spec.setContent(R.id.tab1);
        spec.setIndicator("1-Clock");
        tabs.addTab(spec);

        spec=tabs.newTabSpec("tag2");
        spec.setContent(R.id.tab2);
        spec.setIndicator("2-Login");
        tabs.addTab(spec);

        tabs.setCurrentTab(0);

        Button btnGo = (Button)findViewById(R.id.btnGo);
        btnGo.setOnClickListener(new OnClickListener() {
            @Override
            public void onClick(View arg0) {
                EditText txtPerson =
                        (EditText)findViewById(R.id.txtPerson);
                String theUser = txtPerson.getText().toString();
                txtPerson.setText("Hola " + theUser);
            }
        });
    }
}
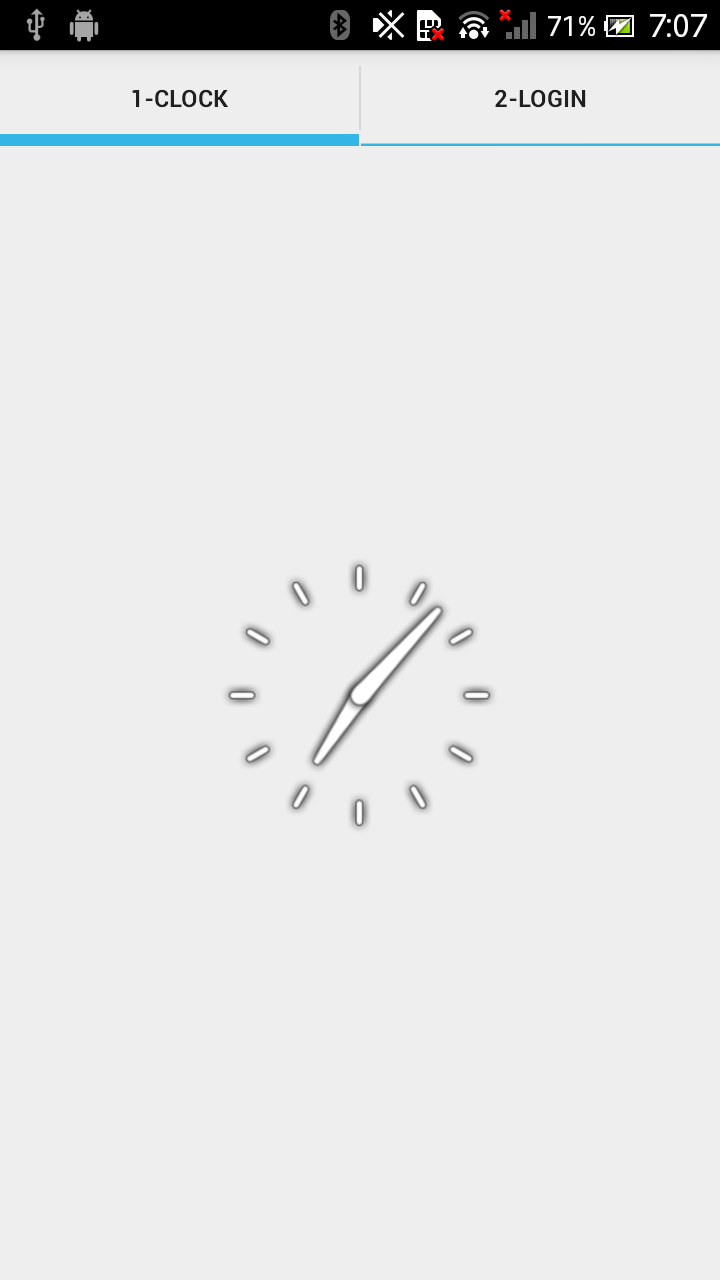
Nếu bạn muốn cho hình ảnh icon vào các tab, bạn có thể làm như sau.
spec = tabs.newTabSpec("tag2");
spec.setContent(R.id.tab2);
spec.setIndicator("2-Login",
	getResources().getDrawable(R.drawable.ic_menu_info_details));
tabs.addTab(spec);
Monitoring
Trong trưởng hợp bạn muốn add thêm 1 listener cho phép bạn có thể xác định được hiện bạn đang ở tab nào. Hãy thêm fragment này vào trong onCreate.
// tabs.setCurrentTab(0);
// you may also use
tabs.setCurrentTabByTag("tag1");
tabs.setOnTabChangedListener(new OnTabChangeListener() {
@Override
	public void onTabChanged(String tagId) {
        // do something useful with the selected screen
        String text = "Im currently in: " + tagId + "
index: " + tabs.getCurrentTab();
        Toast.makeText(getApplicationContext(), text, 1).show();
	}
});
SlidingDrawer
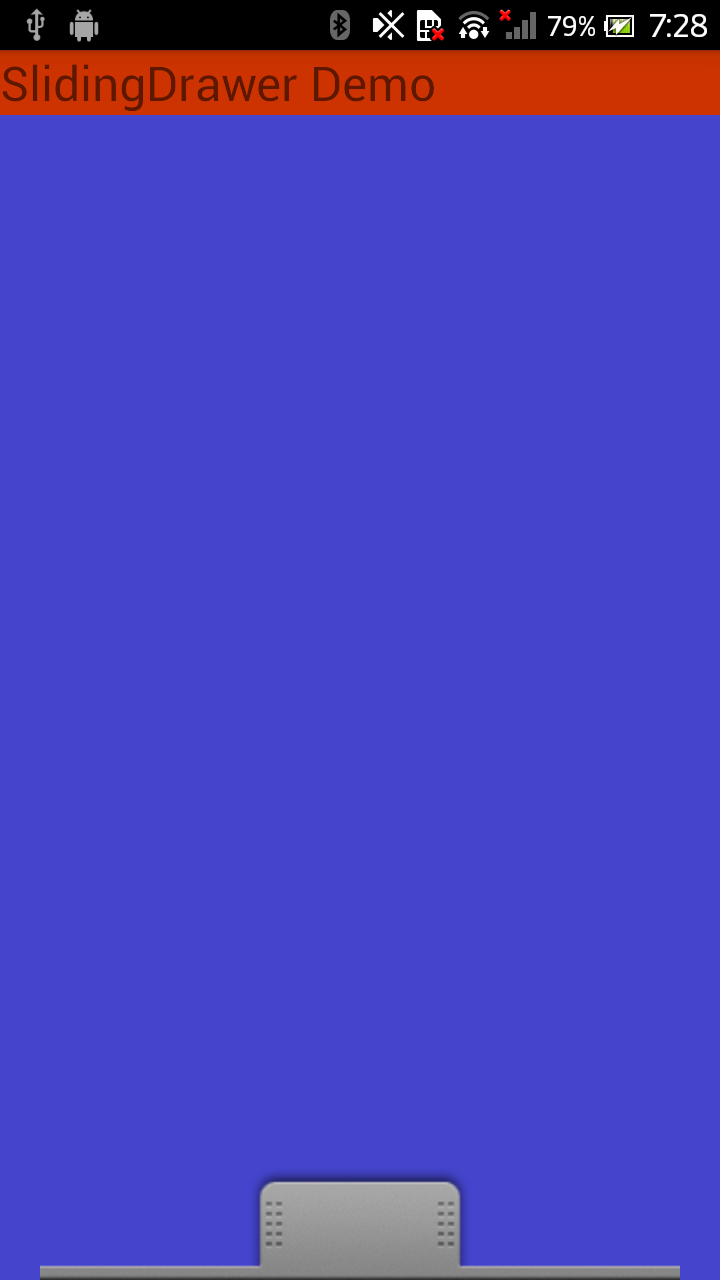
SlidingDrawer sẽ ẩn nội dung khỏi màn hình và cho phép user có thể kéo một handle để tạo nên một màn hình chứa nội dung.
- SlidingDrawercan có thể sử dụng ngang hoặc dọc
- SlidingDrawer sử dụng như một layout overlayinside. Điều này nghĩa là SlidingDrawershould chỉ được sử dụng bên trong một FrameLayout hoặc là RelativeLayout.
- Kích thước của SlidingDrawerdefines sẽ phụ thuộc vào việc nội dung SlidingDrawer cung cấp cho người dùng chiếm ko gian như thế nào cho nên RelativeLayout nên sử dụng fill_parent cho cả 2 chiều của nó.
Một vài ví dụ về SlidingDrawer là như Launcher cho phép người dùng có thể truy cập vào danh sách các ứng dụng yêu thích được cài đặt trong máy.
Trong XML layout, SlidingDrawer phải định nghĩa id của handle và content :
- handle là một graphic nhỏ để hiển thị một indicate cho phép điều khiển mở đóng nội dung
- content thì sẽ được chứa trong một vài kiều container
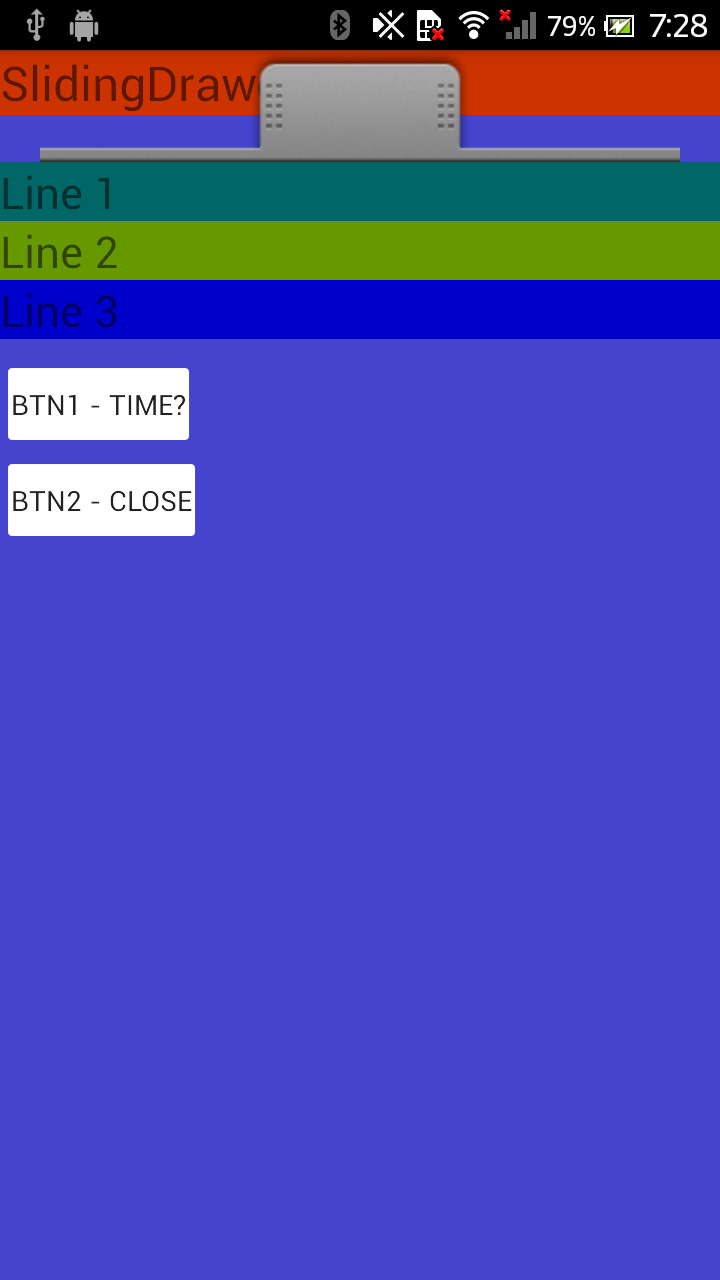
Example
Đây là một ví dụ về một SlidingDrawer khá đẹp mình khá ưng ý.
<?xml version="1.0" encoding="utf-8"?>
<RelativeLayout
    xmlns:android="http://schemas.android.com/apk/res/android"
    android:layout_awidth="fill_parent"
    android:layout_height="fill_parent"
    android:background="#FF4444CC"
    >
    <TextView
        android:id="@+id/label0"
        android:layout_alignParentTop="true"
        android:layout_awidth="fill_parent"
        android:layout_height="wrap_content"
        android:background="#ffcc3300"
        android:text="SlidingDrawer Demo"
        android:textSize="24sp" />
    <SlidingDrawer
        android:id="@+id/drawer"
        android:layout_alignParentBottom="true"
        android:layout_awidth="fill_parent"
        android:layout_height="fill_parent"
        android:handle="@+id/handle"
        android:content="@+id/content" >
        <ImageView
            android:id="@id/handle"
            android:layout_awidth="wrap_content"
            android:layout_height="wrap_content"
            android:src="@drawable/tray_handle_normal"
            />
        <LinearLayout
            android:id="@id/content"
            android:layout_awidth="fill_parent"
            android:layout_height="fill_parent"
            android:orientation="vertical">
            <TextView
            android:id="@+id/label1"
                    android:layout_awidth="fill_parent"
                    android:layout_height="wrap_content"
                    android:background="#ff006666"
                    android:text="Line 1"
                    android:textSize="22sp" />
                    <TextView
                        android:id="@+id/label2"
                        android:layout_awidth="fill_parent"
                        android:layout_height="wrap_content"
                        android:background="#ff669900"
                        android:text="Line 2"
                        android:textSize="22sp" />
            <TextView
                android:id="@+id/label3"
                android:layout_awidth="fill_parent"
                android:layout_height="wrap_content"
                android:background="#ff0000cc"
                android:text="Line 3"
                android:textSize="22sp"
                />
            <TextView
                android:id="@+id/filler1"
                android:layout_awidth="fill_parent"
                android:layout_height="wrap_content"
                android:textSize="6sp"
                />
            <Button
                android:id="@+id/btn1"
                android:layout_awidth="wrap_content"
                android:layout_height="wrap_content"
                android:padding="4px"
                android:text=" btn1 - time? "
                />
            <Button
                android:id="@+id/btn2"
                android:layout_awidth="wrap_content"
                android:layout_height="wrap_content"
                android:padding="4px"
                android:text=" btn2 - close "
                />
        </LinearLayout>
    </SlidingDrawer>
</RelativeLayout>
package com.example.duongichi.helloworld2;

import android.app.Activity;
import android.os.Bundle;
import android.view.View;
import android.view.View.OnClickListener;
import android.widget.*;

import java.util.Date;

public class MainActivity extends Activity {
    Button btn1;
    Button btn2;
    TextView label1;
    TextView label2;
    TextView label3;
    SlidingDrawer myDrawer;

    @Override
    public void onCreate(Bundle savedInstanceState)
    {
        super.onCreate(savedInstanceState);
        setContentView(R.layout.activity_main);
        myDrawer = (SlidingDrawer)findViewById(R.id.drawer);
        btn1 = (Button)findViewById(R.id.btn1);
        btn2 = (Button)findViewById(R.id.btn2);
        label1 = (TextView)findViewById(R.id.label1);
        label2 = (TextView)findViewById(R.id.label2);
        label3 = (TextView)findViewById(R.id.label3);

        btn1.setOnClickListener(new OnClickListener() {
            @Override
            public void onClick(View v) {
                Date dt = new Date();
                String now = dt.toLocaleString();
                label1.setText("111 - Hola amigos " + now);
                label2.setText("222 - Hola amigos " + now) ;
                label3.setText("333 - Hola amigos " + now);
            }
        });
        btn2.setOnClickListener(new OnClickListener() {
            @Override
            public void onClick(View v) {
                myDrawer.animateClose();
            }
        });
    } //onCreate
} // class