Android Getting Started with Material Design
Bạn có thể đã nghe về Android Material Design . Đã được giới thiệu trong phiên bản Android Lollipop . Trong Android Material Design có rất nhiều thứ mới mà đã được giới thiệu như Material Theme New Widgets,Custom Shadows, Vector drawbles, Custom Animations . Nếu bạn chưa từng làm việc với ...
Bạn có thể đã nghe về Android Material Design . Đã được giới thiệu trong phiên bản Android Lollipop . Trong Android Material Design có rất nhiều thứ mới mà đã được giới thiệu như Material Theme New Widgets,Custom Shadows, Vector drawbles, Custom Animations. Nếu bạn chưa từng làm việc với Android Material Design thì có lẽ bài viết này sẽ là sự khởi đầu tốt cho bạn. Trong bài viết này tôi sẽ giới thiệu những bước cơ bản nhất của Android Material Design. Những link bên dưới có thể giúp bạn hiểu hơn về Material Design.
-
Material Design Specifications
-
Creating Apps with Material Design
Material Design Color Customization
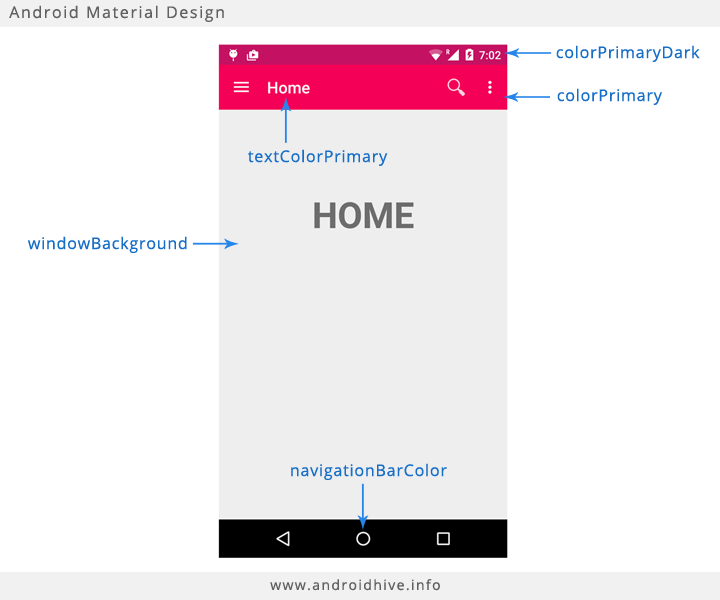
Material Design cung cấp một bộ những thuộc tính cho việc tuỳ chỉnh Material Design Color Theme. Nhưng chúng ta chỉ sử dụng 5 thuộc tính chính trong việc tuỳ chỉnh tất cả các Theme.
- colorPrimaryDark đây là màu cơ bản nhất của ứng dụng, chủ yếu được áp dụng cho background của notification bar.
- colorPrimary đây là màu chính của app , màu này sẽ được áp như là toolbar background.
- textColorPrimary đây là màu chính của text, thường áp dụng cho title của toolbar.
- windowBackground đây là màu background mặc định của app.
- navigationBarColor định nghĩ màu background của footer navigation bar.
Bạn có thể chọn cho ứng dụng của mình một bộ thuộc tính màu sắc mà bạn yêu thích tại đây
Creating Material Design Theme
- Trong Android sau khi bạn đã tạo một new project.
- Bước tiếp theo bạn cần làm là mở res ⇒ values ⇒ strings.xml và thêm những giá trị bên dưới.
 strings.xml
<resources>
    <string name="app_name">Material Design</string>
    <string name="action_settings">Settings</string>
    <string name="action_search">Search</string>
    <string name="drawer_open">Open</string>
    <string name="drawer_close">Close</string>

    <string name="nav_item_home">Home</string>
    <string name="nav_item_friends">Friends</string>
    <string name="nav_item_notifications">Messages</string>


    <string-array name="nav_drawer_labels">
        <item>@string/nav_item_home</item>
        <item>@string/nav_item_friends</item>
        <item>@string/nav_item_notifications</item>
    </string-array>

    <string name="title_messages">Messages</string>
    <string name="title_friends">Friends</string>
    <string name="title_home">Home</string>
</resources>
- Mở res ⇒ values ⇒ colors.xml và thêm những giá trị color .Nếu bạn không tìm thấy file colors.xml thì bạn hãy tạo 1 file mới với cùng tên.
 colors.xml
<?xml version="1.0" encoding="utf-8"?>
<resources>
    <color name="colorPrimary">#F50057</color>
    <color name="colorPrimaryDark">#C51162</color>
    <color name="textColorPrimary">#FFFFFF</color>
    <color name="windowBackground">#FFFFFF</color>
    <color name="navigationBarColor">#000000</color>
    <color name="colorAccent">#FF80AB</color>
</resources>
- Mở res ⇒ values ⇒ dimens.xml và thêm những giá trị bên dưới.
  dimens.xml
<resources>

    <dimen name="activity_horizontal_margin">16dp</dimen>
    <dimen name="activity_vertical_margin">16dp</dimen>
    <dimen name="nav_drawer_awidth">260dp</dimen>
</resources>
- Mở styles.xml bên dưới res ⇒ values và thêm những giá trị styles bên dưới.
styles.xml
<resources>

    <style name="MyMaterialTheme" parent="MyMaterialTheme.Base">

    </style>

    <style name="MyMaterialTheme.Base" parent="Theme.AppCompat.Light.DarkActionBar">
        <item name="windowNoTitle">true</item>
        <item name="windowActionBar">false</item>
        <item name="colorPrimary">@color/colorPrimary</item>
        <item name="colorPrimaryDark">@color/colorPrimaryDark</item>
        <item name="colorAccent">@color/colorAccent</item>
    </style>

</resources>
- Bây giờ bên dưới res tạo một folder values-v21. Bên trong folder này tạo một file styles khác với giá trị như bên dưới. Những styles này được áp dụng duy nhất tới Android Lollipop.
styles.xml
<resources>

    <style name="MyMaterialTheme" parent="MyMaterialTheme.Base">
        <item name="android:windowContentTransitions">true</item>
        <item name="android:windowAllowEnterTransitionOverlap">true</item>
        <item name="android:windowAllowReturnTransitionOverlap">true</item>
        <item name="android:windowSharedElementEnterTransition">@android:transition/move</item>
        <item name="android:windowSharedElementExitTransition">@android:transition/move</item>
    </style>

</resources>
- Bây giờ chúng ta đã có một Material Design Styles đơn giản . Để áp dụng tới Theme mở AndroidManifest.xml và chỉnh sửa lại thuộc tính của Tag <application>
android:theme="@style/MyMaterialTheme" Sau khi áp dụng Theme AndroidManifest.xml sẽ trông giống như bên dưới:
<?xml version="1.0" encoding="utf-8"?>
<manifest xmlns:android="http://schemas.android.com/apk/res/android"
    package="info.androidhive.materialdesign" >

    <application
        android:allowBackup="true"
        android:icon="@mipmap/ic_launcher"
        android:label="@string/app_name"
        android:theme="@style/MyMaterialTheme" >
        <activity
            android:name=".activity.MainActivity"
            android:label="@string/app_name" >
            <intent-filter>
                <action android:name="android.intent.action.MAIN" />

                <category android:name="android.intent.category.LAUNCHER" />
            </intent-filter>
        </activity>
    </application>
 </manifest>
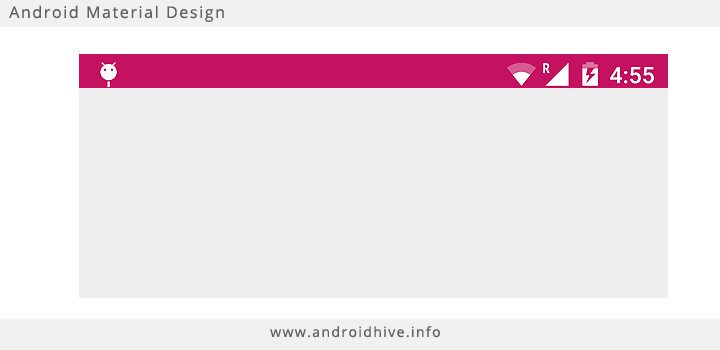
Bây giờ nếu bạn chạy project, bạn sẽ nhìn thấy color của notification bar thay đổi theo màu sắc chúng ta đã đề cập styles trên.
Adding the Toolbar (Action Bar)
Việc adding toolbar là rất dễ dàng. Tất cả những gì bạn cần làm là tạo ra 1 file layout riêng, và thêm vào file layout đó những thành phần bạn muốn hiển thị trên toolbar.
- Tạo 1 file layout có tên là toolbar.xml dưới folder res ⇒ layout và thêm thành phần android.support.v7.widget.Toolbar. Bên dưới chúng ta sẽ tạo toolbar với chiều cao và theme xác định.
<?xml version="1.0" encoding="utf-8"?>
<android.support.v7.widget.Toolbar xmlns:android="http://schemas.android.com/apk/res/android"
    xmlns:local="http://schemas.android.com/apk/res-auto"
    android:id="@+id/toolbar"
    android:layout_awidth="match_parent"
    android:layout_height="wrap_content"
    android:minHeight="?attr/actionBarSize"
    android:background="?attr/colorPrimary"
    local:theme="@style/ThemeOverlay.AppCompat.Dark.ActionBar"
    local:popupTheme="@style/ThemeOverlay.AppCompat.Light" />
- Mở file layout của Activity MainActivity.class và add toolbar bằng cách sử dụng tag <include> như bên dưới .
activity_main.xml
<RelativeLayout xmlns:android="http://schemas.android.com/apk/res/android"
    xmlns:tools="http://schemas.android.com/tools"
    android:layout_awidth="match_parent"
    android:layout_height="match_parent"
    tools:context=".MainActivity">

    <LinearLayout
        android:layout_awidth="fill_parent"
        android:layout_height="wrap_content"
        android:layout_alignParentTop="true"
        android:orientation="vertical">

        <include
            android:id="@+id/toolbar"
            layout="@layout/toolbar" />
    </LinearLayout>

</RelativeLayout>
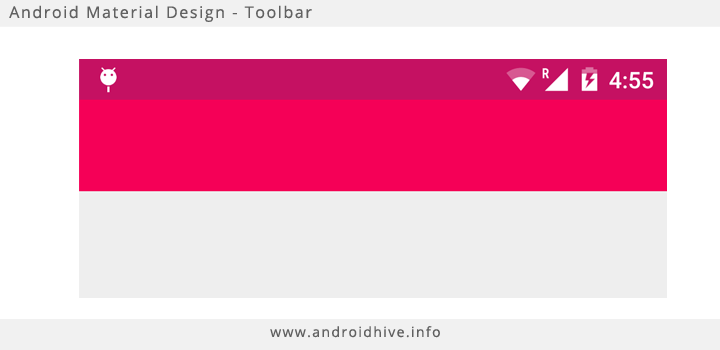
Bây giờ chạy ứng dụng và bạn sẽ nhìn thấy toolbar được hiển thi như bên dưới:
- Download icon search và import nó vào trong android studio như một Image Asset
- Import một Image Asset vào trong Android Studio : click chuột phải trên res ⇒ New ⇒ Image Asset. Nó sẽ hiển thị một bạn 1 cửa sổ popup để import resource. Browse tới icon search mà bạn đã download về trước đó. Lựa chọn Action Bar and Tab Icons cho Asset Type và resouce name là ic_search_action .

- Khi icon đã được import, mở menu_main.xml được đặt res ⇒ menu và thêm menu item search như bên dưới .
menu_main.xml
<menu xmlns:android="http://schemas.android.com/apk/res/android"
    xmlns:app="http://schemas.android.com/apk/res-auto"
    xmlns:tools="http://schemas.android.com/tools"
    tools:context=".MainActivity">

    <item
        android:id="@+id/action_search"
        android:title="@string/action_search"
        android:orderInCategory="100"
        android:icon="@drawable/ic_action_search"
        app:showAsAction="ifRoom" />

    <item
        android:id="@+id/action_settings"
        android:title="@string/action_settings"
        android:orderInCategory="100"
        app:showAsAction="never" />
</menu>
- Bây giờ mở MainActivity.java và thêm những thay đổi.
import android.os.Bundle;
import android.support.v7.app.AppCompatActivity;
import android.support.v7.widget.Toolbar;
import android.view.Menu;
import android.view.MenuItem;

public class MainActivity extends AppCompatActivity {

    private Toolbar mToolbar;

    @Override
    protected void onCreate(Bundle savedInstanceState) {
        super.onCreate(savedInstanceState);
        setContentView(R.layout.activity_main);

        mToolbar = (Toolbar) findViewById(R.id.toolbar);

        setSupportActionBar(mToolbar);
        getSupportActionBar().setDisplayShowHomeEnabled(true);
    }

    @Override
    public boolean onCreateOptionsMenu(Menu menu) {
        // Inflate the menu; this adds items to the action bar if it is present.
        getMenuInflater().inflate(R.menu.menu_main, menu);
        return true;
    }

    @Override
    public boolean onOptionsItemSelected(MenuItem item) {
        // Handle action bar item clicks here. The action bar will
        // automatically handle clicks on the Home/Up button, so long
        // as you specify a parent activity in AndroidManifest.xml.
        int id = item.getItemId();

        //noinspection SimplifiableIfStatement
        if (id == R.id.action_settings) {
            return true;
        }

        return super.onOptionsItemSelected(item);
    }
}
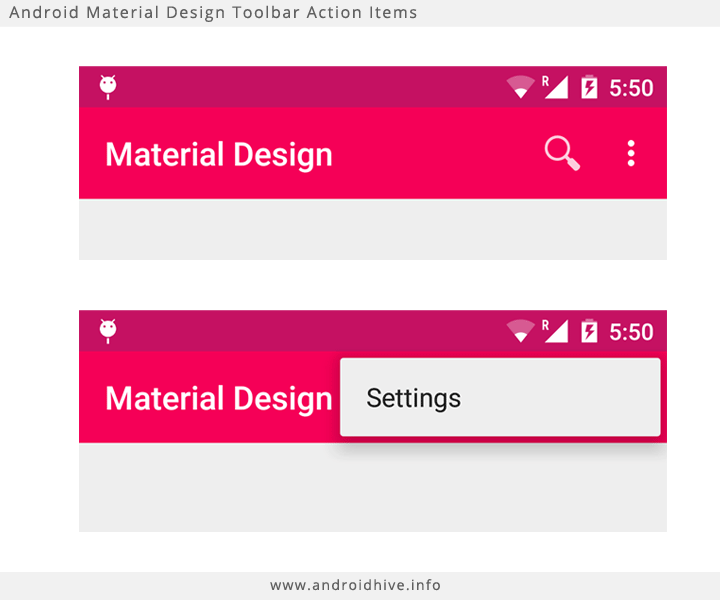
Bây giờ bạn chạy ứng dụng bạn sẽ nhìn thấy kết quả như bên dưới:
Adding Navigation Drawer
Việc thêm Navigation Drawer tương tự như những cái chúng ta đã làm trước lollipop nhưng thay vì sử dụng ListView Chúng ta sử dụng RecyclerView trong material design. Vậy chúng ta hãy cùng tìm hiểu làm thế nào để xây dựng navigation drawer với recyclerview.
- Trong project tạo 3 package name tương ứng là **activities, adapter, model **. Điều này sẽ làm cho bố cục tổ chức project của chúng ta thêm rõ ràng hơn.
- Mở build.gradle và thêm dependencies. Sau đó Build ⇒ Rebuild Project.
build.gradle
dependencies {
    compile fileTree(dir: 'libs', include: ['*.jar'])
    compile 'com.android.support:appcompat-v7:22.2.0'
    compile 'com.android.support:recyclerview-v7:22.2.+'
}
- Dưới package modle tạo một class tên là NavDrawerItem.java. Class này định nghĩ các item trong navigation drawer
public class NavDrawerItem {
    private boolean showNotify;
    private String title;

    public NavDrawerItem() {

    }

    public NavDrawerItem(boolean showNotify, String title) {
        this.showNotify = showNotify;
        this.title = title;
    }

    public boolean isShowNotify() {
        return showNotify;
    }

    public void setShowNotify(boolean showNotify) {
        this.showNotify = showNotify;
    }

    public String getTitle() {
        return title;
    }

    public void setTitle(String title) {
        this.title = title;
    }
}
- Bên dưới res ⇒ layout Tạo một file layout tên nav_drawer_row.xml và thêm code như bên dưới. Đây là file layout cho mỗi item trong navigation drawer.
<?xml version="1.0" encoding="utf-8"?>
<RelativeLayout xmlns:android="http://schemas.android.com/apk/res/android"
    android:layout_awidth="match_parent"
    android:layout_height="wrap_content"
    android:clickable="true">

    <TextView
        android:id="@+id/title"
        android:layout_awidth="fill_parent"
        android:layout_height="wrap_content"
        android:paddingLeft="30dp"
        android:paddingTop="10dp"
        android:paddingBottom="10dp"
        android:textSize="15dp"
        android:textStyle="bold" />
 </RelativeLayout>
- Tạo một file layout khác tên là fragment_navigation_drawer.xml và thêm code như bên dưới. Layout này thể hiện toàn bộ phần view của navigation drawer. Trong layout này có chứa phần header thể hiện thông tin người dùng và recyclerview thể hiện cái item .
<RelativeLayout xmlns:android="http://schemas.android.com/apk/res/android"
    android:layout_awidth="match_parent"
    android:layout_height="match_parent"
    android:background="@android:color/white">

    <RelativeLayout
        android:id="@+id/nav_header_container"
        android:layout_awidth="match_parent"
        android:layout_height="140dp"
        android:layout_alignParentTop="true"
        android:background="@color/colorPrimary">

        <ImageView
            android:layout_awidth="70dp"
            android:layout_height="70dp"
            android:src="@drawable/ic_profile"
            android:scaleType="fitCenter"
            android:layout_centerInParent="true" />

    </RelativeLayout>

    <android.support.v7.widget.RecyclerView
        android:id="@+id/drawerList"
        android:layout_awidth="match_parent"
        android:layout_height="wrap_content"
        android:layout_below="@id/nav_header_container"
        android:layout_marginTop="15dp" />

</RelativeLayout>
- RecyclerView là một customview ,vì vậy chúng ta cần 1 Adapter. Do đó bên dưới package name adapter chúng ta tạo một class NavigationDrawerAdapter.java và thêm những phần code như bên dưới.
import android.content.Context;
import android.support.v7.widget.RecyclerView;
import android.view.LayoutInflater;
import android.view.View;
import android.view.ViewGroup;
import android.widget.TextView;

import java.util.Collections;
import java.util.List;

public class NavigationDrawerAdapter extends RecyclerView.Adapter<NavigationDrawerAdapter.MyViewHolder> {
    List<NavDrawerItem> data = Collections.emptyList();
    private LayoutInflater inflater;
    private Context context;

    public NavigationDrawerAdapter(Context context, List<NavDrawerItem> data) {
        this.context = context;
        inflater = LayoutInflater.from(context);
        this.data = data;
    }

    public void delete(int position) {
        data.remove(position);
        notifyItemRemoved(position);
    }
