12/08/2018, 14:15
Android: Multi Touch Example
Bài viết nhằm mục đích hướng dẫn, hỗ trợ nền tảng cơ bản trong phát triển CustomView trên Android Với các ứng dụng cơ bản và thao tác với View hay liên quan đến Image thường rất hay có các sự kiện liên quan đến việc tương tác giữa chúng. Nếu tương tác Image thì gần như không có gì khó khăn hay ...
Bài viết nhằm mục đích hướng dẫn, hỗ trợ nền tảng cơ bản trong phát triển CustomView trên Android
Với các ứng dụng cơ bản và thao tác với View hay liên quan đến Image thường rất hay có các sự kiện liên quan đến việc tương tác giữa chúng. Nếu tương tác Image thì gần như không có gì khó khăn hay phức tạp Tuy nhiên để xử lý với nhiều ảnh thì sẽ gây trở ngại hoặc đôi chút khó khăn
Ở đây mình xin chia sẻ một Example về việc sử dụng thao tác đơn giản cho MutilTouch về ảnh Với một số chức năng cơ bản nhất
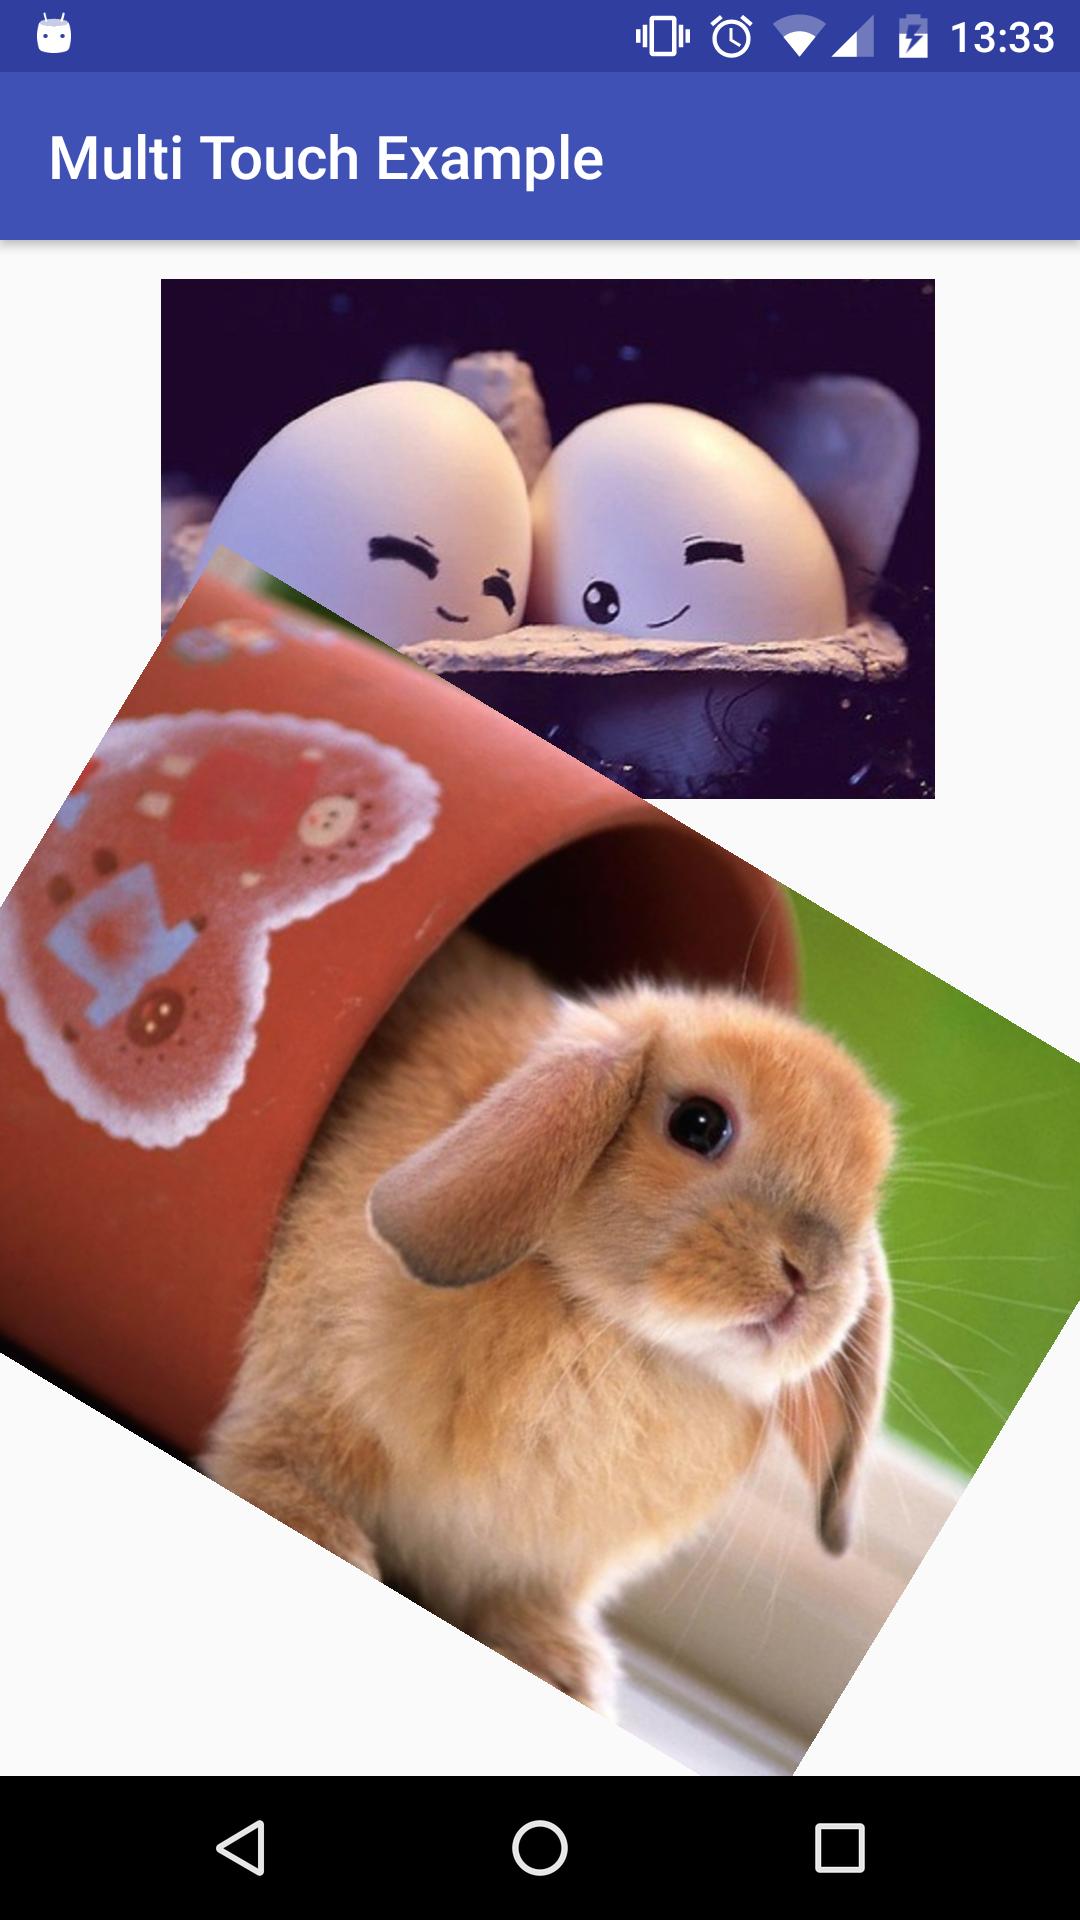
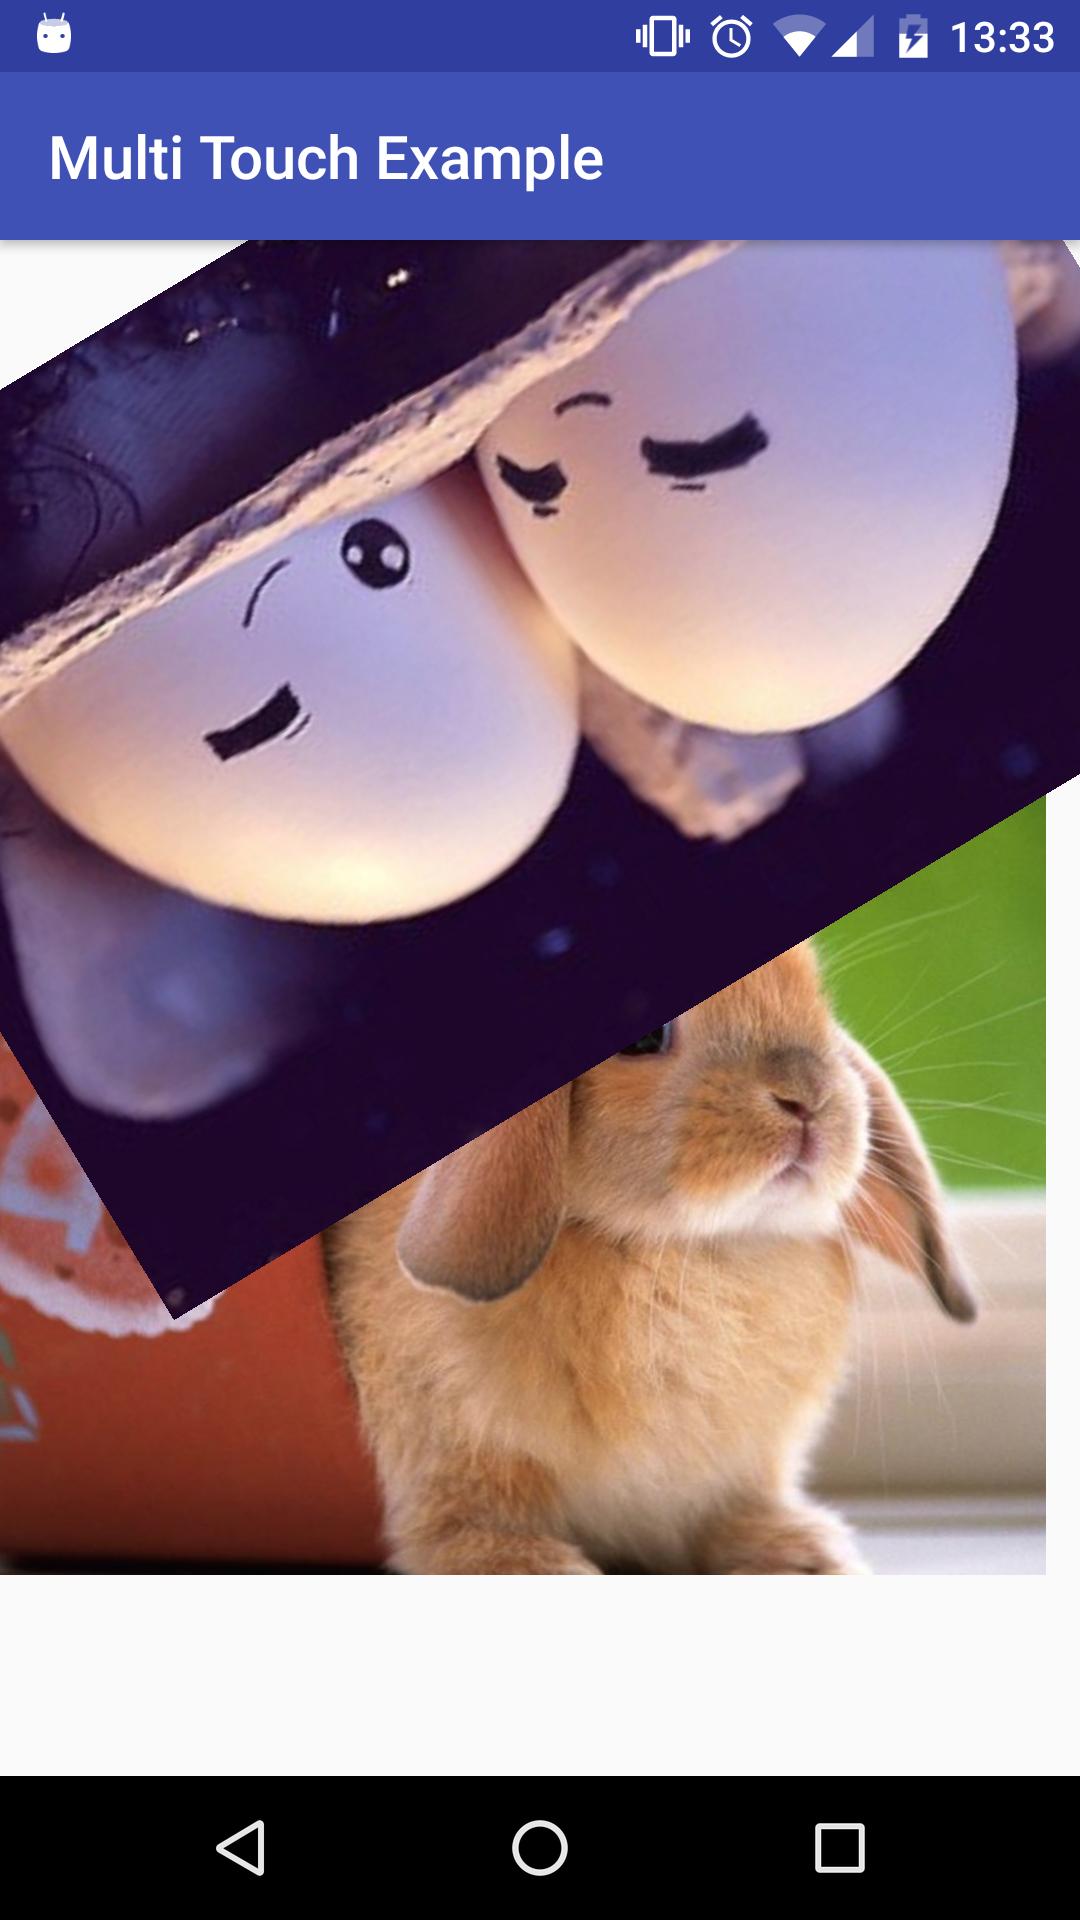
- Di chuyển ảnh vị trí bất kỳ
- Rotate ảnh theo góc sử dụng multitouch
- Zoom ảnh theo multitouch
- Double Tap để rotate ảnh theo góc 90
- BringTOFront khi touch vào 1 ảnh
- Ngoài ra các bạn có thể sử dụng base của mình cho việc CustomView phức tạp hơn: Custom Seekbar, CustomTextTouchView phức tạp hơn có thể sử dụng cho CustomItemRecycleView
Về Example không có độ phức tạp về xử lý nên gần như ai cũng có thể đọc, sử dụng được ngay sau khi làm quen
Cấu trúc Example
- Layout
activity_main.xml
<!--- Tạo FrameLayout để add các View --->
<?xml version="1.0" encoding="utf-8"?>
<FrameLayout xmlns:android="http://schemas.android.com/apk/res/android"
    xmlns:tools="http://schemas.android.com/tools"
    android:id="@+id/layout_content"
    android:layout_awidth="match_parent"
    android:layout_height="match_parent" />
- Tạo Vecter2D.java Object để lưu trữ các thông tin khi touch vào Screen
package sample.com.multitouchexample.instances;

import java.util.Locale;

public class Vector2D {

    private float x;
    private float y;

    public Vector2D() {
    }

	// Constructor Object from other object
    public Vector2D(Vector2D v) {
        this.x = v.x;
        this.y = v.y;
    }

	// Constructor Ojbect when touched
    public Vector2D(float x, float y) {
        this.x = x;
        this.y = y;
    }

    public float getX() {
        return x;
    }

    public float getY() {
        return y;
    }

	// get lenght Object
    public float getLength() {
        return (float) Math.sqrt(x * x + y * y);
    }

    public Vector2D set(Vector2D other) {
        x = other.getX();
        y = other.getY();
        return this;
    }

    public Vector2D set(float x, float y) {
        this.x = x;
        this.y = y;
        return this;
    }

	// Add Object when move
    public Vector2D add(Vector2D value) {
        this.x += value.getX();
        this.y += value.getY();
        return this;
    }

	//
    public static Vector2D subtract(Vector2D lhs, Vector2D rhs) {
        return new Vector2D(lhs.x - rhs.x, lhs.y - rhs.y);
    }

	// Caculator distance between two Object
    public static float getDistance(Vector2D lhs, Vector2D rhs) {
        Vector2D delta = Vector2D.subtract(lhs, rhs);
        return delta.getLength();
    }

    public static float getSignedAngleBetween(Vector2D a, Vector2D b) {
        Vector2D na = getNormalized(a);
        Vector2D nb = getNormalized(b);

        return (float) (Math.atan2(nb.y, nb.x) - Math.atan2(na.y, na.x));
    }

	// Normalized Object to basic
    public static Vector2D getNormalized(Vector2D v) {
        float l = v.getLength();
        if (l == 0)
            return new Vector2D();
        else
            return new Vector2D(v.x / l, v.y / l);

    }

	// Debug object
    @Override
    public String toString() {
        return String.format(Locale.US, "(%.4f, %.4f)", x, y);
    }
}
- Tạo đối tượng TouchManager.java thực hiện tính toán lưu trữ thông tin về touch screen, single touch, multi touch, tính toán 1 số phương thức khi người dùng touch vào screen
- Thực hiện việc tạo ra đường chéo khi touch và tính độ scale
- Thực hiện việc tạo ra góc quay khi 2 touch vào screen và quay 1 góc
- Quản lý lưu trữ, release touch
package sample.com.multitouchexample.instances;

import android.view.MotionEvent;

public class TouchManager {

    private final int maxNumberOfTouchPoints;

	// Tạo 2 list đối tượng lưu trữ Vector khi touch và trước đó, để thực hiện tính toán cho việc zoom và góc quay
    private final Vector2D[] points;
    private final Vector2D[] previousPoints;

	// Constructor cho phép người dùng thưc hiện single touch hay multi touch
    public TouchManager(final int maxNumberOfTouchPoints) {
        this.maxNumberOfTouchPoints = maxNumberOfTouchPoints;

        points = new Vector2D[maxNumberOfTouchPoints];
        previousPoints = new Vector2D[maxNumberOfTouchPoints];
    }

    public boolean isPressed(int index) {
        return points[index] != null;
    }

	// Tính toán số touch đã touch trên màn hình ví dụng single = 1, zoom thường là 2, nhưng đôi khi người dùng cần thực hiện nhiều hơn 2 touch
    public int getPressCount() {
        int count = 0;
        for (Vector2D point : points) {
            if (point != null)
                ++count;
        }
        return count;
    }

	// Tính toán khoảng cách dịch chuyển
    public Vector2D moveDelta(int index) {

        if (isPressed(index)) {
            Vector2D previous = previousPoints[index] != null ? previousPoints[index] : points[index];
            return Vector2D.subtract(points[index], previous);
        } else {
            return new Vector2D();
        }
    }

    private static Vector2D getVector(Vector2D a, Vector2D b) {
        if (a == null || b == null)
            throw new RuntimeException("can't do this on nulls");

        return Vector2D.subtract(b, a);
    }

	// Lấy lại vị trí mới khi dịch chuyển detal
    public Vector2D getPoint(int index) {
        return points[index] != null ? points[index] : new Vector2D();
    }

	// Lấy lại vị trí touch cũ
    public Vector2D getPreviousPoint(int index) {
        return previousPoints[index] != null ? previousPoints[index] : new Vector2D();
    }

	// Tạo ra vector giữa 2 vector trong mặt phẳng
    public Vector2D getVector(int indexA, int indexB) {
        return getVector(points[indexA], points[indexB]);
    }

    public Vector2D getPreviousVector(int indexA, int indexB) {
        if (previousPoints[indexA] == null || previousPoints[indexB] == null)
            return getVector(points[indexA], points[indexB]);
        else
            return getVector(previousPoints[indexA], previousPoints[indexB]);
    }

	// Update khi người dùng touch vào screen
    public void update(MotionEvent event) {
        int actionCode = event.getAction() & MotionEvent.ACTION_MASK;

        if (actionCode == MotionEvent.ACTION_POINTER_UP || actionCode == MotionEvent.ACTION_UP) {
            int index = event.getAction() >> MotionEvent.ACTION_POINTER_INDEX_SHIFT;
            previousPoints[index] = points[index] = null;

        } else {
            for (int i = 0; i < maxNumberOfTouchPoints; ++i) {
                if (i < event.getPointerCount()) {
                    int index = event.getPointerId(i);

                    Vector2D newPoint = new Vector2D(event.getX(i), event.getY(i));

                    if (points[index] == null)
                        points[index] = newPoint;
                    else {
                        if (previousPoints[index] != null) {
                            previousPoints[index].set(points[index]);
                        } else {
                            previousPoints[index] = new Vector2D(newPoint);

                        }

//                        if (Vector2D.subtract(points[index], newPoint).getLength() < 64)
                            points[index].set(newPoint);
                    }
                } else {
                    previousPoints[i] = points[i] = null;
                }
            }
        }
    }
}
- MainActivity.java Thực hiện kết nối giữa load và add View
package sample.com.multitouchexample;

import android.graphics.BitmapFactory;
import android.support.v7.app.AppCompatActivity;
import android.os.Bundle;
import android.widget.FrameLayout;

import sample.com.multitouchexample.view.CustomTouchView;

public class MainActivity extends AppCompatActivity {

    @Override
    protected void onCreate(Bundle savedInstanceState) {
        super.onCreate(savedInstanceState);
        // load layout
        setContentView(R.layout.activity_main);

		// Load FrameLayout từ XML để add View
        FrameLayout frameLayout = (FrameLayout) findViewById(R.id.layout_content);

        // Constructor 2 View với 2 bitmap khác nhau
        CustomTouchView customTouchView1 = new CustomTouchView(this, BitmapFactory.decodeResource(getResources(), R.mipmap.image_1));
        CustomTouchView customTouchView2 = new CustomTouchView(this, BitmapFactory.decodeResource(getResources(), R.mipmap.image_2));

		// Set cho việc touch vào bitmap ảnh đó sẽ được nhảy lên trên để dễ thao tác và cảm nhận
        customTouchView1.setBringToFront(true);
        customTouchView2.setBringToFront(true);

		// Cho phép rotate
        customTouchView1.setRotateEnable(true);
        customTouchView2.setRotateEnable(true);

		// Add View vào FrameLayout
        frameLayout.addView(customTouchView1);
        frameLayout.addView(customTouchView2);
    }
}
- Source code Các bạn có thể tham khảo source code của mình tại đây, ngoài ra nếu gặp trục trặc trong việc CustomView riêng cho bản thân khi sử dụng basic của mình thì hoàn toàn có thể liên hệ hoặc để lại comment
Git Clone
