Bubble animation trong React Native
Xin chào các bạn, trong bài viết này mình sẽ hướng dẫn các bạn làm một Bubble Animation. Đây là 1 animation khá đơn giản, phù hợp với các bạn chưa có nhiều kinh nghiệm về React Native như mình. Animation này có thể ứng dụng vào việc phân trang như trong ảnh bên dưới Bài viết được tham khảo ...
Xin chào các bạn, trong bài viết này mình sẽ hướng dẫn các bạn làm một Bubble Animation. Đây là 1 animation khá đơn giản, phù hợp với các bạn chưa có nhiều kinh nghiệm về React Native như mình.
Animation này có thể ứng dụng vào việc phân trang như trong ảnh bên dưới

Bài viết được tham khảo từ nguồn https://medium.freecodecamp.org/bubble-animation-with-react-native-72674eab073a
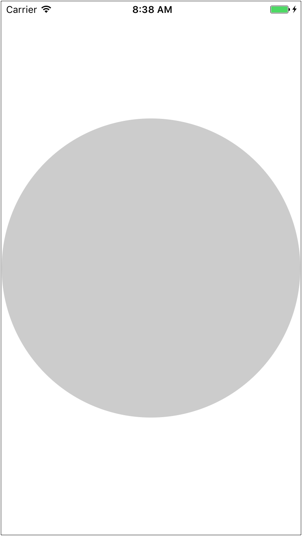
Mình sử dụng View giữ màu nền, bao gồm Animated.View cho Bubble animation.
import React from 'react';
import { StyleSheet,
  View,
  Animated,
  Dimensions
} from 'react-native';
const { awidth, height } = Dimensions.get('window');
const size = Math.min(awidth, height) - 1;
export default class App extends React.Component {
  render() {
    return (
      <View style={styles.container}>
        <Animated.View style={{
          position: 'absolute',
          backgroundColor: '#ccc',
          awidth: size,
          height: size,
          borderRadius: size / 2
        }} />
      </View>
    );
  }
}
const styles = StyleSheet.create({
  container: {
    flex: 1,
    alignItems: 'center',
    justifyContent: 'center',
    backgroundColor: '#fff'
  },
});
Sau đó, mình cho Bubble chạy bằng cách mở rộng từ 0 đến cuối màn hình bằng cách sử dụng thuộc tính transform scale của CSS cùng với Animated.timing để quyết định thời gian cho bubble mở rộng.
...
constructor(props) {
  super(props);
  this.state = {
    scale: new Animated.Value(0)
  };
}
componentDidMount() {
  Animated.timing(this.state.scale, {
    toValue: 4,
    duration: 1000,
    easing: Easing.linear
  }).start();
}
render() {
  return (
    <View style={styles.container}>
      <Animated.View style={{
        ...
        transform: [{
          scale: this.state.scale
        }]
      }} />
    </View>
  );
}
...
animation trên cần kích hoạt dựa trên user action. Đầu tiên chúng ta sẽ sử dụng TouchableWithoutFeedback để bắt action onPress trước nhé. Sau đó, chúng ta sẽ thay đổi bằng các action như swipe.
...
onPress() {
  Animated.timing(this.state.scale, {
    toValue: 4,
    duration: 1000,
    easing: Easing.linear
  }).start(() => {
    this.setState({
      scale: new Animated.Value(0)
    });
  });
}
render() {
  return (
    <TouchableWithoutFeedback onPress={this.onPress.bind(this)}>
      <View style={styles.container}>
        <Animated.View style={{
          ...
        }} />
      </View>
    </TouchableWithoutFeedback>
  );
}
...
Để có thể định vị bubble animation từ phía dưới. Chúng ta sử dụng sử dụng thuộc tính top và left.
...
getLeftPosition () {
  const halfSize = size / 2;
  const halfWidth = awidth / 2;
  let marginHorizontalTopLeft = -halfSize;
return marginHorizontalTopLeft + halfWidth;
}
getTopPosition () {
  const halfSize = size / 2;
  let marginVerticalTopLeft = -halfSize;
return marginVerticalTopLeft + height;
}
render() {
  let topPosition = this.getTopPosition();
  let leftPosition = this.getLeftPosition();
  return (
    <TouchableWithoutFeedback onPress={this.onPress.bind(this)}>
      <View style={styles.container}>
        <Animated.View style={{
          ...
          left: leftPosition,
          top: topPosition,
          ...
        }} />
      </View>
    </TouchableWithoutFeedback>
  );
}
Kết quả như mong đợi ngoại trừ màu sắc. Chúng ta sẽ quay lại component này sau nhé.
Bây giờ chúng ta nên cấu trúc lại code bằng cách di chuyển logic của bubble thành một component riêng biệt, và đặt tên là CircleTransition.
import React, { Component, PropTypes } from 'react';
import { Easing, Modal, Dimensions, Animated } from 'react-native';
const { awidth, height } = Dimensions.get('window');
class CircleTransition extends Component {
  constructor (props) {
    super(props);
this.state = {
      scale: new Animated.Value(0),
      color: '#ccc'
    };
  }
animate() {
    Animated.timing(this.state.scale, {
      toValue: 4,
      duration: this.props.duration,
      easing: this.props.easing
    }).start(() => {
      this.setState({
        scale: new Animated.Value(0)
      });
    });
  }
getLeftPosition () {
    const halfSize = this.props.size / 2;
    const halfWidth = awidth / 2;
    let marginHorizontalTopLeft = -halfSize;
return marginHorizontalTopLeft + halfWidth;
  }
getTopPosition () {
    const halfSize = this.props.size / 2;
    let marginVerticalTopLeft = -halfSize;
return marginVerticalTopLeft + height;
  }
render () {
    const {scale, color} = this.state;
    const { size } = this.props;
    let topPosition = this.getTopPosition();
    let leftPosition = this.getLeftPosition();
    return (
      <Animated.View style={{
        position: 'absolute',
        backgroundColor: color,
        top: topPosition,
        left: leftPosition,
        awidth: size,
        height: size,
        borderRadius: size / 2,
        transform: [{
          scale: scale
        }]
      }} />
    )
  }
}
CircleTransition.propTypes = {
  size: PropTypes.number,
  duration: PropTypes.number,
  easing: PropTypes.func,
}
CircleTransition.defaultProps = {
  size: Math.min(awidth, height) - 1,
  duration: 400,
  easing: Easing.linear
}
export default CircleTransition;
Sau đó, chúng ta sẽ sử dụng nó từ Component gốc.
...
onPress() {
  this.circleTransition.animate();
}
render() {
  return (
    <TouchableWithoutFeedback onPress={this.onPress.bind(this)}>
      <View style={styles.container}>
        <CircleTransition
          ref={(circle) => { this.circleTransition = circle }}
        />
      </View>
    </TouchableWithoutFeedback>
  );
}
...
Bây giờ là lúc chúng ta giải quyết màu sắc. Để làm cho bubble animation biến đổi màu mới khi onPress, chúng ta cần thêm một số màu mới vào component.
...
const screens = [{
  id: 0,
  bgcolor: '#698FB2'
}, {
  id: 1,
  bgcolor: '#68B0B3'
}, {
  id: 2,
  bgcolor: '#9B91BA'
}];
...

constructor(props) {
  super(props);
  this.state = {
    _counter: 0,
    currentbg: screens[0].bgcolor
  };
}
onPress() {
  const { _counter } = this.state;
  let newCounter = _counter < screens.length - 1 ? _counter + 1 : 0;
  this.setState({
    _counter: newCounter
  }, () => {
    this.circleTransition.start(screens[newCounter].bgcolor);
  });
}
render() {
  return (
    <TouchableWithoutFeedback onPress={this.onPress.bind(this)}>
      <View style={[styles.container, {
        backgroundColor: this.state.currentbg
      }]}>
        ...
      </View>
    </TouchableWithoutFeedback>
  );
}
...
...
start(color) {
  this.setState({
    color: color
  }, () => {
    this.animate();
  });
}
animate() {
  Animated.timing(this.state.scale, {
    toValue: 4,
    duration: this.props.duration,
    easing: this.props.easing
  }).start(() => {
    this.hideCircle();
  });
}
hideCircle () {
  this.setState({
    scale: new Animated.Value(0)
  });
}
...
Các bạn có thấy điều gì đó kỳ lạ trong quá trình chuyển đổi ở trên không? Trong quá trình chuyển đổi bong bóng thứ hai, màu nền sẽ bị quay về màu đầu tiên. Chúng ta cần cập nhật màu nền cho màu mới với bong bóng được chuyển đổi. Chúng ta cần một callback đến method start khi quá trình chuyển đổi hoàn tất.
...
this.circleTransition.start(newColor, this.changeColor.bind(this, newColor));
...
changeColor(newColor) {
  this.setState({
    currentbg: newColor
  });
}
...
start(color, callback) {
  ...
  this.animate(callback);
  ...
}
animate(callback) {
  Animated.timing(this.state.scale, {
    ...
  }).start(() => {
    callback();
    ...
  });
}
Các bạn cũng có thể thay thế SWIPE_LEFT SWIPE_RIGHT bằng SWIPE_UP và SWIPE_DOWN nhé
Như vậy mọi thứ cơ bản đều được thiết lập. Bây giờ chúng ta đã có một animation cơ bản.
Tiếp theo chúng ta vào phần gestures. Bubble chuyển tiếp khi người dùng vuốt sang trái hoặc sang phải màn hình.
Ở đây mình sử dụng thư viện react-native-swipe-gestures
Từ đây mình đã làm khác đi so với bài viết tham khảo ở phần giới thiệu. Các bạn có thể sử dụng thư viện có sẵn mà mình dùng, hoặc dùng theo như bài gốc nhé.
...
render() {
    const config = {
      velocityThreshold: 0.3,
      directionalOffsetThreshold: 80
    };

    return (
      <GestureRecognizer onPress={this.onPress.bind(this)}
        style={[styles.container, { backgroundColor: this.state.currentbg }]}
        onSwipe={(direction, state) => this.onSwipe(direction, state)}
        config={config}
      >
        <CircleTransition
          ref={(circle) => { this.circleTransition = circle }}
        />
      </GestureRecognizer>
    );
  }
...
Bây giờ cho logic của các gestures. Thư viện react-native-swipe-gestures đã hỗ trợ chúng ta việc bắt được hướng của người dùng đang vuốt.
Như vậy, chúng ta chỉ cần thiết lập một số counter để quay trở lại hoặc tới màn hình tiếp theo.
onSwipeLeft() {
    console.log("left");
    const { _counter } = this.state;
    let newCounter = _counter < screens.length - 1 ? _counter + 1 : 0;
    this.swipeTo(newCounter);
  }
  onSwipeRight() {
    console.log("right");
    const { _counter } = this.state;
    let newCounter = _counter === 0 ? screens.length - 1 : _counter - 1;
    this.swipeTo(newCounter);
  }

  swipeTo(counter) {
    const newColor = screens[counter].bgcolor;
    this.setState({
      _counter: counter
    }, () => {
      this.circleTransition.start(newColor, this.changeColor.bind(this, newColor));
    });
  }

  onSwipe(gestureName, gestureState) {
    const { SWIPE_UP, SWIPE_DOWN, SWIPE_LEFT, SWIPE_RIGHT } = swipeDirections;
    this.setState({ gestureName: gestureName });
    switch (gestureName) {
      case SWIPE_LEFT:
        this.onSwipeLeft();
        break;
      case SWIPE_RIGHT:
        this.onSwipeRight();
        break;
    }
  }

Đó là thành quả của chúng ta! Cảm ơn các bạn đã theo dõi bài tutorial này.
Nếu bạn đang mắc kẹt, hãy xem lại tại đây.
Chúc các bạn thành công!!!!
