Customize UIAlertController
Trong iOS, UIAlertView được dùng rất nhiều để hiển thị một message dialog hoặc confirm dialog... Tuy nhiên, từ iOS 8.0 trở đi, UIAlertView đã bị deprecated và thay thế bởi UIAlertController . Giao diện mặc định của UIAlertController nhìn đơn giản nhưng khá đơn điệu, nhiều khi không đáp ứng ...
Trong iOS, UIAlertView được dùng rất nhiều để hiển thị một message dialog hoặc confirm dialog... Tuy nhiên, từ iOS 8.0 trở đi, UIAlertView đã bị deprecated và thay thế bởi UIAlertController. Giao diện mặc định của UIAlertController nhìn đơn giản nhưng khá đơn điệu, nhiều khi không đáp ứng được yêu cầu đưa ra. Vì vậy, trong bài viết này, chúng ta sẽ cùng tìm hiểu một số cách đơn giản để customize giao diện mặc định của Apple.
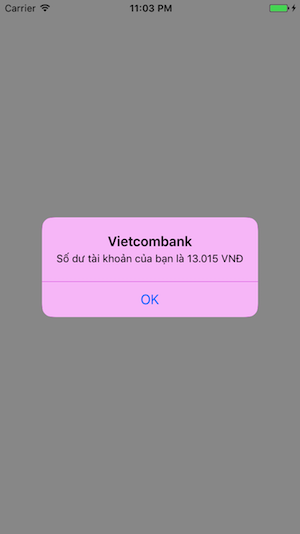
Đơn giản là lấy ra backgroundView của UIAlertController rồi set backgroundColor và cornerRadius cho nó.
    fileprivate func customizeBackground() {
        let alertController = UIAlertController(title: "Vietcombank", message: "Số dư tài khoản của bạn là 13.015 VNĐ",
            preferredStyle: .alert)
        let okAction = UIAlertAction(title: "OK", style: .default, handler: nil)
        alertController.addAction(okAction)

        // Get background view
        let backgroundView = alertController.view.subviews.last?.subviews.last
        backgroundView?.layer.cornerRadius = 14.0
        backgroundView?.backgroundColor = .purple

        present(alertController, animated: true, completion: nil)
}
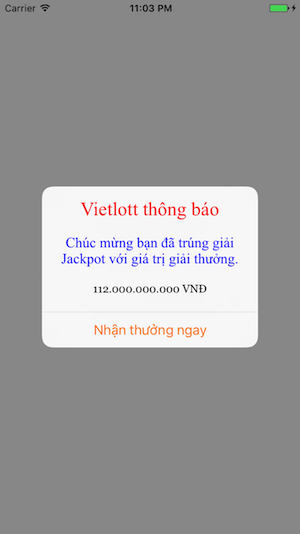
Sử dụng NSMutableAttributedString để tạo custom title, custom message, customActionTitle và setValue cho các private property của UIAlertController: attributedTitle, attributedMessage, titleTextColor.
    fileprivate func customizeFont() {
        let alertController = UIAlertController(title: nil, message: nil, preferredStyle: .alert)
        let okAction = UIAlertAction(title: "Nhận thưởng ngay", style: .default, handler: nil)
        alertController.addAction(okAction)

        // Create custom title
        let customTitle = NSMutableAttributedString(string: "Vietlott thông báo", attributes: [
            NSFontAttributeName: UIFont(name: "Times New Roman", size: 24.0)!,
            NSForegroundColorAttributeName: UIColor.red
        ])
        alertController.setValue(customTitle, forKey: "attributedTitle")

        // Create custom message
        let customMessage = NSMutableAttributedString(string: "
Chúc mừng bạn đã trúng giải Jackpot với giá trị giải thưởng.

", attributes: [
            NSFontAttributeName: UIFont(name: "Times New Roman", size: 18.0)!,
            NSForegroundColorAttributeName: UIColor.blue
        ])
        customMessage.append(NSMutableAttributedString(string: "112.000.000.000 VNĐ", attributes: [
            NSFontAttributeName: UIFont(name: "Georgia", size: 14.0)!,
            NSForegroundColorAttributeName: UIColor.black
        ]))
        alertController.setValue(customMessage, forKey: "attributedMessage")

        // Change action title color
        okAction.setValue(UIColor.orange, forKey: "titleTextColor")
        present(alertController, animated: true, completion: nil)
}
Dùng private property contentViewController có thể giúp ta thêm một view controller vào trong UIAlertController. Đồng nghĩa có thể giúp ta thực hiện các yêu cầu phức tạp hơn, ví dụ, thêm list item, ảnh, tableview... các giao diện phức tạp hơn vào UIAlertController. Let's do it.
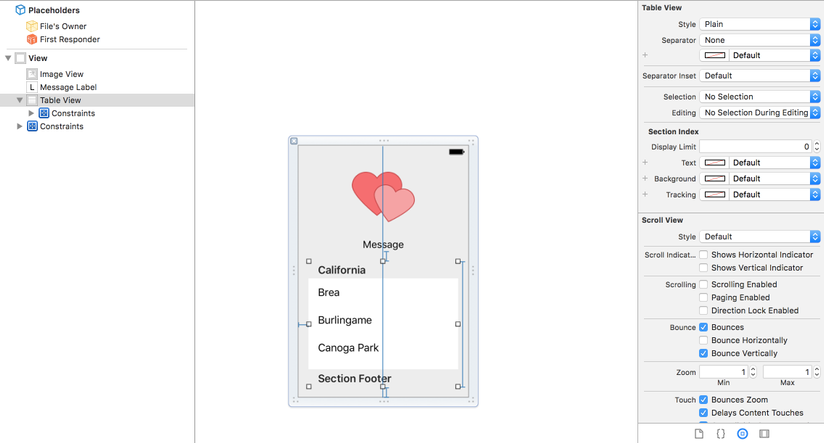
Tạo một UIViewController mới, set size XIB thành Freeform, awidth = 270, rồi design theo tuỳ ý.
Ví dụ như CustomViewController hiển thị list item như sau:
 Code:
Code:
import UIKit

class CustomViewController: UIViewController {

    @IBOutlet fileprivate weak var imageView: UIImageView!
    @IBOutlet fileprivate weak var messageLabel: UILabel!
    @IBOutlet fileprivate weak var tableView: UITableView!
    @IBOutlet fileprivate weak var tableViewHeightConstraint: NSLayoutConstraint!

    fileprivate var items = [(String, Bool)]()

    override func viewDidLoad() {
        super.viewDidLoad()
        tableView.register(UINib(nibName: "ItemTableViewCell", bundle: nil),
            forCellReuseIdentifier: "ItemCell")
    }

    func updateUI(image: String, message: String, items: [(String, Bool)]) {
        imageView?.image = UIImage(named: image)
        messageLabel?.text = message
        self.items = items
        tableViewHeightConstraint?.constant = 44.0 * CGFloat(items.count)
        tableView?.reloadData()
    }

}

// MARK: - UITableViewDataSource

extension CustomViewController: UITableViewDataSource {

    func tableView(_ tableView: UITableView, numberOfRowsInSection section: Int) -> Int {
        return items.count
    }

    func tableView(_ tableView: UITableView, cellForRowAt indexPath: IndexPath) -> UITableViewCell {
        guard let cell = tableView.dequeueReusableCell(withIdentifier: "ItemCell", for: indexPath)
                as? ItemTableViewCell else {
            return UITableViewCell()
        }
        cell.updateUI(item: items[indexPath.row])
        return cell
    }

}
Và một cell rất đơn giản giản, chỉ có 1 label và 1 switch.
class ItemTableViewCell: UITableViewCell {

    @IBOutlet fileprivate weak var titleLabel: UILabel!
    @IBOutlet fileprivate weak var `switch`: UISwitch!

    func updateUI(item: (String, Bool)) {
        titleLabel.text = item.0
        `switch`.isOn = item.1
    }

}
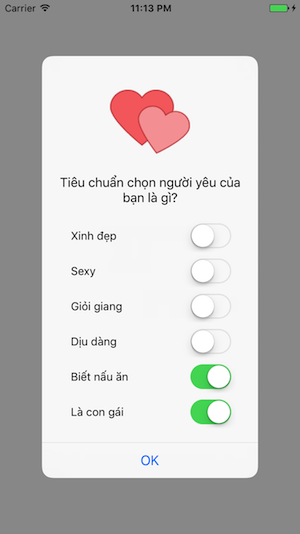
Bây giờ, để customize UIAlertController bằng một UIViewController, ta chỉ cần setValue cho key contentViewController. Và cũng đừng quên set data cho custom viewController mới tạo nhé.
    fileprivate func customizeViewController() {
        let alertController = UIAlertController(title: nil, message: nil, preferredStyle: .alert)
        let okAction = UIAlertAction(title: "OK", style: .default, handler: nil)
        alertController.addAction(okAction)

        // Create custom content viewController
        let contentViewController = CustomViewController()
        contentViewController.preferredContentSize = contentViewController.view.bounds.size
        alertController.setValue(contentViewController, forKey: "contentViewController")
        contentViewController.updateUI(image: "heart", message: "Tiêu chuẩn chọn người yêu của bạn là gì?",
            items: [
                ("Xinh đẹp", false),
                ("Sexy", false),
                ("Giỏi giang", false),
                ("Dịu dàng", false),
                ("Biết nấu ăn", true),
                ("Là con gái", true),
            ])
        present(alertController, animated: true, completion: nil)
    }
Kết quả là chúng ta sẽ có một alert controller chứa image, text, tableView được customize như sau: