Hello world - Kotlin
Kotlin một ngôn ngữ mới được phát triển bởi JetBrains. Tại sao chúng ta nên sử dụng Kotlin? Lý do là đây. Một ngôn ngữ hiện đại dễ sử dụng. Sau đây chúng ta sẽ tìm hiểu làm sao để xây dựng một ứng dụng Hello world với Kotlin. Đầu tiên chúng ta cần: Androis Studio 3.0 trở lên Để cài đặt ...
Kotlin một ngôn ngữ mới được phát triển bởi JetBrains. Tại sao chúng ta nên sử dụng Kotlin? Lý do là đây. Một ngôn ngữ hiện đại dễ sử dụng. Sau đây chúng ta sẽ tìm hiểu làm sao để xây dựng một ứng dụng Hello world với Kotlin.
Đầu tiên chúng ta cần:
- Androis Studio 3.0 trở lên
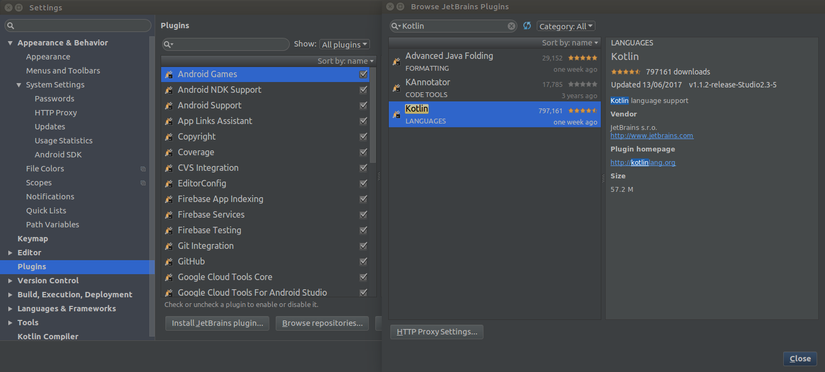
Để cài đặt Kotlin plugin ta thực hiệ như sau: File -> Settings -> Plugins -> Install JetBrains plugin -> Kotlin
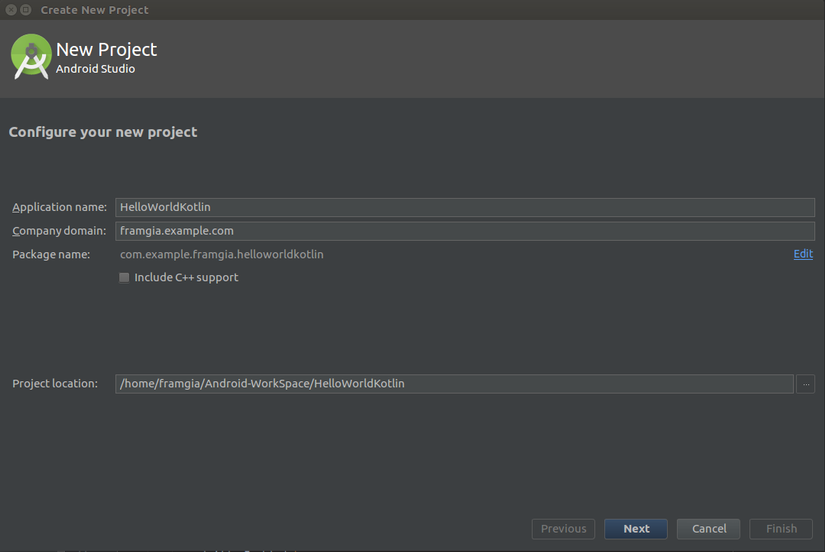
Ta bắt đầu khởi tạo một project mới
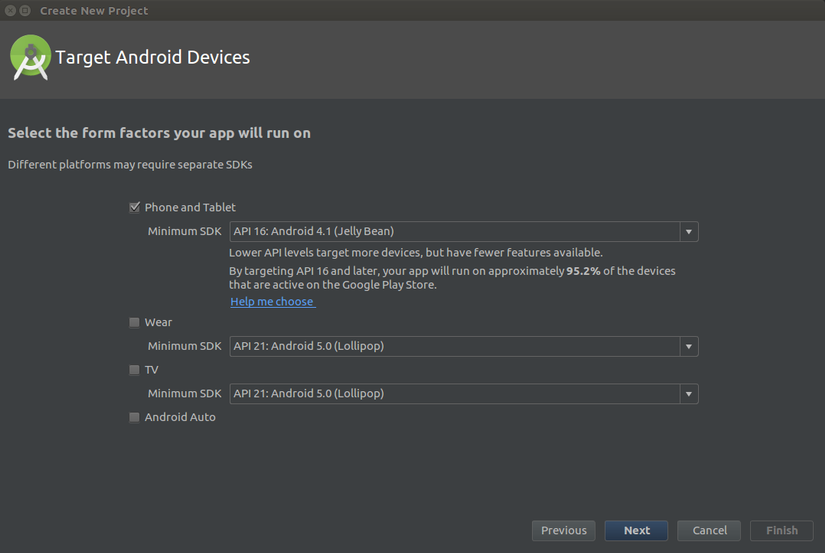
Lựa chọn Android version
Tạo một activity rỗng
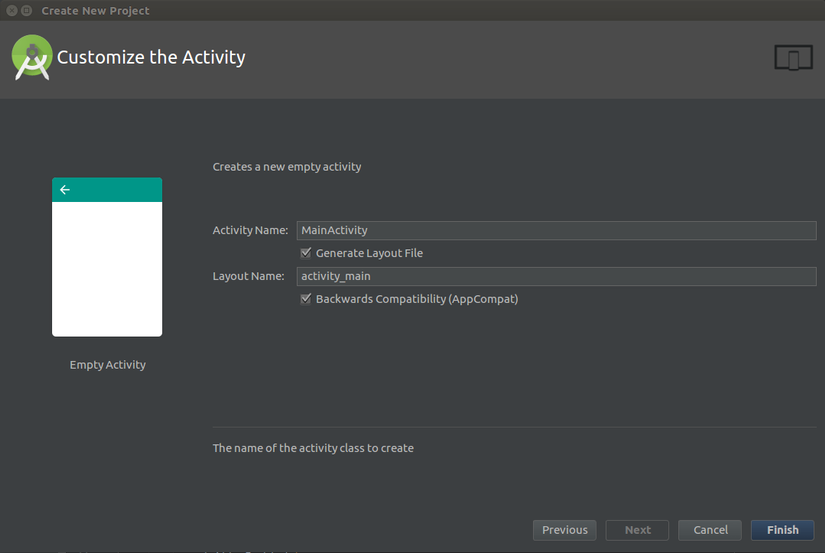
như vậy là ta đã khởi tạo thành công project.
Converting Java code to Kotlin
Activity ta nhận được vẫn là một java file, vì vậy ta cần convert nó sang thành 1 file kt
public class MainActivity extends AppCompatActivity {

    @Override
    protected void onCreate(Bundle savedInstanceState) {
        super.onCreate(savedInstanceState);
        setContentView(R.layout.activity_main);
    }
}
để convert jave file sang Kotlin bạn có thể đánh thẳng vào ô search "convert java file to kotlin" nó sẽ hiện ra như này:
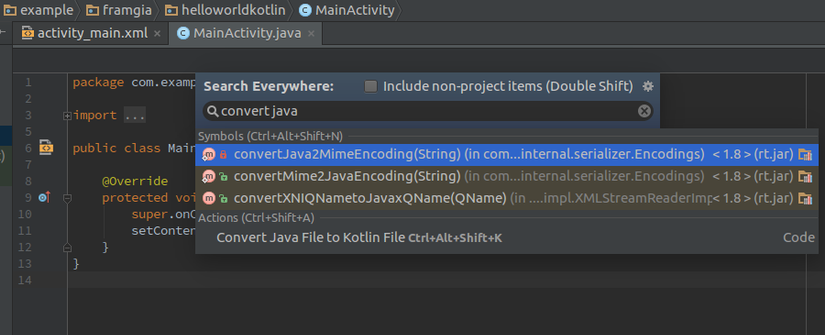
hoặc có thể chọn Code -> Convert Java file to Kotlin file
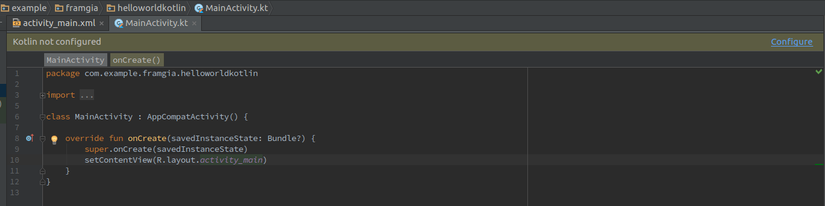
Configuring Kotlin in the project
Khi convert java file sang kotlin thì Android studio sẽ thông báo cho chúng ta biết phải config Kotlin cho project để có thể sử dụng được nó
gradle-project
buildscript {
    ext.kotlin_version = '1.1.2-5'
    repositories {
        jcenter()
    }
    dependencies {
        classpath 'com.android.tools.build:gradle:2.3.3'
        classpath "org.jetbrains.kotlin:kotlin-gradle-plugin:$kotlin_version"

        // NOTE: Do not place your application dependencies here; they belong
        // in the individual module build.gradle files
    }
}

allprojects {
    repositories {
        jcenter()
    }
}

task clean(type: Delete) {
    delete rootProject.buildDir
}
gradle-app
apply plugin: 'com.android.application'
apply plugin: 'kotlin-android'

...

dependencies {
    compile fileTree(dir: 'libs', include: ['*.jar'])
    androidTestCompile('com.android.support.test.espresso:espresso-core:2.2.2', {
        exclude group: 'com.android.support', module: 'support-annotations'
    })
    compile 'com.android.support:appcompat-v7:25.3.1'
    compile "org.jetbrains.kotlin:kotlin-stdlib-jre7:$kotlin_version"
    testCompile 'junit:junit:4.12'
}
repositories {
    mavenCentral()
}
như vậy là cơ bản ta đã tạo được một project Kotlin build và chạy bình thường.
Make a RecyclerView
Chúng ta sẽ tạo một RecyclerView với Kotlin Khởi tạo một Adapter cho RecyclerView. Về cách thức thì tao tạo một adapter như tương tự khi viết bằng java, nhưng sau đây ta có thể thấy nó được viết rất ngắn ngọn bằng Kotlin
Java
public class RecyclerViewAdapter extends RecyclerView.Adapter<RecyclerViewAdapter.RecyclerViewHolder> {

    private Context context;
    private ArrayList<String> listName;

    public RecyclerViewAdapter(Context context, ArrayList<String> listName) {
        this.context = context;
        this.listName = listName;
    }
...
}
Kotlin
class RecyclerViewAdapter(private val context: Context, private val listName: ArrayList<String>):
        RecyclerView.Adapter<RecyclerViewAdapter.RecyclerViewHolder>() {
}
ta có thể thấy context và listName được viết lại rất gắn ngọn và đầy đủ các val bạn có thể viết 1 các trực tiếp. Tương tự với ViewHolder
java
class RecyclerViewHolder extends RecyclerView.ViewHolder {

        private TextView textView;

        RecyclerViewHolder(View itemView) {
            super(itemView);
            textView = (TextView) itemView.findViewById(R.id.text_view);
        }

        void setData(String label) {
            textView.setText(label);
        }
    }
Kotlin
inner class RecyclerViewHolder(parent: ViewGroup) : RecyclerView.ViewHolder(LayoutInflater
            .from(parent.context).inflate(R.layout.item_view, parent, false)) {
        private val textView: TextView

        init {
            textView = itemView.findViewById(R.id.text_view) as TextView
        }

        fun setData(label: String) {
            textView.setText(label)
        }
    }
Sau khi có Adapter rồi thì ta thực hiện setAdapter cho RecyclerView
list_view.layoutManager = LinearLayoutManager(this)
list_view.setHasFixedSize(true)
list_view.adapter = RecyclerViewAdapter(this, listName)
như ta thấy list_view có thể được truy xuất trực tiếp chứ không cần đến phương thức findViewById() nữa. Vậy làm sao để ta có thể làm được như vậy, nhìn lại phía trên ViewHolder đc viết bằng Kotlin vẫn phải sử dụng đến findViewById().
Đơn giản ta chỉ cần import thêm
import kotlinx.android.synthetic.main.activity_main.*
trong đó activity_main chính là layout mong muốn, ở đây mình để * để có thể truy xuất tất cả các đối tượng trong activity_main, còn nếu bạn chỉ muốn truy xuất 1 đối tượng cố định nào đó, ví dụ như chỉ truy xuất list_view thì chỉ cần khai báo
import kotlinx.android.synthetic.main.activity_main.list_view
Chú ý: Khi các bạn import kotlinx, có thể sẽ bị hiện thông báo Unresolved reference: kotlinx - không thể xác định đc kotlinx là cái gì. Thì các bạn cần config thêm cho Kotlin. Tại gradle-project thêm
buildscript {
    dependencies {
        classpath "org.jetbrains.kotlin:kotlin-android-extensions:$kotlin_version"
    }
}
tại gradle-app thêm
apply plugin: 'kotlin-android-extensions'
thế là bạn có thể sử dụng kotlinx như bình thường rồi.
Trên đây là một tutorial đơn giản giới thiệu về Kotlin cũng nhưng các config Kotlin cho project của bạn. Hãy nhớ là 1 project android bạn vừa có thể sử dụng Java vừa có thể sử dụng Kotlin song song với nhau mà không hề bị vấn đề gì, vì vậy nếu bạn muốn chuyển sang Kotlin thì tại một phần nào đó của project bạn có thể sử dụng Kotlin xem thế nào
