JAVASCRIPT TINT COLOR – THAY ĐỔI MÀU SẮC BỨC ẢNH
JavaScript Tint Color là gì? JavaScript Tint Color là việc sử dụng JavaScript (Canvas) để thay đổi màu sắc của một bức ảnh. Bạn có thể thấy ở phía trên. Cùng là ảnh một ngôi sao nhưng màu sắc của chúng là khác nhau. Bình thường, bạn cần phải tạo ra những tệp tin ảnh tương ứng với mỗi ...
JavaScript Tint Color là gì?
JavaScript Tint Color là việc sử dụng JavaScript (Canvas) để thay đổi màu sắc của một bức ảnh.
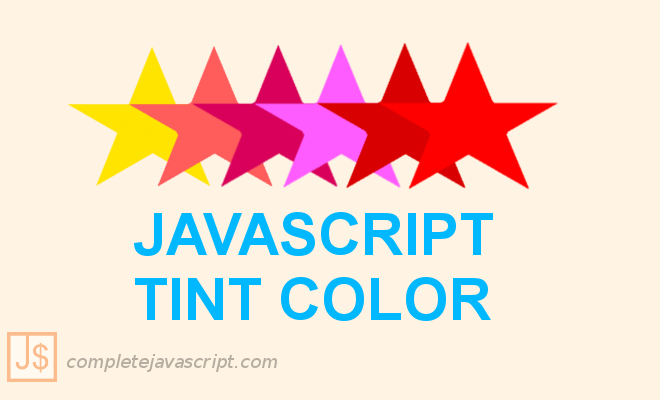
Bạn có thể thấy ở phía trên. Cùng là ảnh một ngôi sao nhưng màu sắc của chúng là khác nhau. Bình thường, bạn cần phải tạo ra những tệp tin ảnh tương ứng với mỗi màu. Nhưng khi áp dụng JavaScript Tint Color, chúng ta chỉ cần một bức ảnh ban đầu, sau đó có thể tạo ra vô số bức ảnh tương tự với màu sắc khác nhau.
Những lợi ích của JavaScript Tint Color
Lúc đầu, tôi định viết về ưu, nhược điểm của JavaScript Tint Color. Tuy nhiên, vì hiện tại tôi chưa biết cách nào khác để so sánh, nên bài viết này sẽ bàn về lợi ích của JavaScript Tint Color:
- Tiết kiệm thời gian: vì bạn chỉ cần thiết kế ảnh 1 lần, không phải mỗi màu sắc cần thiết kế lại.
- Tiết kiệm dung lượng của host: nếu như với mỗi màu sắc bạn lại upload lên host thì không lâu sau dung lượng của bạn sẽ hết.
Cách sử dụng JavaScript Tint Color
Với mục đích tái sử dụng, tôi đã viết một thư viện đơn giản là TintColor.js.
TintColor.js
(function(document, window){
  var TintColor = function(srcImage, tintColor, blendMode) {
    this.srcImage = srcImage;
    this.tintColor = tintColor;
    this.blendMode = blendMode;
  }
  TintColor.prototype.setSourceImage = function(srcImage) {
    this.srcImage = srcImage;
  }
  TintColor.prototype.setTintColor = function(tintColor) {
    this.tintColor = tintColor;
  }
  TintColor.prototype.setBlendMode = function(blendMode) {
    this.blendMode = blendMode;
  }
  TintColor.prototype.run = function() {
    var self = this;
    return new Promise(function(resolve, reject){
      var canvas = document.createElement('canvas');
      var context = canvas.getContext('2d');
      var image = new Image();
      image.crossOrigin = "Anonymous";
      image.onload = function() {
        canvas.awidth  = image.awidth;
        canvas.height = image.height;

        context.fillStyle = self.tintColor;
        context.fillRect(0, 0, canvas.awidth, canvas.height);

        context.globalCompositeOperation = self.blendMode;

        context.drawImage(image, 0, 0, image.awidth, image.height);

        var dataUrl = canvas.toDataURL();
        resolve({url: dataUrl, awidth: image.awidth, height: image.height});
      };
      image.onerror = function(error) {
        reject(error);
      }
      image.src = srcImg;
    });
  }
  TintColor.prototype.getSize = function getSize() {
    var self = this;
    return new Promise(function(resolve, reject) {
      var image = new Image();
      image.crossOrigin = "Anonymous";
      image.onload = function() {
        resolve({url: self.srcImage, awidth: image.awidth, height: image.height});
      };
      image.onerror = function(error) {
        reject(error);
      }
      image.src = self.srcImage;
    });
  }
  window.TintColor = TintColor;
})(document, window);
Hàm khởi tạo:
TintColor(srcImage, tintColor, blendMode) Trong đó:
- srcImage: (string) là đường dẫn đến bức ảnh, có thể là đường dẫn tương đối đến một vị trí trên server hoặc đường dẫn tuyệt đối đến một host (cdn) lưu trữ ảnh.
- tintColor: (string) là mã màu mới dạng Hexa hoặc RGB. Ví dụ: #ff00ff hoặc rgb(255, 0, 255).
- blendMode: (string) là chế độ blend. Ví dụ: destination-atop. Tất cả các giá trị có thể sử dụng được tham khảo tại đây.
- Bao gồm: source-over, source-in, source-out, source-atop, destination-over, destination-in, destination-out, destination-atop, lighter, copy, xor, multiply, screen, overlay, darken, lighten, color-dodge, color-burn, hard-light, soft-light, difference, exclusion, hue, saturation, color, luminosity.
Các hàm setter:
- setSourceImage(srcImage)
- setTintColor(tintColor)
- setBlendMode(blendMode)
Mục đích của những hàm này là để set lại các thông số url của ảnh, mã màu mới và blend mode khi bạn muốn thay đổi.
Hàm getSize()
Hàm này trả về một Promise. Trong trường hợp thành công thì kết quả là một object với 3 thông số là url, awidth, height của bức ảnh gốc, như sau:
{url: dataUrl, awidth: image.awidth, height: image.height}
Hàm run()
Cũng tương tự như hàm getSize() bên trên, nhưng lần này dataUrl sẽ là của một bức ảnh mới - sau khi đã vẽ lại màu. Để hiểu hơn về cách sử dụng của các API trên, tôi có chuẩn bị một ví dụ là tint-color-js trên Github.
Cách sử dụng TintColor.js
const srcImg = "start-yellow.png";
const newColor = "#ff00ff";
const blendMode = "destination-atop";

var tintWorker;

window.onload = function() {
  tintWorker = new TintColor(srcImg, newColor, blendMode);
};

/*
* Show original image
*/
function view() {
  var originImgDiv = document.getElementById("originImg");
  tintWorker
    .getSize()
    .then(
      result => setImage(originImgDiv, result.url, result.awidth, result.height),
      error => console.log("Get size of image error: ", error)
    );
}

/*
* Show normal image after changing image's color
*/
function test() {
  var tintImgDiv = document.getElementById("newImg");
  tintWorker
    .run()
    .then(result =>
      setImage(tintImgDiv, result.url, result.awidth, result.height)
    )
    .catch(error => {
      console.log("Failed to change color of image", error);
    });
}

function setImage(divElement, srcURL, awidth, height) {
  divElement.style.awidth = awidth + "px";
  divElement.style.height = height + "px";
  divElement.style.backgroundSize = "" + awidth + "px " + height + "px";
  divElement.style.backgroundImage = "url('" + srcURL + "')";
}
- Đầu tiên, tôi sẽ khởi tạo một đối tượng TintColor:
const srcImg = "start-yellow.png";
const newColor = "#ff00ff";
const blendMode = "destination-atop";

var tintWorker;

window.onload = function() {
  tintWorker = new TintColor(srcImg, newColor, blendMode);
};
- Để hiển thị ảnh gốc tôi sẽ dùng hàm getSize(), nếu bạn chưa biết gì về Promise thì có thể tham khảo tại đây.
var originImgDiv = document.getElementById("originImg");
tintWorker
  .getSize()
  .then(
    result => setImage(originImgDiv, result.url, result.awidth, result.height),
    error => console.log("Get size of image error: ", error)
  );
- Cuối cùng để áp dụng Tint Color cho bức ảnh, tôi sẽ dùng hàm run():
var tintImgDiv = document.getElementById("newImg");
tintWorker
  .run()
  .then(result =>
    setImage(tintImgDiv, result.url, result.awidth, result.height)
  )
  .catch(error => {
    console.log("Failed to change color of image", error);
  });
- Hàm setImage() áp dụng DOM để set lại giá trị awidth, height, url cho thể div hiển thị bức ảnh.
function setImage(divElement, srcURL, awidth, height) {
  divElement.style.awidth = awidth + "px";
  divElement.style.height = height + "px";
  divElement.style.backgroundSize = "" + awidth + "px " + height + "px";
  divElement.style.backgroundImage = "url('" + srcURL + "')";
}
Bạn có thể thấy là cách sử dụng TintColor.js rất là đơn giản phải không ạ! Tuy nhiên, tôi rất mong muốn nhận được phản hồi của bạn đọc để có thể cải tiến và hoàn thiện thư viện này. Vì vậy, tôi sẽ vui khi nhận được phản hồi của các bạn. Xin chào và hẹn gặp lại bạn ở bài viết tiếp theo trong series JavaScript nâng cao. Thân ái,
Xem thêm
- Code github tại tint-color-js.
- Chỉnh sửa và preview tại
- Bản gốc: Blog Complete JavaScript
Theo dõi Lam Pham trên Kipalog để nhận thông báo khi có bài viết mới nhất:
- Facebook Fanpage: Complete JavaScript
- Facebook Group: Hỏi đáp JavaScript VN
- Portfoflio : Lam Pham
