Net Core API Project With EF6 code first, Responsitory Design Partern - P4 - Sử dụng JWT để thực hiện Authorization.
Hi All ở 2 phần trước mình đã hướng dẫn các bạn Tạo projecy .Net core. Tạo Repository Tạo Configuration from database và hôm nay mình sẽ tiếp tục bài viết để hướng dẫn các bạn sử dụng JWT để thực hiện Authorization. Phần 1: .Net Core API Project With EF6 code first, Responsitory ...
Hi All
ở 2 phần trước mình đã hướng dẫn các bạn
- Tạo projecy .Net core.
- Tạo Repository
- Tạo Configuration from database
và hôm nay mình sẽ tiếp tục bài viết để hướng dẫn các bạn sử dụng JWT để thực hiện Authorization.
Phần 1: .Net Core API Project With EF6 code first, Responsitory Design Partern
Phần 2: .Net Core API Project With EF6 code first, Responsitory Design Partern - P2 - Create Repository
Phần 3: Net Core API Project With EF6 code first, Responsitory Design Partern - P3 - Create Configuration from database
Authorization refers to the process that determines what a user is able to do. For example, an administrative user is allowed to create a document library, add documents, edit documents, and delete them. A non-administrative user working with the library is only authorized to read the documents.
Authorization is orthogonal and independent from authentication. However, authorization requires an authentication mechanism. Authentication is the process of ascertaining who a user is. Authentication may create one or more identities for the current user.
Doc from Microsoft
Mọi người có thể đọc thêm ở trang chủ của Microsoft.
Hiểu nôm na Authorization là để chúng ta quy định quyền truy cập Controller đối với từng loại User.
Về mặt Authorization thì API được chia làm 2 loại
- AllowAnymous
- Grant Permission
- AllowAnymous
Đây là các API cho phép tất cả các loại User có thể truy cập lên hệ thống, ví dụ như:
- Login
- Fogort Password
- ....
các API này có chung đặc điểm là input đầu vào chưa xác định được User truy cập là ai.
- Grant Permission
Đây là các API có liên quan đến Logic của hệ thống và cần phân định rõ ràng xem loại User nào được thao tác với controller và action nào
Mình đang chọn Authorization theo Policy-based authorization
Document
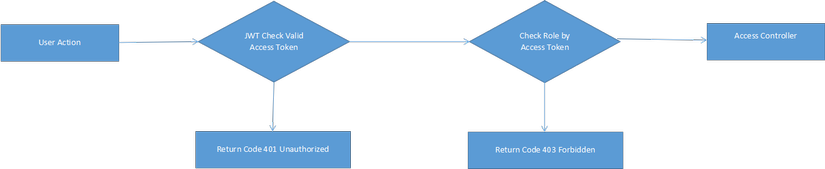
Với phương thức này mình sẽ định nghĩa các Policy cụ thể để gán cho các controller và khi truy cập sẽ dựa vào access token để check xem có đúng với Policy đó hay ko và sẽ cho phép truy cập tiếp hoặc trả về mã lỗi 403
- Phương thức này thì rõ ràng như vậy nhưng sẽ đẻ ra một vấn đề đó là các policy sẽ phải xác định trước và định nghĩa rõ ràng và vấn đề đó đẩy chúng ta vào bài toán làm sao để chúng ta có thể handle các policy đó một cách tự động và có thể tùy biến mà ko phải sửa code.
JWT là gì
Trước khi bắt đầu chúng ta cùng tìm hiểu JWT là gì, vì đây ko phải là bài post dành riêng cho JWT nên các bạn vui lòng Follow link sau để tìm hiểu nhé.
JWT
JSON Web Token (JWT) is an open standard (RFC 7519) that defines a compact and self-contained way for securely transmitting information between parties as a JSON object. This information can be verified and trusted because it is digitally signed. JWTs can be signed using a secret (with the HMAC algorithm) or a public/private key pair using RSA. Let's explain some concepts of this definition further.
-
Compact: Because of its smaller size, JWTs can be sent through a URL, POST parameter, or inside an HTTP header. Additionally, the smaller size means transmission is fast.
-
Self-contained: The payload contains all the required information about the user, avoiding the need to query the database more than once.
Sử dụng với .Net Core 2.0 như thế nào
- JWT được sử dụng cho phiên bản .Net core 2.0 trở lên nên với các phiên bản trước các bạn vui lòng tìm các phương án authorization khác nhé
Để sử dụng JWT chúng ta làm như sau
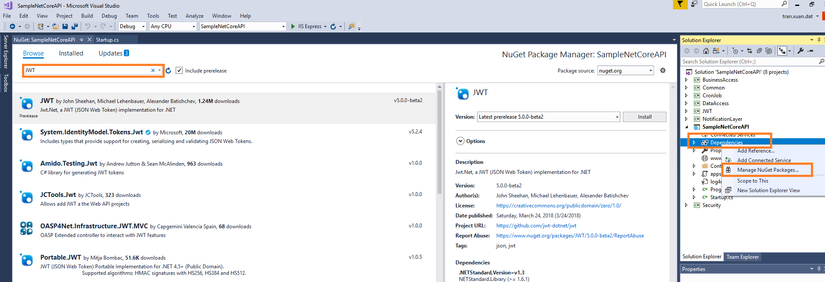
- Expan API Project
- Right Click to Dependencies
- Select Manage Nuget Packages
- Search JWT and Install
Config
Trước hết chúng ta sẽ phải config lại ConfigureServices trong file Startup.cs như code phía dưới
 public void ConfigureServices(IServiceCollection services)
 {
       services.AddAuthentication(o =>
            {
                o.DefaultAuthenticateScheme = JwtBearerDefaults.AuthenticationScheme;
                o.DefaultChallengeScheme = JwtBearerDefaults.AuthenticationScheme;
            })
            .AddJwtBearer(options =>
            {
                options.Audience = Configuration["TokenAuthentication:siteUrl"];
                options.RequireHttpsMetadata = false;
                options.TokenValidationParameters = new TokenValidationParameters
                {
                    ValidateIssuerSigningKey = true,
                    IssuerSigningKey = new SymmetricSecurityKey(System.Text.Encoding.ASCII.GetBytes(Constant.SecretSercurityKey)),

                    ValidateIssuer = true,
                    ValidIssuer = Configuration["TokenAuthentication:siteUrl"],

                    ValidateAudience = true,
                    ValidAudience = Configuration["TokenAuthentication:siteUrl"],

                    ValidateLifetime = true,
                };
            });
 }
- Chúng ta đã đăng ký authentication schema bằng cách sử dụng method AddAuthentication và chỉ định phương thức là JwtBearerDefaults.AuthenticationScheme
- Các option khi config bao gồm:
- ValidateIssuerSigningKey = true => xác minh rằng khóa được sử dụng để ký mã thông báo đến là một phần của danh sách các khóa đáng tin cậy
- IssuerSigningKey => secret key do chúng ta quy định, được đặt ở server, và dùng khi render AccessToken và kiểm tra xem AccessToken có hợp lệ ko
- ValidateIssuer => Kiểm tra xem server render của Access Token
- ValidIssuer=> Thông tin của server render AccessToken
- ValidateAudience => đảm bảo rằng người nhận mã thông báo được ủy quyền nhận nó
- ValidAudience => thông tin đảm bảo, được đặt ở server
- Các Thông tin như ValidAudience, ValidIssuer thì được đưa vào file Configuration, còn IssuerSigningKey thì các bạn nên lưu trữ ở database, và nên đọc bài này Phần 3: Net Core API Project With EF6 code first, Responsitory Design Partern - P3 - Create Configuration from database
các thông số lưu ở File Cònig thì có định dạng như sau:
{
// ...
  "TokenAuthentication": {
    "siteUrl": "http://localhost:5000"
  }
Bước tiếp theo chúng ta config ở Method Configure
    public void Configure(IApplicationBuilder app, IHostingEnvironment env)
    {
        if (env.IsDevelopment())
        {
            app.UseDeveloperExceptionPage();
        }

        app.UseMvc();
        app.UseAuthentication();
    }
update code của BlockController như sau
using System;
using System.Collections.Generic;
using System.Linq;
using System.Threading.Tasks;
using BusinessAccess.Services.Interface;
using Common;
using Microsoft.AspNetCore.Authorization;
using Microsoft.AspNetCore.Http;
using Microsoft.AspNetCore.Mvc;
using Security;
using Security.AuthozirationAttributes;
using Security.SecurityModel;

namespace SampleNetCoreAPI.Controllers
{
    [Produces("application/json")]
    [Route("api/Blog")]
    public class BlogController : Controller
    {
        private readonly IBlogService _blogService;
        private readonly IAuthozirationUtility _securityUtility;
        public BlogController(IBlogService blogService, IAuthozirationUtility securityUtility)
        {
            _blogService = blogService;
            _securityUtility = securityUtility;
        }

        [HttpPost]
        [Authorize]
        [Route("GetAllBlogs")]
        public IActionResult GetAllBlogs()
        {
            var result = _blogService.GetAllBlogs();
            return Json(ApiSecurity.Encode(result));
        }

        [HttpPost]
        [AllowAnonymous]
        [Route("GetAccessToken")]
        public IActionResult GetAccessToken()
        {
            //Nên gọi function này ở Login Service để render access token theo login user
            var AccessToken = _securityUtility.RenderAccessToken(new current_user_access()
            {
                Email = "dattx1@gmail.com",
                ExpireTime = DateTime.Now.AddYears(1),
                UserName = "dattx1@gmail.com",
                UserType = new List<string>() { "Administrator" }
            });
            return Json(AccessToken);
        }
    }
}
ở đây mình có 2 Action:
- 1 action của AllowAnonymous
- 1 action phải có Accesstoken
Kết quả như sau
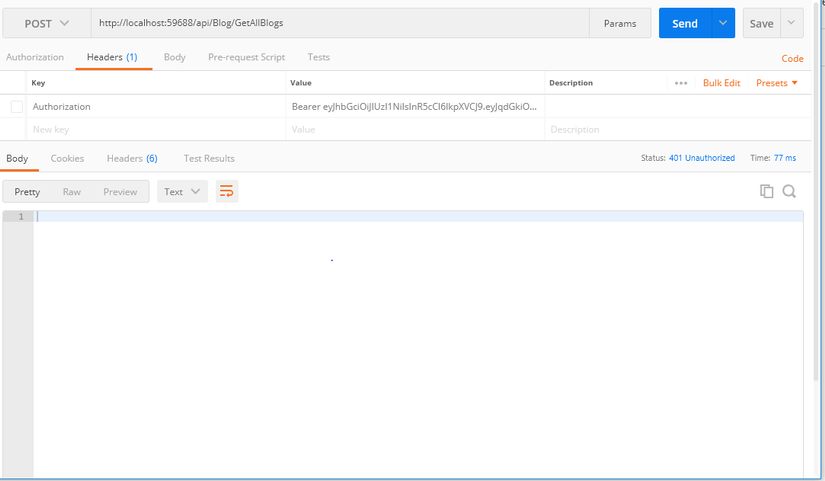
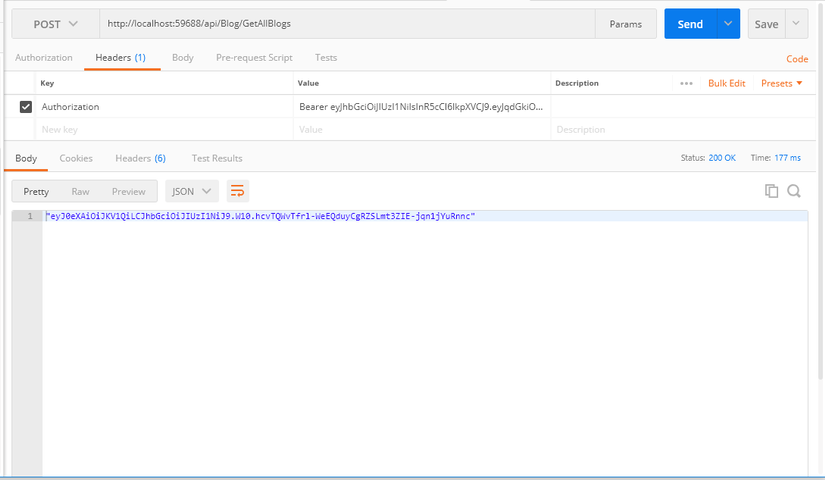
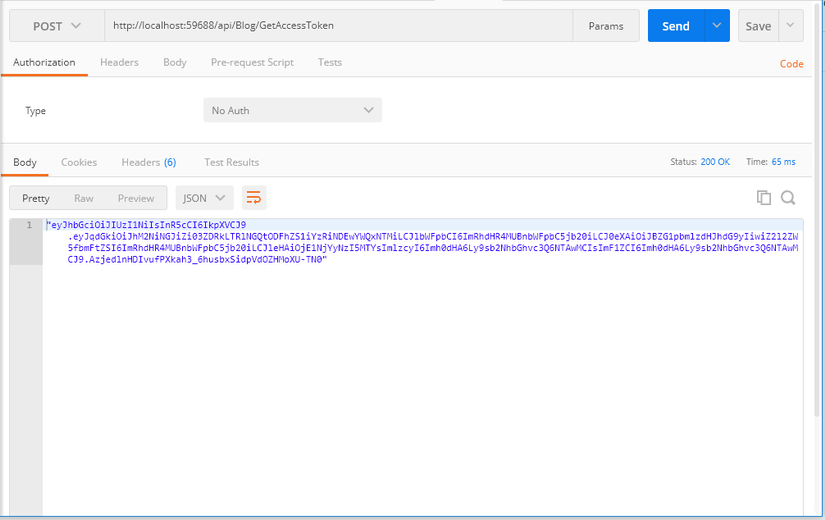
Như vậy là Chúng ta đã config thành công JWT rồi
Github
Các bạn chạy thử project mẫu nhé.
