RecyclerView trong Android ( phần 2 )
Tiếp theo phần 1 ở phần này mình sẽ giới thiệu tiếp tới các bạn 1 số tính năng nổi bật của RecyclerView Sử dụng RecyclerView 7. Notifying the Adapter Có nhiều phương thức được sử dụng để thông báo khi có thay đổi nguồn dữ liệu trong Adapter. notifyItemChanged(int pos) -> Thông báo ...
Tiếp theo phần 1 ở phần này mình sẽ giới thiệu tiếp tới các bạn 1 số tính năng nổi bật của RecyclerView
Sử dụng RecyclerView
7. Notifying the Adapter
Có nhiều phương thức được sử dụng để thông báo khi có thay đổi nguồn dữ liệu trong Adapter.
-
notifyItemChanged(int pos) -> Thông báo khi dữ liệu ở 1 vị trí được thay đổi
-
notifyItemInserted(int pos) -> Thông báo khi dữ liệu ở 1 vị trí được thêm mới
-
notifyItemRemoved(int pos) -> Thông báo khi dữ liệu ở 1 vị trí bị gỡ bỏ
-
notifyDataSetChanged() -> Thông báo khi dữ liệu bị thay đổi ( chỉ dùng trong trường hợp cuối cùng )
Bạn có thể dùng nó trong Activity hoặc Fragment
// Add a new contact
contacts.add(0, new Contact("Barney", true));
// Notify the adapter that an item was inserted at position 0
adapter.notifyItemInserted(0);
Mỗi lần thao tác làm thay đổi dữ liệu trong RecyclerView ( thêm, xóa ) bạn cần thông báo chính xác sự kiện tới Adapter. Không giống như ListView, RecyclerView khuyến cáo bạn không nên dùng notifyDataSetChanged() vì nó đã cung cấp đầy đủ sự kiện để thay đổi dữ liệu. Xem thêm tại API documentation để biết thêm chi tiết.
Nếu bạn định thực hiện thêm dữ liệu vào List có sẵn thì nên biết chắc chắn rằng bạn định thêm dữ liệu chính xác vào vị trí nào.
// record this value before making any changes to the existing list
int curSize = adapter.getItemCount();

// replace this line with wherever you get new records
ArrayList<Contact> newItems = Contact.createContactsList(20);

// update the existing list
contacts.addAll(newItems);
// curSize should represent the first element that got added
// newItems.size() represents the itemCount
adapter.notifyItemRangeInserted(curSize, newItems.size());
8. Cuộn tới vị trí thêm mới
// Add data in first position
adapter.notifyItemInserted(0);
rvContacts.scrollToPosition(0);   // index 0 position

// Add data in last position
adapter.notifyItemInserted(contacts.size() - 1);  // contacts.size() - 1 is the last element position
rvContacts.scrollToPosition(mAdapter.getItemCount() - 1); // update based on adapter
9. Thực hiện Endless Scrolling
RecyclerView hỗ trợ sự kiện onLoadMore() khi người dùng cuộn đến vị trí cuối cùng của danh sách. Bạn có thể sử dụng nó trong addOnScrollListener() và @Override phương thức onLoadMore()
rvItems.addOnScrollListener(new EndlessRecyclerViewScrollListener(linearLayoutManager) {
           @Override
           public void onLoadMore(int page, int totalItemsCount) {
               customLoadMoreDataFromApi(page);
           }
      });

public void customLoadMoreDataFromApi(int offset) {
      items.addAll(moreItems);

      int curSize = adapter.getItemCount();
      adapter.notifyItemRangeInserted(curSize, items.size() - 1);
}
10. Hiệu năng
Nếu các Item có cùng chiều cao và độ rộng thì bạn có thể tối ưu hiệu năng để khi cuộn danh sách được mượt mà hơn
recyclerView.setHasFixedSize(true);
11. Layouts
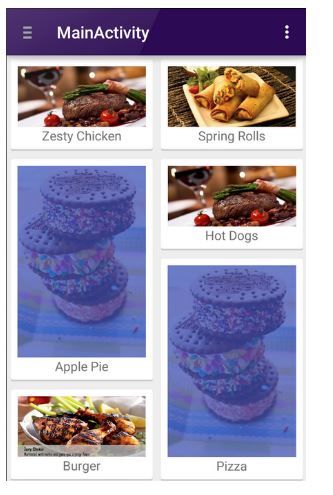
Mặc định chúng ta sẽ được lựa chọn giữa 3 Layout chính là linearLayoutManager, GridLayoutManager, và StaggeredGridLayoutManager. Và hiển thị theo chiều dọc và ngang.
// Setup layout manager for items
LinearLayoutManager layoutManager = new LinearLayoutManager(this);
// Control orientation of the items
// also supports LinearLayoutManager.HORIZONTAL
layoutManager.setOrientation(LinearLayoutManager.VERTICAL);
// Optionally customize the position you want to default scroll to
layoutManager.scrollToPosition(0);
// Attach layout manager to the RecyclerView
recyclerView.setLayoutManager(layoutManager);
Hiển thị dữ liệu dưới dạng StaggeredGridLayoutManager
// First param is number of columns and second param is orientation i.e Vertical or Horizontal
StaggeredGridLayoutManager gridLayoutManager =
    new StaggeredGridLayoutManager(2, StaggeredGridLayoutManager.VERTICAL);
// Attach the layout manager to the recycler view
recyclerView.setLayoutManager(gridLayoutManager);
**12. Hiệu ứng **
RecyclerView hỗ trợ các hiệu ứng khi cuộn, click vào Item hay delete item sử dụng ItemAnimator. Mặc định các hiệu ứng được định nghĩa trong DefaultItemAnimator.
Ngoài ra bạn cũng có thể sử dụng thư viện của bên thứ 3 như third-party recyclerview-animators library. Bạn cần chỉnh sửa trong app/build.gradle của project.
repositories {
    jcenter()
}

dependencies {
    compile 'jp.wasabeef:recyclerview-animators:2.2.0'
}
Tiếp sau đó chung ta cần đinh nghĩ hành vi của RecyclerView:
recyclerView.setItemAnimator(new SlideInUpAnimator());
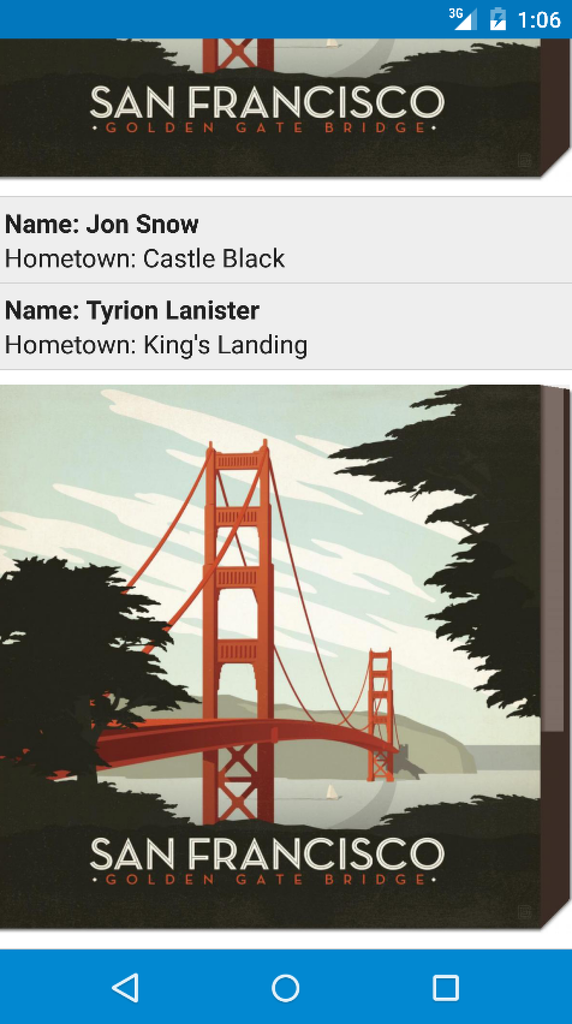
**13. Hiển thị nhiều kiểu dữ liệu **
Bạn có thể xem ở ví dụ dưới đây để hiểu thêm về cách hiển thị nhiều kiểu dữ liệu khác nhau trên 1 danh sách.
**14. onClick với ViewHolder **
RecyclerView không hỗ trợ sự kiện view.setOnItemClickListener như ListView, để làm được điều này bạn cần viết hàm ** setOnItemClickListener** trong ViewHolder.
public class ContactsAdapter extends RecyclerView.Adapter<ContactsAdapter.ViewHolder> {
    public class ViewHolder extends RecyclerView.ViewHolder implements View.OnClickListener {
        public TextView tvName;
        public TextView tvHometown;
        private Context context;

        public ViewHolder(Context context, View itemView) {
            super(itemView);
            this.tvName = (TextView) itemView.findViewById(R.id.tvName);
            this.tvHometown = (TextView) itemView.findViewById(R.id.tvHometown);
            // Store the context
            this.context = context;
            // Attach a click listener to the entire row view
            itemView.setOnClickListener(this);
        }

        // Handles the row being being clicked
        @Override
        public void onClick(View view) {
            int position = getLayoutPosition(); // gets item position
            User user = users.get(position);
            // We can access the data within the views
            Toast.makeText(context, tvName.getText(), Toast.LENGTH_SHORT).show();
        }
    }
}
Hoặc bạn muốn gọi sự kiện *setOnItemClickListener * ở ngoài ViewHolder thì bạn cần viết 1 Interface để cung cấp phương thức gọi hàm ra ngoài.
public class ContactsAdapter extends RecyclerView.Adapter<ContactsAdapter.ViewHolder> {
    /***** Creating OnItemClickListener *****/

    private static OnItemClickListener listener;

    public interface OnItemClickListener {
        void onItemClick(View itemView, int position);
    }

    public void setOnItemClickListener(OnItemClickListener listener) {
        this.listener = listener;
    }

    public static class ViewHolder extends RecyclerView.ViewHolder {
        public TextView tvName;
        public TextView tvHometown;

        public ViewHolder(final View itemView) {
            super(itemView);
            this.tvName = (TextView) itemView.findViewById(R.id.tvName);
            this.tvHometown = (TextView) itemView.findViewById(R.id.tvHometown);
            itemView.setOnClickListener(new View.OnClickListener() {
                @Override
                public void onClick(View v) {
                    if (listener != null)
                        listener.onItemClick(itemView, getLayoutPosition());
                }
            });
        }
    }

    // ...
}
Và ở ngoài bạn có thể gọi sự kiện thông qua Adapter
ContactsAdapter adapter = ...;
adapter.setOnItemClickListener(new ContactsAdapter.OnItemClickListener() {
    @Override
    public void onItemClick(View view, int position) {
        // To do something
    }
});
Nếu bạn muốn Item được chọn hiển thị hiệu ứng khi click vào thì bạn cần chỉnh sửa trong android:background của (he root layout for the row) thành ?android:attr/selectableItemBackground
<?xml version="1.0" encoding="utf-8"?>
<LinearLayout xmlns:android="http://schemas.android.com/apk/res/android"
    android:orientation="horizontal" android:layout_awidth="match_parent"
    android:layout_height="match_parent"
    android:background="?android:attr/selectableItemBackground">

</LinearLayout>
Hi vọng qua bài viết các bạn có thể hiểu rõ hơn về RecyclerView, cách truyền, hiển thị và các sự kiện cơ bản của nó.
