Selenium Guideline for Beginners - Part 2
In this session, you complete your first project by adding a test with TestNG annotation. 1. TestNG? TestNG is a framework for Java Unit Testing. Like its predecessor - JUnit, TestNG provides a way to write test methods, organize them in suites, run and produce test report. TestNG makes it ...
In this session, you complete your first project by adding a test with TestNG annotation.
1. TestNG?
TestNG is a framework for Java Unit Testing. Like its predecessor - JUnit, TestNG provides a way to write test methods, organize them in suites, run and produce test report. TestNG makes it easier using Java annotation.
For the shake of simplicity, the annotation can be demonstrated as below:
You write a method and mark it "this is a test". TestNG then is responsible for scanning your code to find the marked (annotated) methods and call them. Look at the following annotated method:
  @Test
   public void test() {
   //test smth
   }
The method has no return, so how TestNG determines Pass/Fail result of the test? You have to add TestNG assertions in the method. In the following example, your test is always "Pass":
@Test
public void test() {
Assert.assertTrue(true);
}
Of course you do not write a test that is always Pass. This is more realistic:
@Test
public void test() {
boolean condition;
//calculate condition
Assert.assertTrue(condition);
}
As said, you do not write a main() method. It's TestNG's main() method will be invoked and it will call your test method. What if you want to run other logic before or after your @Test method? TestNG has other annotations to do so:
@BeforeTest
public void setup() {
//start a browser session
}
@Test
public void test() {
//test smth with the browser session
}
@AfterTest
public void teardown() {
//close the session
}
With the three above annotated methods, TestNG will call setup() first, then test(), and teardown(). You can take a look at the annotations at https://www.tutorialspoint.com/testng/testng_basic_annotations.htm.
Now say you write a lot of tests in your project, so you want to divide them into some suites. In other words, you want the ability to run selective tests, not all at once. TestNG allows you to create a suite via XML configuration. A minimum configuration:
   <?xml version="1.0" encoding="UTF-8"?>
   <suite name="Suite1">
       <test name="Test1">
           <classes>
            <class name="com.gnc.csm.Test1"/>
            <class name="com.gnc.csm.Test2"/>
          </classes>
       </test>
   </suite>
- Let's start:
-
In mvn-prj (with pom.xml you created before), create folders and files in the below structure:
D:seleniummvn-prj |_pom.xml |_src |_main |_java |_com |_auto |_Test1.java |_resources |_suites |_suite1.xml -
Edit Test1.java:
package com.auto; import org.testng.annotations.Test; public class Test1 { @Test public void test() { System.out.println("This is a test method"); } } -
Edit suite1.xml:
<?xml version="1.0" encoding="UTF-8"?> <suite name="Suite1"> <test name="Test1"> <classes> <class name="com.gnc.csm.Test1"> </class> </classes> </test> </suite> -
Edit pom.xml. It has dependencies, now you add configuration for two plugins:
 <project ...>

    <dependencies> </dependencies>
    <build>
        <plugins>
            <plugin>
                <groupId>org.apache.maven.plugins</groupId>
                <artifactId>maven-compiler-plugin</artifactId>
                <version>3.2</version>
            </plugin>
        <plugin>
        <groupId>org.apache.maven.plugins</groupId>
        <artifactId>maven-surefire-plugin</artifactId>
        <version>2.16</version>
        <configuration>
        <suiteXmlFiles>
                <suiteXmlFile>${project.build.outputDirectory}/suites/suite1.xml</suiteXmlFile>
                </suiteXmlFiles>
                </configuration>
            </plugin>
        </plugins>
    </build>
</project>
Here you see $$project.build.outputDirectory}. This expresses a Maven property that is by default target/classes folder. Maven creates this folder when running mvn install command and deletes this folder when running mvn clean command. Resources (files) that you put in src/main/resources folder will be copied into target/classes.
5.Everything is ready now. Run command: mvn clean install and watch the output in console.
6.Go check the result:
• Html test report is generated under target/surefire-reports. Open index.html in a browser to view the report.
• A csm-selenium-1.0.jar file will be installed in target/ folder and in your local repo as well.
• The jar file is indeed a compressed folder, you might view its content by some archive tools like 7Zip. Uncompressed stuffs are installed into target/classes, including Java packages (.class files) and resources (e.g, xml files).
2. Eclipse setup
In this session you install Eclipse and its plugin. We have an impediment while installing Eclipse plugins behind the You- Know company proxy, so the fastest way is to copy a ready-to-use package of Eclipse. You will be given such a package in the course, while this guideline still walks you through a complete setup procedure.
2.1 Install Eclipse
- Google "Eclipse download", download a latest stable version of Eclipse, depending on your OS x64/x86 version. Run it if it is an installer. Unzip it if it is a binary archive (zip or tar or something similar).
- Launch Eclipse from a desktop shortcut or D:Appseclipseeclipse.exe
- If it asks you to set a default workspace, choose the folder mentioned in the beginning of this session.
- If you want to check where is the current workspace, from Eclipse menu choose File → Switch Workspace → Other.
2.2 Configure proxy
If you are working behind a proxy that requires Basic Authentication:
- From Eclipse menu open Preferences window: Window → Preferences
- In Preferences, select General → Network Connections
- In Active Provider box, select Manual.
- For each item of HTTP, HTTPS and SOCKS, input proxy host, port, username and password.
- Save it.
2.3 Install Plugins
The plugins you mostly use: SVN (named Subversive), Maven (named m2e), TestNG. Like the great experience you have with the way Maven manages dependencies in central repositories, the preferred way to install Eclipse plugins is let it install plugins from plugin-vendor sites. What you need is to give a site URL, Eclipse will automatically fetch it, find and install plugins, and update them in future.
Here is the common way to install a plugin:
- Google the plugin name, e.g "eclipse svn plugin", "eclipse subversive plugin", "eclipse maven plugin", "eclipse m2e plugin". You will have a high chance to find out the plugin site URL, for example "http://download.eclipse.org/technolo-gy/m2e/releases".
- From Eclipse menu, choose Help → Install New Softwares
- Paste the URL and click Add
- Wait while Eclipse is fetching the site. When it completes fetching, you can check what to be installed. You will know how to finish it.
However, as said, you might have problems due to the proxy, so another way is to copy plugins from a ready-to-use Eclipse package. Fortunately, it seems the plugins work across x64 and x86 versions. Hereunder is how to copy TestNG plugin from a ready-to-use Eclipse package: • In the ready-to-use Eclipse package, in plugins folder, find files and folders of which name contains "testng". Copy and paste them to the same location in your Eclipse folder. • Do the same in the features folder.
2.4 Configure Maven plugin
- From Preference window (you did learn where to open it), choose Maven → User Settings
- In User Settings box, input path of your Maven setting file (that you edited before), like: D:Appsmavenconfsettings.xml
- Click Update Settings.
2.5 Configure default JRE
If your JDK and Eclipse is installed for the first time, Eclipse sets the Build Path correctly based on JAVA_HOME setup. However, there are situations when ones install, remove, re-install them many times, or have multi versions of them. For such situations, you should check and correct the default JRE in Eclipse to have things right.
- From Preference window, choose Java → Installed JREs
- In Installed JREs box, you might see one or more than one path of JRE Location. The one is checked is the default JRE. Correct it to make sure it points exactly to your JAVA_HOME.
3. Importing Maven projects in Eclipse
In the previous sessions, you installed Eclipse and its m2e plugin. So Eclipse is ready to work with Maven projects. In this session, you import your Maven project into Eclipse and also learn some best practices to manage projects. The first recommendation: instead of using Eclipse to create a Maven project, you should create the project by creating its starting structure and pom.xml manually, then import it to Eclipse. This is also the situation when another team member has initiated a project, pushed it to SVN/GIT or something, and you pull it to your local machine and import it. In another situation when you are the one who initiates the project, read recommendations in SVN/GIT ignores.
3.1 Import Maven project to Eclipse
- Go to your mvn-prj folder, and run this command: mvn eclipse:clean Indeed, this command is not necessary in case you have never imported the project before. But this guideline still introduces it first as a way to start with a "clean" project. You should run it articularly when you are porting the project over different machines/environments.
- Run mvn eclipse:eclipse This command makes your project compatible with Eclipse M2E. Basically it creates some files and folders such as .classpath, .settings, .project, whereas the "eclipse:clean" command will erase those. Those files might be hidden. To see them in Windows Explorer, you need to set a you-know option.
- From Eclipse menu, choose File → Import... then in opened Import window, select Maven → Existing Maven projects
- In Root Directory box browse your mvn-prj folder. Then you will know how to finish it.
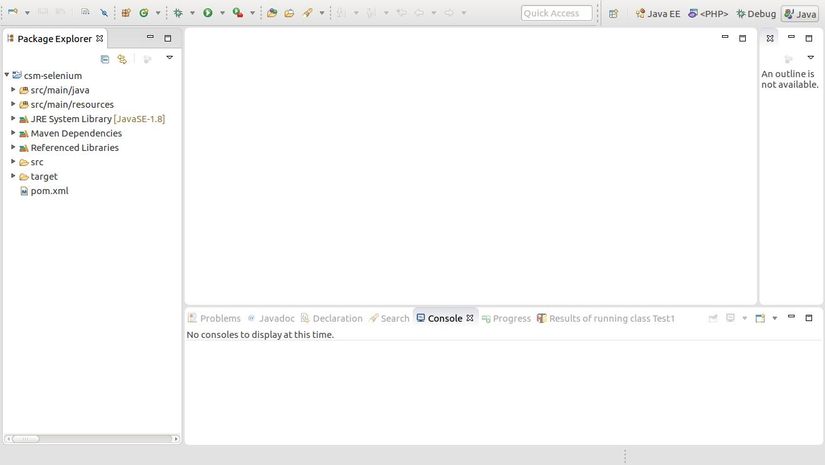
Now in the left pane you will see your project. Check that JRE System Library is 1.8
3.2 Safely delete a project in Eclipse
As said, the project source code should NOT be placed under Eclipse workspace. For many reasons you will want to delete a project in Eclipse, especially when you are done with it. Deleting a project in Eclipse means deleting its metadata from the workspace, the source code is not removed unless you tell Eclipse to do so.
- To delete a project in Eclipse, right-click it in the left pane and select Delete
- Confirm the following dialog, make sure the option Delete project contents on disk is NOT checked.

3.3 Updating Maven project
Sometimes when you modify a resource by an editor aside from Eclipse, for example you edit an Excel file by MS Office, you will have to tell Eclipse to update the project, by right click in the project and select Maven → Update Project.
If you forget this, you might have unexpected result when running your project.
Similarly, when you add/remove a file or folder not by Eclipse, you should tell Eclipse to refresh your project, just by right-click and select Refresh.
