Sử dụng Blade Layout và Eloquent ORM bên ngoài Laravel Framework
Kể từ khi Taylor Otwell chính thức ra mắt phiên bản Laravel đầu tiên vào ngày 9/6/2011, nó đã được phát triển vô cùng mạnh mẽ và được cộng đồng lập trình PHP trên toàn thế giới đón nhận. Hiện nay, với những tính năng nổi bật thì không khó để Laravel vươn lên dẫn đầu trong số những PHP Framework phổ ...
Kể từ khi Taylor Otwell chính thức ra mắt phiên bản Laravel đầu tiên vào ngày 9/6/2011, nó đã được phát triển vô cùng mạnh mẽ và được cộng đồng lập trình PHP trên toàn thế giới đón nhận. Hiện nay, với những tính năng nổi bật thì không khó để Laravel vươn lên dẫn đầu trong số những PHP Framework phổ biến nhất. Tuy nhiên, được đánh giá rất cao và sử dụng rộng rãi không có nghĩa rằng những lập trình viên PHP mặc định sử dụng Framework này. Tùy vào tính chất, quy mô của dự án cũng như yêu cầu kỹ thuật của khách hàng mà chúng ta có thể lựa chọn rất nhiều PHP Framework khác như CachePHP, Yii2, Symfony... Trước đây, khi còn đang hăng say với với Codeigniter 3.x thì mình bắt đầu đì vào tìm hiểu Laravel (lúc đó là phiên bản 5.1) và nhận thấy Laravel 5.1 có quá nhiều điểm nổi bật như Blade Layout, Eloquent ORM, Database Migrations, Seeders... Khi ấy, chưa nắm bắt được Laravel nên mình không giám chuyển sang sử dụng ngay và trong đầy nảy ra câu hỏi "Liệu có thể sử dụng những tính năng này trong CI, những framework khác hay thậm chí là kịch bản php thuần?" Mình đã tìm hiểu qua và thấy rất thú vị nhưng hôm nay mới có dịp chia sẻ cùng mọi người về cách sử dụng Blade Layout và Eloquent ORM - hai kỹ thuật mình thấy "mê mẩn nhất" bên ngoài Laravel Framework. Sau bài viết này, mình rất mong mọi người (những người không sử dụng Laravel) hoàn toàn có thể áp dụng vào framework mà các bạn đang làm việc để cảm nhận được sự tuyệt vời của Laravel.
Kỹ thuật đầu tiên mà mình muốn giới thiệu là Blade Layout, lúc mới biết cái này thì mình đã vô cùng thích thú và cảm thấy ảo diệu vô cùng. Chúng ta cùng bắt tay vào làm ngay thôi nào.
Bước 1:
- Tạo thư mục my-project trong thư mục chứa code của AppServer trên máy tính cá nhân.
- Mở command line (terminal - ubuntu) rồi chuyển hướng đến thư mục my-project vừa tạo.
- Trong cửa sổ command line, chạy lện composer init để tạo tệp composer.json trong my-project.
$ composer init


  Welcome to the Composer config generator


This command will guide you through creating your composer.json config.

Package name (<vendor>/<name>) [nguyenquynh/my-project]:
Description []:
Author [Quynh Nguyen Xuan <[email protected]>, n to skip]:
Minimum Stability []:
Package Type (e.g. library, project, metapackage, composer-plugin) []:
License []:

Define your dependencies.

Would you like to define your dependencies (require) interactively [yes]?
Search for a package:
Would you like to define your dev dependencies (require-dev) interactively [yes]?
Search for a package:

{
    "name": "nguyenquynh/my-project",
    "authors": [
        {
            "name": "Quynh Nguyen Xuan",
            "email": "[email protected]"
        }
    ],
    "require": {}
}

Do you confirm generation [yes]?
Bước 2:
- Tìm kiếm thư viện blade muốn dùng. Ở đây, mình sử dụng của tác giả Jenssegers.
- Trong cửa số command line, chạy lệnh composer require jenssegers/blade để tải thư viện blade về thư mục my-project/vendor.
composer require jenssegers/blade
Using version ^1.1 for jenssegers/blade
./composer.json has been updated
Loading composer repositories with package information
Updating dependencies (including require-dev)
Package operations: 12 installs, 0 updates, 0 removals
  - Installing psr/log (1.0.2): Loading from cache
  - Installing symfony/debug (v3.2.7): Loading from cache
  - Installing paragonie/random_compat (v2.0.10): Loading from cache
  - Installing illuminate/contracts (v5.4.19): Downloading (100%)
  - Installing doctrine/inflector (v1.1.0): Loading from cache
  - Installing illuminate/support (v5.4.19): Downloading (100%)
  - Installing symfony/finder (v3.2.7): Loading from cache
  - Installing illuminate/filesystem (v5.4.19): Downloading (100%)
  - Installing illuminate/container (v5.4.19): Downloading (100%)
  - Installing illuminate/events (v5.4.19): Downloading (100%)
  - Installing illuminate/view (v5.4.19): Downloading (100%)
  - Installing jenssegers/blade (v1.1.0): Downloading (100%)
paragonie/random_compat suggests installing ext-libsodium (Provides a modern crypto API that can be used to generate random bytes.)
illuminate/support suggests installing symfony/process (Required to use the composer class (~3.2).)
illuminate/support suggests installing symfony/var-dumper (Required to use the dd function (~3.2).)
illuminate/filesystem suggests installing league/flysystem (Required to use the Flysystem local and FTP drivers (~1.0).)
illuminate/filesystem suggests installing league/flysystem-aws-s3-v3 (Required to use the Flysystem S3 driver (~1.0).)
illuminate/filesystem suggests installing league/flysystem-rackspace (Required to use the Flysystem Rackspace driver (~1.0).)
Writing lock file
Generating autoload files
Bước 3:
- Tạo tệp blade.php bên trong thư mục my-project với nội dung như bên dưới.
- Tạo thư mục views trong my-project để chứa những tệp views có phần mở rộng là .blade.php.
- Tạo một tệp example.blade.php trong thư mục my-project/views có nội dung như bên dưới.
- Tạo thư mục cache/views trong my-project để chứa những tệp .php được biên dịch từ tệp .blade.php.
my-project/blade.php
<?php

// include composer autoload file from vendor directory.
include 'vendor/autoload.php';

// use short name of Balde class.
use JenssegersBladeBlade;

// create a new instance of Blade class with two parameters.
// views mean the directory that you want to define files with extension '.blade.php'.
// cache/views mean the directory that you want to store compiled files from blade files.
$blade = new Blade('views', 'cache/views');

// loading an example file with blade layout technique.
// feel comfortable with blade layout outside Laravel framework
echo $blade->make('example', ['title' => 'Blade layout outside laravel framework']);
my-project/views/example.blade.php
<!DOCTYPE html>
<html>
    <head>
        <meta charset="utf-8">
        <title>{{ $title }}</title>
    </head>
    <body>
        <h1>{{ $title }}</h1>
    </body>
</html>
=> Chú ý: nếu sử dụng linux (Ubuntu, CentOS...) thì mọi người nhớ ghi quyền cho thư mục cache/views để chương trình có thể thêm các tệp mới biên dịch vào đó.
Bước 4: Thực thi kịch bản my-project/blade.php để thấy kết quả.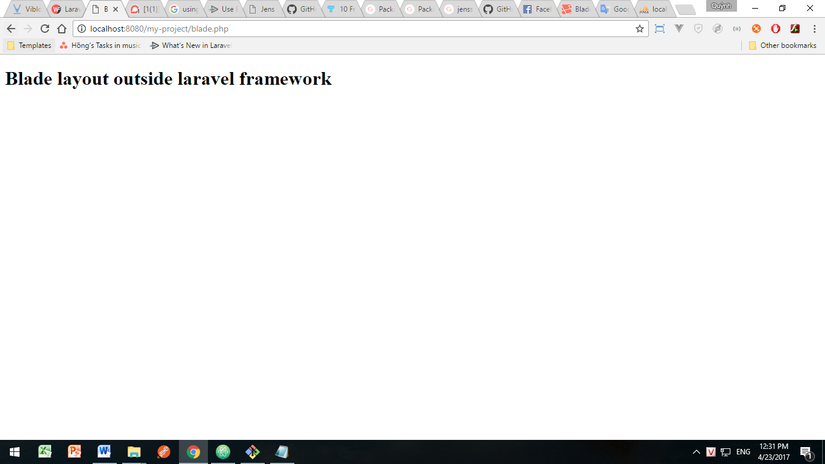
Về mặt lý thuyết thì chắc hẳn ai cũng có thể hiểu "phần nào" về Object Relationship Mapping nhưng để xây dựng ra nó thì e rằng vô vùng khó khăn. Với những Framework khác, chúng ta hoàn toàn có thể áp dụng được Eloquent ORM của Laravel để tăng khả năng làm việc hiệu quả với CSDL. Cùng bắt đầu thôi nào.
Bước 1:
- Tải thư viện illuminate/database về thư mục vendor trong my-project.
- Trong sửa số command line, chạy lệnh composer require illuminate/database để làm việc này.
composer require illuminate/database
Using version ^5.4 for illuminate/database
./composer.json has been updated
Loading composer repositories with package information
Updating dependencies (including require-dev)
Package operations: 4 installs, 0 updates, 0 removals
  - Installing symfony/polyfill-mbstring (v1.3.0): Loading from cache
  - Installing symfony/translation (v3.2.7): Loading from cache
  - Installing nesbot/carbon (1.22.1): Loading from cache
  - Installing illuminate/database (v5.4.19): Downloading (100%)
symfony/translation suggests installing symfony/config ()
symfony/translation suggests installing symfony/yaml ()
illuminate/database suggests installing doctrine/dbal (Required to rename columns and drop SQLite columns (~2.5).)
illuminate/database suggests installing fzaninotto/faker (Required to use the eloquent factory builder (~1.4).)
illuminate/database suggests installing illuminate/console (Required to use the database commands (5.4.*).)
illuminate/database suggests installing illuminate/pagination (Required to paginate the result set (5.4.*).)
Writing lock file
Generating autoload files
Bước 2:
- Tạo một tệp my-project/database.php cấu hình với hệ CSDL mysql (nếu các bạn sử dụng hệ quản trị CSDL khác thì hoàn toàn có thể tự điều chỉnh thông số).
<?php

// use short alias name.
use IlluminateDatabaseCapsuleManager as Capsule;

// create a new Capsule instance.
$capsule = new Capsule;

// add a database connection.
// I only use mysql. If you are using different db, you should customize your connection. =))
$capsule->addConnection([
    'driver'    => 'mysql',
    'host'      => 'localhost',
    'database'  => 'eloquent',
    'username'  => 'root',
    'password'  => '[email protected]#',
    'charset'   => 'utf8',
    'collation' => 'utf8_unicode_ci',
    'prefix'    => ',
]);

// Make this Capsule instance available globally via static methods
$capsule->setAsGlobal();

// Setup the Eloquent ORM
$capsule->bootEloquent();

return $capsule;
- Tạo một tệp my-project/schema.php nhằm tạo bảng mới trong CSDL nếu bảng đó không tồn tại.
<?php

// get capsule instance.
$capsule = include 'database.php';

// create users table if not exists.
if (! $capsule->schema()->hasTable('users')) {
    $capsule->schema()->create('users', function ($table) {
        $table->increments('id');
        $table->string('name');
        $table->timestamps();
    });
}

// create tasks table if not exists.
if (! $capsule->schema()->hasTable('tasks')) {
    $capsule->schema()->create('tasks', function ($table) {
        $table->increments('id');
        $table->string('name');
        $table->integer('user_id');
        $table->timestamps();
    });
}
- Tiếp đến tạo hai tệp User.php và Task.php trong thư mục my-project/models để khai báo models.
<?php

namespace Models;

use IlluminateDatabaseEloquentModel;

class User extends Model
{
    protected $fillable = ['name'];

    public function tasks()
    {
        return $this->hasMany(Task::class);
    }
}
<?php

namespace Models;

use IlluminateDatabaseEloquentModel;

class Task extends Model
{
    protected $fillable = ['name', 'user_id'];

    public function user()
    {
        return $this->belongsTo(User::class);
    }
}
- Sau khi tạo các tệp trên, mọi người mở tệp composer.json và thêm thông số autoload.
- Cuối cùng, trong cửa sổ command line, chạy lệnh composer dump-autoload để composer tự động require các tệp models khi sử dụng.
{
    "name": "nguyenquynh/my-project",
    "authors": [
        {
            "name": "Quynh Nguyen Xuan",
            "email": "[email protected]"
        }
    ],
    "require": {
        "jenssegers/blade": "^1.1",
        "illuminate/database": "^5.4"
    },
    "autoload": {
        "classmap": [
            "models"
        ]
    }
}
Bước 3:
- Thêm tệp eloquent.php trong my-project để chạy ví dụ:
<?php

// include composer autoload file from vendor directory.
include 'vendor/autoload.php';

// use short alias name.
include 'schema.php';

use ModelsUser;
use ModelsTask;

// insert new user.
$user = User::firstOrCreate(['name' => 'Laravel']);

// create some new tasks with the user name 'Laravel'
$user->tasks()->saveMany([
    new Task(['name' => 'Initialize project.']),
    new Task(['name' => 'Code as good as possible.']),
    new Task(['name' => 'Finish and get money from customer.']),
]);

// get data.
$user = User::where('name', 'Laravel')->first();

echo '<pre>';
print_r($user->tasks);
- Thực thi kịch bản my-project/eloquent.php để thấy kết quả.
Trên đây là trải nghiệm mà mình đã từng thực thiện khi cố gắng sử dụng một số kỹ thuật của Laravel vào trong CI và PHP thuần. Chúc mọi người có những trải nghiệm thú vị khác.
http://webfaver.com/php-coding/laravel-5/tut-laravel-5-0-laravel-la-gi-gioi-thieu-laravel-framework.html
https://laracasts.com/lessons/how-to-use-eloquent-outside-of-laravel
https://jenssegers.com/53/using-eloquent-without-laravel