Tạo bubble control sử dụng trong các app dạng chỉnh sửa ảnh, thiệp năm mới
Ở bài viết này mình sẽ hướng dẫn các bạn cách làm 1 custom control được sử dụng rất phổ biến trong các app chỉnh sửa ảnh, sticker... mình gọi nó là bubble control, để thấy hình thù của nó thế nào thì bạn hãy xem hình biên dưới: Đây là control mình đã viết cách đây khá lâu nên vẫn dùng ...
Ở bài viết này mình sẽ hướng dẫn các bạn cách làm 1 custom control được sử dụng rất phổ biến trong các app chỉnh sửa ảnh, sticker... mình gọi nó là bubble control, để thấy hình thù của nó thế nào thì bạn hãy xem hình biên dưới:

Đây là control mình đã viết cách đây khá lâu nên vẫn dùng Objective-C, bạn nào có thời gian thì convert sang Swift 3 chia sẻ cho mọi người nhé. Yêu cầu với dạng control này như sau:
- Có thể nhập thay đổi text bất cứ khi nào
- Kích thước bubble thay đổi theo text và giới hạn max kích thước (theo awidth)
- Có thể di chuyển cả khối text cho phù hợp với ngữ cảnh lúc sử dụng
- Có tuỳ chọn viền bubble dạng nét liền hoặc nét đứt
- Phải luôn đảm bảo sự liền mạnh giữa cái bubble và speech cho dù nó di chuyển ra sao
- Speech phải thay đổi được độ dài tuỳ ý
Bắt tay vào làm nào Trước hết chúng ta phân tích 1 chút về yêu cầu:
- Với mục 1 và 2 ta sẽ dùng 1 UITextView để xử lý nhập text, chúng ta có thể đo xem text nhập vào có awidth,height là bao nhiêu để điều chỉnh vùng nhập text cho phù hợp
- Mục 3 chúng ta sẽ sử dụng UIPanGesture để xử lý việc di chuyển khối text view
- Mục 4 chúng ta sẽ sử dụng các draw, sử dụng phương thức drawRect để vẽ các nét liền hoặc đứt
- Mục 5 với phần này để draw và tính toán để sự liền 1 khối của bubble và speech theo cách thông thường thì làm rất khó khăn, nên chúng ta có thể dùng cách sử dụng 2 lớp view: 1 là khối speech nằm bên dưới text view - có viền trùng màu với viền của speech, nó là 1 hình tam giác, có background trùng màu với text view, Với phần này chỉ cần cố định điểm đuôi của speech là xong
Bước 1: Định hình BubbleTextView Tạo class BubbleTextView, implement phương thức drawRect: (CGRect)rect, sử dụng đoạn code sau để vẽ:
  CGContextRef context = UIGraphicsGetCurrentContext();
  CGContextSetRGBStrokeColor(context,1,1,1,1.0);
  CGContextSetLineWidth(context, 1.0);
  UIColor *aColor = [UIColor colorWithRed:1 green:1 blue:1 alpha:1];
  CGContextSetFillColorWithColor(context, aColor.CGColor);
  CGRect paddedRect = CGRectMake(rect.origin.x+self.rectPadding, rect.origin.y+self.rectPadding, rect.size.awidth-self.rectPadding*2, rect.size.height-self.rectPadding*2);
  CGContextAddEllipseInRect(context, paddedRect);
   CGContextDrawPath(context, kCGPathFillStroke);
Với đoạn code trên chúng ta đã định hình được BubbleTextView với hình dáng của 1 elipse Trong đó biến rectPadding bạn có thể khai báo trong header của BubbleTextView
@property (nonatomic) CGFloat maxWidth;
@property (nonatomic, weak) id<BubbleTextViewDelegate> delegate;
@property (nonatomic) NSInteger rectPadding;
Delegate khai báo như sau:
@protocol BubbleTextViewDelegate <NSObject>

- (void)bubbleTextViewDidmoved:(BubbleTextView *)textBubbleView;
- (void)bubbleTextViewDidChanged:(BubbleTextView *)textBubbleView;

@end
Bước 2
Bổ sung thuộc tính trong file .m của BubbleTextView như sau:
@interface BubbleTextView () <UITextViewDelegate>

@property (nonatomic, strong) UITextView *textView;
@property (nonatomic, strong) MoveableView *foregroundView;
@property (nonatomic) CGFloat padding_x_scale;
@property (nonatomic) CGFloat padding_y_scale;

@end
Bước 3
Khi khởi tạo text view trong phương thức init nhớ set delegate cho UITextView, implement phương thức textViewDidChange:
- (void)textViewDidChange:(UITextView *)textView {

    CGSize currentSize = textView.frame.size;
    CGSize textViewTosize = [textView sizeThatFits:CGSizeMake(self.maxWidth, MAXFLOAT)];


   float deltaWidth = textViewTosize.awidth - currentSize.awidth;
    float deltaHeight = textViewTosize.height - currentSize.height;

    // bubble update frame
    CGSize currentBubbleSize = self.frame.size;
    CGSize bubbleToSize = CGSizeMake(currentBubbleSize.awidth+deltaWidth, currentBubbleSize.height+deltaHeight);
    self.frame = (CGRect){.origin=self.frame.origin, .size=bubbleToSize};

    // textview update frame
    // set min awidth
    if (textViewTosize.awidth < 20) {
        textViewTosize = CGSizeMake(20, textViewTosize.height);
    }
    textView.bounds = (CGRect){.origin=CGPointZero, .size=textViewTosize};
    textView.center = CGPointMake(CGRectGetMidX(self.bounds), CGRectGetMidY(self.bounds));

    // foreground view
    self.foregroundView.frame = (CGRect){.origin=CGPointZero, .size=bubbleToSize};
    [self setNeedsDisplay];

    if ([self.delegate respondsToSelector:@selector(bubbleTextViewDidChanged:)]) {
        [self.delegate bubbleTextViewDidChanged:self];
    }
}
Bước 4: Điều quan trọng không kém là gắn thêm TapAction cho việc ẩn hiện bàn phím của text view:
// tap action trong init method
       UITapGestureRecognizer *tapGestureRecognizer = [[UITapGestureRecognizer alloc] initWithTarget:self action:@selector(tapAction:)];
       [self.foregroundView addGestureRecognizer:tapGestureRecognizer];
implement tapAction
#pragma mark - Handle Action

- (void)tapAction:(UITapGestureRecognizer *)recognizer {
    if ([self.textView isFirstResponder]) {
        [self.textView resignFirstResponder];
    } else {
        [self.textView becomeFirstResponder];
    }
}
OK về cơ bản đã xong TapAction
Bước 5: Việc xử lý move TextView Không nên add thêm UIPanGesture lên trên text view để dễ quản lý và để code trông sáng sủa hơn nên chúng ta sẽ tạo thêm 1 MoveableView nữa để xử lý việc này, về class này đơn giản nó chỉ cung cấp 1 delegate để bắt sự kiện bắt đầu di chuyển và đang di chuyển chính nó:
@protocol MoveableViewDelegate <NSObject>

@optional
- (void)movableViewDidBeginMove:(MoveableView *)movableView;
- (void)movableView:(MoveableView *)movableView deltaX:(float)deltaX deltaY:(float)deltaY;

@end
Implement các phương thức nhận gesture của UIView như sau:
- (void)touchesBegan:(NSSet *)touches withEvent:(UIEvent *)event {
    [super touchesBegan:touches withEvent:event];
    UITouch *touch = [[event allTouches] anyObject];
    CGPoint touchLocation = [touch locationInView:self];
    self.oldX = touchLocation.x;
    self.oldY = touchLocation.y;
}

- (void)touchesMoved:(NSSet *)touches withEvent:(UIEvent *)event {
    [super touchesMoved:touches withEvent:event];
    float deltaX = [[touches anyObject]locationInView:self].x - self.oldX;
    float deltaY = [[touches anyObject]locationInView:self].y - self.oldY;
    if (deltaX != 0 && deltaY != 0) {
        if ([self.delegate respondsToSelector:@selector(movableViewDidBeginMove:)]) {
            [self.delegate movableViewDidBeginMove:self];
        }
    }
    if ([self.delegate respondsToSelector:@selector(movableView:deltaX:deltaY:)]) {
        [self.delegate movableView:self deltaX:deltaX deltaY:deltaY];
    }
}
Bước 6: Giờ đến nhân vật chính rồi, các bạn hãy tạo class DynamicBubble trong header bổ sung thuộc tính sau:
@property (nonatomic, setter=setBoderDash:) BOOL isBoderDashed;
@property (nonatomic, strong) BubbleTextView *bubbleTextView;
Bước 7 Implement việc di chuyển text view
- (void)bubbleTextViewDidmoved:(BubbleTextView *)textBubbleView {
    self.textBubbleViewCenterPoint = CGPointMake(CGRectGetMidX(textBubbleView.frame), CGRectGetMidY(textBubbleView.frame));
    [self setNeedsDisplay];
}

- (void)bubbleTextViewDidChanged:(BubbleTextView *)textBubbleView {
    self.textBubbleViewCenterPoint = CGPointMake(CGRectGetMidX(textBubbleView.frame), CGRectGetMidY(textBubbleView.frame));
    [self setNeedsDisplay];
}
Nhớ gọi lại phương thức setNeedDisplay để việc vẽ được đúng trong các trường hợp.
Bước 8: Draw Bubble và speech
Trong phương thức drawRect
float x_scale = self.bubbleTextView.x_scale;  // tỷ lệ scale textview theo x
float y_scale = self.bubbleTextView.y_scale;  // tỷ lệ scale textview theo y
float textBubbleViewFrameX = self.bubbleTextView.frame.origin.x;
float textBubbleViewFrameY = self.bubbleTextView.frame.origin.y;
float x1 = self.targetPoint.x;
float y1 = self.targetPoint.y; //TargetPoint: là point của điểm bắt đầu đuôi của speech
float x2 = self.textBubbleViewCenterPoint.x;
float y2 = self.textBubbleViewCenterPoint.y; //center của textview
float k, b;
if ((x2-x1)==0) {
    k=0;
    b=x1;
} else {
    k = (y2-y1)/(x2-x1);
    b = y1-(y2-y1)*x1/(x2-x1);
}
float dist = sqrtf(powf((x1-x2), 2) + powf((y1-y2), 2));
CGContextRef context = UIGraphicsGetCurrentContext();
CGContextSetRGBStrokeColor(context,0,0,0,1.0);
CGContextSetLineWidth(context, 2.0);
UIColor *aColor = [UIColor whiteColor];
CGContextSetFillColorWithColor(context, aColor.CGColor);
if (_isBoderDashed) {
    CGFloat ra[] = {4,2};
    CGContextSetLineDash(context, 0.0, ra, 2);
}
// border background
 CGContextAddEllipseInRect(context, self.bubbleTextView.frame);
  CGContextDrawPath(context, kCGPathFillStroke);
Xong bubble, tiếp theo đến cái hình tam giác, draw cái này với chiều cao tính bằng khoảng cách từ targetPoint tới textview center, 2 giá trị này đã mô tả ở trên, cụ thể:
          int c = 10;
          float x3, x4, y3, y4;
          float k = sqrt(pow((x1-x2), 2) + pow((y1-y2), 2));

          if ((x1-x2)*(y1-y2)>0) {
              x3 = MIN((x2+c*(y2-y1)/k), (x2-c*(y2-y1)/k));
              x4 = MAX((x2+c*(y2-y1)/k), (x2-c*(y2-y1)/k));
              y3 = MAX((y2+c*(x2-x1)/k), (y2-c*(x2-x1)/k));
              y4 = MIN((y2+c*(x2-x1)/k), (y2-c*(x2-x1)/k));
          } else if ((x1-x2)*(y1-y2) < 0) {
              x3 = MAX((x2+c*(y2-y1)/k), (x2-c*(y2-y1)/k));
              x4 = MIN((x2+c*(y2-y1)/k), (x2-c*(y2-y1)/k));
              y3 = MAX((y2+c*(x2-x1)/k), (y2-c*(x2-x1)/k));
              y4 = MIN((y2+c*(x2-x1)/k), (y2-c*(x2-x1)/k));
          } else {
              x3 = x2-c;
              x4 = x2+c;
              y3 = y2;
              y4 = y2;
          }

          CGContextBeginPath(context);
          CGContextMoveToPoint(context, x1, y1);
          CGContextAddLineToPoint(context, x3, y3);
          CGContextAddLineToPoint(context, x4, y4);
          CGContextAddLineToPoint(context, x1, y1);
          CGContextDrawPath(context, kCGPathFillStroke);
Đoạn này tính toán nhìn hơi loàng ngoằng nhưng cũng khá dễ hiểu, bởi việc di chuyển textview kéo theo việc phải tính toán lại các cạch của tam giác sao cho phù hợp.
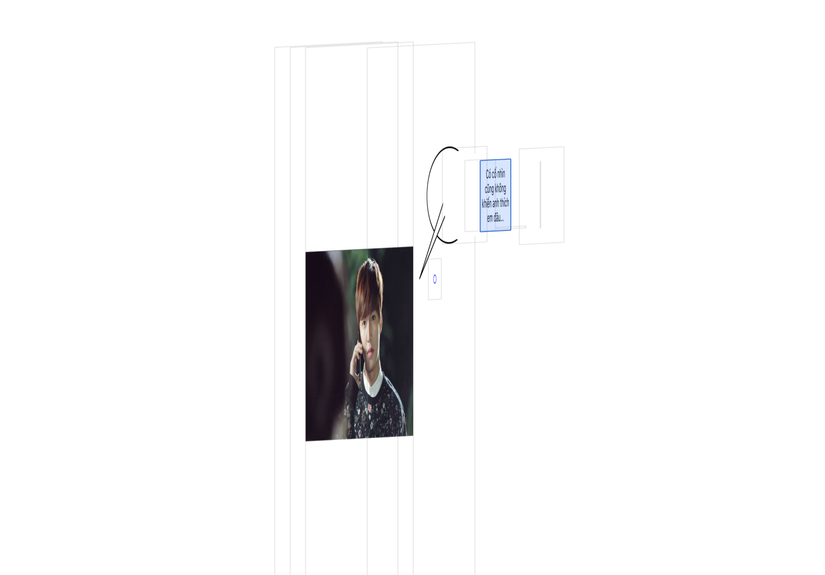
Thêm hình ảnh về phân bố các view để cho các bạn dễ hiểu:
Các bạn thấy đấy sự đảm bảo các nét vẽ liền mạch ở góc độ người dùng đã OK, cũng đã di chuyển được bubble, text thay đổi như mong đợi, nói chung đã đáp ứng đủ các yêu cầu. Xem thành quả:
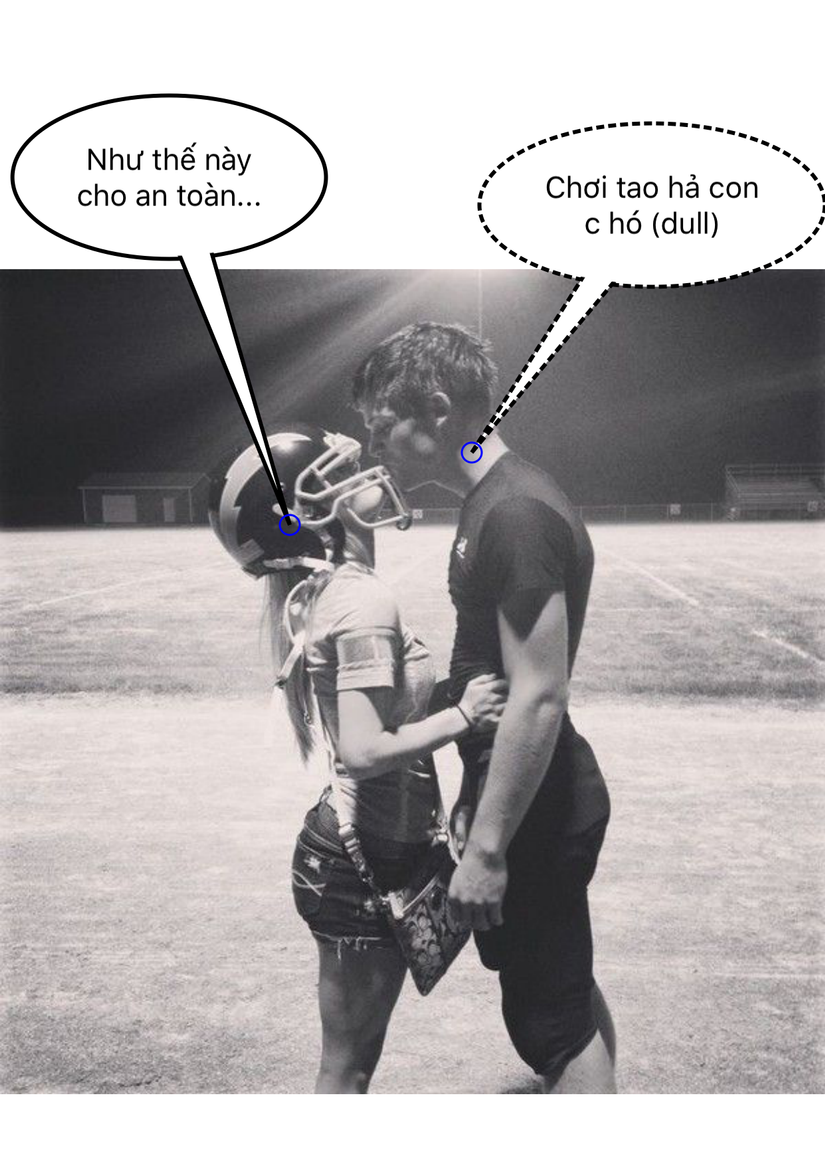
Hướng mở rộng: *Có thể di chuyển được đuôi của speech (điểm mình đánh dấu tròn màu xanh)
*Có thể custom thêm kiểu dáng speech (dạng bong bóng)
*Có thể custom thêm kiểu dáng bubble (dạng đám mây, ngôi sao .... )
Hãy tiếp tục mở rộng và chia sẻ nhé các bạn, có thắc mắc vui lòng comment hoặc liên hệ trực tiếp với mình. Source code mình đã chia sẻ ở đây, các bạn có thể download về và tham khảo, thanks.