Các bạn có thể đã có những Kiến thức cơ bản về Laravel Mix, tuy nhiên chúng ta chưa thực hành một ví dụ cụ thể nào có sử dụng Mix. Trong bài viết này, chúng ta cùng quay lại với Laravel Mix và đưa ra các bước cần thực hiện trong khi tạo một project Laravel.
Các bước thực hiện tạo ứng dụng Laravel mẫu có sử dụng Mix
Bước 1: Tạo ứng dụng Laravel mẫu
Nếu bạn chưa cài đặt các công cụ cần thiết tham khảo Cài đặt nhanh Laravel trên môi trường Windows. Chúng ta tạo ứng dụng mẫu Laravel bằng lệnh laravel new <my-app>
c:xampphtdocs>laravel new my-app
Crafting application...
Loading composer repositories with package information
Installing dependencies (including require-dev) from lock file
Package operations: 59 installs, 0 updates, 0 removals
  - Installing doctrine/inflector (v1.1.0): Loading from cache

...

Generating optimized autoload files
> php -r "file_exists('.env') || copy('.env.example', '.env');"
> IlluminateFoundationComposerScripts::postInstall
> php artisan optimize
Generating optimized class loader
The compiled services file has been removed.
> php artisan key:generate
Application key [base64:4JVo8OsOLP9rm3/QmkQYDYBj8X32eejCvZ77dcahl+0=] set successfully.
Application ready! Build something amazing.
Nếu bạn muốn truy cập theo tên miền ảo như http://my-app.dev, thực hiện thêm dòng 127.0.0.1 my-app.dev vào file hosts trong thư mục C:/Windows/System32/drivers/etc. Nếu sử dụng Apache thêm đoạn code sau vào cuối file httpd-vhosts.conf trong thư mục apache/conf/extra
<VirtualHost *:80>
    DocumentRoot "C:/xampp/htdocs/my-app/public"
    ServerName my-app.dev
</VirtualHost>
Khởi động lại Apache và bạn vào thử http://my-app.dev.
Bước 2: Cài đặt các thư viện cần thiết đã được Laravel thiết lập sẵn
Thực hiện lệnh npm install
c:xampphtdocsmy-app>npm install
[       ...........] / fetchMetadata: verb afterAdd C:UsersAdminAppDataRoam
Bước 3: Thực hiện build ở chế độ watch
Thực hiện lệnh npm run watch
c:xampphtdocsmy-app>npm run watch

> @ watch c:xampphtdocsmy-app
> cross-env NODE_ENV=development node_modules/webpack/bin/webpack.js --watch --p
rogress --hide-modules --config=node_modules/laravel-mix/setup/webpack.config.js

...

 DONE  Compiled successfully in 6490ms                                8:30:49 PM


                    Asset      Size  Chunks                    Chunk Names
  fonts/vendor/bootstrap-sass/bootstrap/glyphicons-halflings-regular.eot?f4769f9
bdb7466be65088239c12046d1   20.1 kB          [emitted]
  fonts/vendor/bootstrap-sass/bootstrap/glyphicons-halflings-regular.svg?8988968
8147bd7575d6327160d64e760    109 kB          [emitted]
  fonts/vendor/bootstrap-sass/bootstrap/glyphicons-halflings-regular.ttf?e18bbf6
11f2a2e43afc071aa2f4e1512   45.4 kB          [emitted]
 fonts/vendor/bootstrap-sass/bootstrap/glyphicons-halflings-regular.woff?fa27723
27f55d8198301fdb8bcfc8158   23.4 kB          [emitted]
fonts/vendor/bootstrap-sass/bootstrap/glyphicons-halflings-regular.woff2?448c34a
56d699c29117adc64c43affeb     18 kB          [emitted]

               /js/app.js   1.19 MB       0  [emitted]  [big]  /js/app

             /css/app.css    681 kB       0  [emitted]  [big]  /js/app

        mix-manifest.json  66 bytes          [emitted]
Bước 4: Update welcome view
Cập nhật nội dụng trong resources/views/welcome.blade.php
<!DOCTYPE html>
<html lang="en">
    <head>
        <meta charset="utf-8">
        <title>Laravel</title>

        <link rel="stylesheet" href="{{ mix('css/app.css') }}">
    </head>
    <body>
        <div id="app">
            <example></example>
        </div>

        <script src="{{ mix('js/app.js') }}"></script>
    </body>
</html>
Bước 5: Thay đổi và kiểm tra kết quả
Chạy thử đường dẫn http://my-app.dev bạn sẽ thấy kết quả như sau:
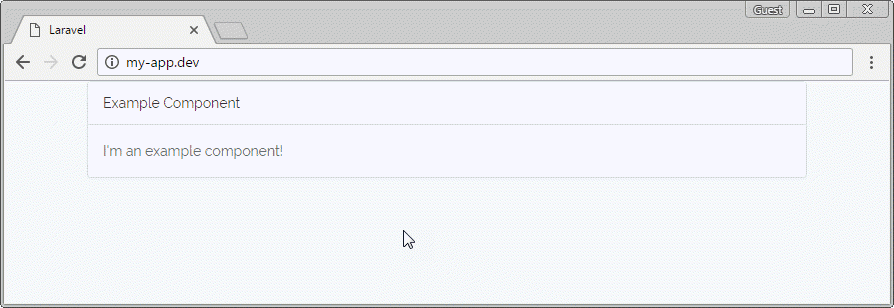
Ok, như vậy ứng dụng mẫu đã chạy, tiếp theo chúng ta thử thay đổi, ví dụ nội dung của file Example.vue là component được render trong ứng dụng và xem nó hoạt động như thế nào.
Đưa nội dung mới vào file resources/assets/js/components/Example.vue như sau:
<template>
    <div class="container">
        <div class="row">
            <div class="col-md-8 col-md-offset-2">
                <div class="panel panel-default">
                    <div class="panel-heading">Ví dụ về Vue component</div>

                    <div class="panel-body">
                        Đây là vue component.
                    </div>
                </div>
            </div>
        </div>
    </div>
</template>

<script>
    export default {
        mounted() {
            console.log('Component mounted.')
        }
    }
</script>
Khi bạn save file này lại, ngay lập tức sẽ thấy một thông báo xuất hiện từ hệ điều hành
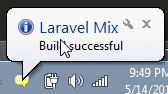
Do chúng ta đang chạy npm run watch, nó sẽ thấy bất kỳ file tài nguyên nào thay đổi, nó sẽ tự động build vào public/js và public/css. Nếu bạn dùng npm run dev, mỗi lần thay đổi tài nguyên bạn sẽ phải thực hiện lại lệnh này để build lại. Mở lại trang http://my-app.dev bạn sẽ thấy nó đã thay đổi.
Lời kết
Một lần nữa chúng ta thấy được Laravel Mix là công cụ rất hữu ích, tất cả các tác vụ cần thiết trong quá trình build tài nguyên được tự động hóa. Với một ứng dụng Laravel mới có sử dụng Laravel Mix quả là có nhiều bỡ ngỡ khi có quá nhiều kiến thức cần phải làm chủ. Với 5 bước ở trên bạn đã có một ứng dụng mẫu hoàn chỉnh, giờ bạn chỉ cần tập trung vào viết ứng dụng của mình thôi đúng không?
