Tạo một project React mới với Webpack 4 và Babel
Bài viết đc dịch từ: https://hackernoon.com/how-to-build-a-react-project-from-scratch-using-webpack-4-and-babel-56d4a26afd32 Trước khi bắt đầu, máy bạn phải có sẵn npm, nếu chưa có thì bạn có thể tìm nó ở đây Cấu trúc thư mục Bạn có thể khởi tạo thư cấu trúc thư mục như trên với lệnh: ...
Bài viết đc dịch từ: https://hackernoon.com/how-to-build-a-react-project-from-scratch-using-webpack-4-and-babel-56d4a26afd32
Trước khi bắt đầu, máy bạn phải có sẵn npm, nếu chưa có thì bạn có thể tìm nó ở đây
Cấu trúc thư mục
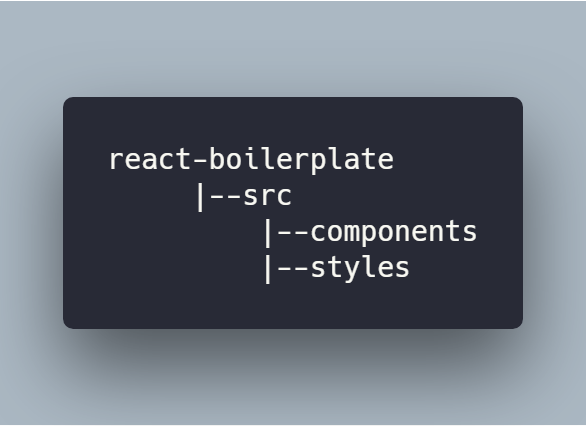
Bạn có thể khởi tạo thư cấu trúc thư mục như trên với lệnh:
mkdir react-boilerplate
cd react-boilerplate
mkdir -p src/components src/styles
Khởi tạo project
Để khởi tạo project, bạn gõ lệnh sau, nó sẽ tạo ra một file package.json
npm init -y
File package.json của bạn sẽ có dạng như này:
{
"name": "react-boilerplate",
"version": "1.0.0",
"description": "",
"main": "index.js",
"scripts": {
  "test": "echo "Error: no test specified" && exit 1"
},
"keywords": [],
"author": "",
"license": "ISC"
}
Cài đặt webpack
Webpack là công cụ giúp chúng ta bundle các file trong project thành một file để cho production. Để cài webpack, gõ lệnh:
npm install webpack webpack-cli --save-dev
Lệnh trên sẽ thêm webpack và webpack-cli vào phần devDependencies của file package.json. Chúng ta cài webpack-cli để có thể sử dụng webpack bằng command line.
Cài đặt React
Cài react và react-dom như một dependency.
npm install react react-dom --save
Cài đặt Babel
Để code React chạy đc, chúng ta cần cài thêm Babel. Babel sẽ giúp chuyển (transpile) code ES6 và JSX thành ES5. Cài đặt babel-core, babel-loader, babel-preset-env, babel-preset-react như thành dev dependency.
npm install babel-core babel-loader babel-preset-env babel-preset-react --save-dev
- babel-core: Chuyển code ES6 thành code ES5.
- babel-loader: Một webpack helper giúp chuyển code dựa trên preset.
- babel-preset-env: Bộ preset giúp babel chuyển code ES6, ES7 và ES8 thành ES5.
- babel-preset-react: Bộ Preset giúp chuyển JSX thành javascript.
Index.js :
Tạo một file index.js ở trong folder /src, tạm thời thêm dòng code này cho nó. File này sẽ là điểm bắt đầu của app.
console.log("hello");
Index.html :
Tạo một file index.html trong folder /src và thêm đoạn code này cho nó.
<!DOCTYPE html>
<html lang="en">

<head>
    <meta charset="UTF-8">
    <meta name="viewport" content="awidth=device-awidth, initial-scale=1.0">
    <meta http-equiv="X-UA-Compatible" content="ie=edge">
    <title>React Boilerplate</title>
</head>

<body>
    <div id="root">

    </div>
</body>

</html>
File bắt đầu và file output
Tạo một file webpack.config.js trong thư mục gốc của project, trong đó ta có thể định nghĩa các rule cho các loader.
Định nghĩa điểm bắt đầu và thư mục output cho app trong webpack.config.js
const path = require("path");

module.exports = {
  entry: "./src/index.js",
  output: {
    path: path.join(__dirname, "/dist"),
    filename: "index_bundle.js"
  }
};
Theo như code trên, webpack sẽ đóng gói tất cả những file js thành file index-bundle.js trong thư mục /dist.
Webpack Loaders:
Bây giờ chúng ta sẽ thêm vài loader vào file này. Những loader này chịu trách nhiệm load và đóng gói các file gốc.
Trong webpack.config.js, thêm những dòng code sau:
const path = require("path");

module.exports = {
  entry: "./src/index.js",
  output: {
    path: path.join(__dirname, "/dist"),
    filename: "index_bundle.js"
  },
  module: {
    rules: [
      {
        test: /.js$/,
        exclude: /node_modules/,
        use: {
          loader: "babel-loader"
        },
      },
      {
        test: /.css$/,
        use: ["style-loader", "css-loader"]
      }
    ]
  }
};
Trong đó, babel-loader dùng cho việc load file JSX/js và css-loader dùng cho việc load và đóng gói tất cả các file css thành một file. Còn style-loader sẽ thêm tất cả các style đó vào một thẻ style của document.
Trước khi webpack có thể dùng css-loader và style-loader, chúng ta cần phải cài nó vào dev dependency.
npm install css-loader style-loader --save-dev
Lưu ý rằng webpack sẽ xử lý các loader theo thứ tự từ cuối cùng đến đầu tiên hay từ phải sang trái.
.babelrc:
Tạo một file .babelrc trong thư mục gốc của project với nội dung sau:
{
    "presets": [
        "env",
        "react"
    ]
}
File này sẽ chỉ cho babel biết nên dùng preset nào để chuyển đổi code. Ở đây, chúng ta dùng 2 preset:
- env: Preset này dùng để chuyển code ES6/ES7/ES8 thành code ES5.
- react: Preset này dùng để chuyển JSX thành code ES5.
Compile file với Webpack:
Thêm những dòng code sau vào object script trong file package.json:
"start": "webpack --mode development --watch",
"build": "webpack --mode production"
Ở đây tôi có dùng thêm cờ watch, do đó, mỗi khi có thay đổi ở source file thì webpack sẽ tự động compile lại.
Trong webpack 4 có 2 mode, production và development. Ở production mode, webpack sẽ đóng gói các source file một cách tối ưu, sẵn sàng để deploy, còn ở mode developemnt thì sẽ sinh ra những đoạn code dễ hiểu hơn, giúp bạn có trải nhiệm dev tốt nhất. Cờ --mode để chọn một trong 2 mode.
Bây giờ bạn có thế compile project bằng lệnh sau:
npm start
Sau khi chạy lệnh trên, bạn sẽ thấy một file index_bundle.js đc tạo trong folder /dist. File này sẽ chứa code ES5 đc chuyển từ file index.js
App.js
Tạo một file App.js trong folder components trong folder /src với nội dung sau:
import React, { Component } from "react";

import '../styles/App.css';

class App extends Component {
    render() {
        return (
            <div>
                <h1>My React App!</h1>
            </div>
        );
    }
}

export default App;
App.css
Tạo một file App.css trong folder styles trong folder /src với nội dung sau:
h1 {
    color: #27aedb;
    text-align: center;
}
File CSS này để đảm bảo là css-loader và style-loader hoạt động tốt. Bây giờ sửa lại file index.js mà chúng ta tạo lúc vừa nãy, thêm những dòng sau:
import React from "react";
import ReactDOM from "react-dom";
import App from "./components/App.js";

ReactDOM.render(<App />, document.getElementById("root"));
Cài đặt Html-webpack-plugin
Bây giờ chúng ta cần cài thêm html-webpack-plugin, plugin này sinh ra một file HTML, inject thẻ script vào file HTML và ghi file này vào /dist/index.html.
Cài html-webpack-plugin:
npm install html-webpack-plugin --save-dev
Giờ chúng ta cần config plugin này trong webpack.config.js, thêm những dòng code sau:
const path = require("path");
const HtmlWebpackPlugin = require("html-webpack-plugin");

module.exports = {
  entry: "./src/index.js",
  output: {
    path: path.join(__dirname, "/dist"),
    filename: "index-bundle.js"
  },
  module: {
    rules: [
      {
        test: /.js$/,
        exclude: /node_modules/,
        use: ["babel-loader"]
      },
      {
        test: /.css$/,
        use: ["style-loader", "css-loader"]
      }
    ]
  },
  plugins: [
    new HtmlWebpackPlugin({
      template: "./src/index.html"
    })
  ]
};
Giá trị của key template là file index.html chúng ta vừa tạo lúc nãy, và nó sẽ dùng file này như một template để sinh ra file mới tên là index.html trong thư mục /dist.
Quá trình setup gần như đã hoàn thành, tất cả những gì ta cần làm là complile source file bằng webpack, bạn có thể chạy lệnh dưới đây:
npm start
Bạn sẽ có output file trong thư mục /dist. Bây giờ, hãy mở file index.html đó bằng trình duyệt, bạn sẽ thấy chữ "My React App!" trong đó.
Nhưng có một nhược điểm là, mỗi khi bạn thay đổi code, bạn phải refresh lại trang web để thấy thay đổi. Để webpack theo dõi sự thay đổi và tự động refresh trang web, chúng ta cần cài thêm webpack-dev-server
Cài đặt Webpack-dev-server
npm install webpack-dev-server --save-dev
Và thay đổi đoạn start script trong file package.json như sau:
"start": "webpack-dev-server --mode development --open --hot"
Tôi vừa thêm 2 cờ mới là --open và --hot, 2 cờ này sẽ tự động mở và refresh trang web mỗi khi source file có thay đổi.
Giờ chạy lệnh sau:
npm start
Bạn sẽ thấy browser tự động bật trang web lên.

Vậy là xong, bạn có thể xem thành quả tại đây.
