Video Depth Maps trong iOS
Trong bài viết này, chúng ta sẽ cùng tìm hiểu và sử dụng video depth maps, một tính năng mới từ iOS 11, cho phép apply các filter video realtime, tạo nên các hiệu ứng đặc biệt từ hình ảnh thu được từ camera. Cụ thể, trong bài tutorial này, chúng ta sẽ: Request các thông tin về chiều sâu cho ...
Trong bài viết này, chúng ta sẽ cùng tìm hiểu và sử dụng video depth maps, một tính năng mới từ iOS 11, cho phép apply các filter video realtime, tạo nên các hiệu ứng đặc biệt từ hình ảnh thu được từ camera.
Cụ thể, trong bài tutorial này, chúng ta sẽ:
- Request các thông tin về chiều sâu cho video đầu vào.
- Xử lý các thông tin về chiều sâu của hình ảnh.
- Kết hợp các thông tin chiều sâu, nguồn hình ảnh video và các filter để tạo ra các hiệu ứng kỹ xảo đẹp mắt.
Để thực hành tutorial này, chúng ta cần Xcode 9 hoặc version cao hơn. Ngoài ra, bạn cũng phải có một chiếc iPhone với dual camera sau (iPhone 7 Plus, iPhone 8 Plus, iPhone X, iPhone XS/XR/XS MAX). Chỉ những chiếc iPhone này mới có thể generate các thông tin về chiều sâu của hình ảnh do chúng có camera thứ 2. Chúng ta không thể chạy trên simulator được nên cũng cần có cả tài khoản Apple developer để chạy ứng dụng trên device thật.
Khi đã chuẩn bị xong các yêu cầu nhỏ trên, hãy download starter project này và bắt đầu thôi.
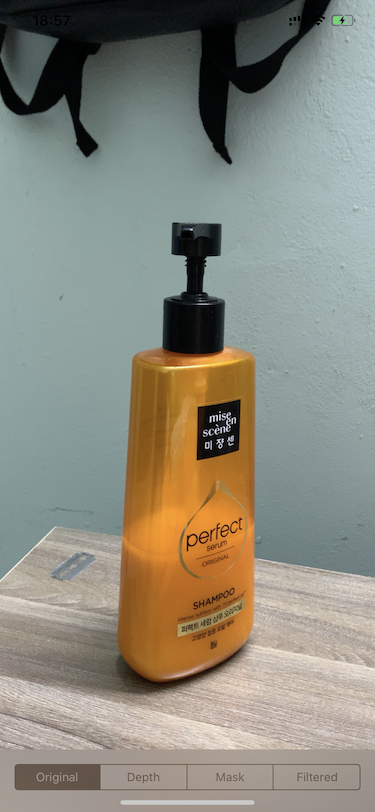
Sau khi mở starter project trên, build và run trên device thật, bạn sẽ thấy giao diện app như sau, chưa xử lý gì cả:
Để capture các dữ liệu chiều sâu video, chúng ta cần thêm một object AVCaptureDepthDataOutput vào session AVCaptureSession.
Như cái tên đã nói lên tất cả, AVCaptureDepthDataOutput được Apple thêm mới từ iOS 11 để xử lý chuyên biệt các dữ liệu chiều sâu của hình ảnh.
Open DepthVideoViewController.swift and add the following lines to the bottom of configureCaptureSession(): Mở file DepthVideoViewController.swift và thêm đoạn code sau vào cuối method configureCaptureSession():
    // 1. Tạo mới object AVCaptureDepthDataOutput
    let depthOutput = AVCaptureDepthDataOutput()

    // 2. Set delegate để xử lý depthOutput trên dataOutputQueue
    depthOutput.setDelegate(self, callbackQueue: dataOutputQueue)

    // 3. Enable filter cho depthOutput
    depthOutput.isFilteringEnabled = true

    // 4. Thêm depthOutput vào session
    session.addOutput(depthOutput)

    // 5. Lấy ra object AVCaptureConnection của depthOutput
    let depthConnection = depthOutput.connection(with: .depthData)

    // 6. Set video orientation kiểu portrait
    depthConnection?.videoOrientation = .portrait
Tiếp theo, chúng ta cần implement các method của AVCaptureDepthDataOutputDelegate để handle các dữ liệu chiều sâu hình ảnh capture được.
Vẫn trong file DepthVideoViewController.swift, thêm extension và các delegate method sau vào cuối file:
// MARK: - Capture Depth Data Delegate Methods

extension DepthVideoViewController: AVCaptureDepthDataOutputDelegate {

  func depthDataOutput(_ output: AVCaptureDepthDataOutput,
                       didOutput depthData: AVDepthData,
                       timestamp: CMTime,
                       connection: AVCaptureConnection) {

    // 1. Nếu tab preview mode đang là original thì sẽ không xử lý
    if previewMode == .original {
      return
    }

    var convertedDepth: AVDepthData

    // 2. Đảm bảo kiểu dữ liệu chiều sâu nhận được là kCVPixelFormatType_DisparityFloat32, nếu không thì convert sang
    if depthData.depthDataType != kCVPixelFormatType_DisparityFloat32 {
      convertedDepth = depthData.converting(toDepthDataType: kCVPixelFormatType_DisparityFloat32)
    } else {
      convertedDepth = depthData
    }

    // 3. Lưu bản đồ dữ liệu chiều sâu từ object AVDepthData dưới dạng CVPixelBuffer
    let pixelBuffer = convertedDepth.depthDataMap

    // 4. Method extension CVPixelBufferExtension.swift, giúp giới hạn các pixel trong buffer có giá trị từ 0.0 đến 1.0
    pixelBuffer.clamp()

    // 5. Convert pixcel buffer thành CIImage
    let depthMap = CIImage(cvPixelBuffer: pixelBuffer)

    // 6. Lưu object CIImage để dùng sau
    DispatchQueue.main.async { [weak self] in
      self?.depthMap = depthMap
    }
  }

}
Tiếp theo, trong extension AVCaptureVideoDataOutputSampleBufferDelegate, thêm case sau vào method captureOutput(_:didOutput:from:):
    case .depth:
      previewImage = depthMap ?? image
Code hoàn chỉnh:
// MARK: - Capture Video Data Delegate Methods

extension DepthVideoViewController: AVCaptureVideoDataOutputSampleBufferDelegate {

  func captureOutput(_ output: AVCaptureOutput,
                     didOutput sampleBuffer: CMSampleBuffer,
                     from connection: AVCaptureConnection) {

    let pixelBuffer = CMSampleBufferGetImageBuffer(sampleBuffer)
    let image = CIImage(cvPixelBuffer: pixelBuffer!)

    let previewImage: CIImage

    switch previewMode {
    case .original:
      previewImage = image
    case .depth:
      previewImage = depthMap ?? image
    default:
      previewImage = image
    }

    let displayImage = UIImage(ciImage: previewImage)
    DispatchQueue.main.async { [weak self] in
      self?.previewView.image = displayImage
    }
  }

}
Build và run project, chọn tap Depth ở segment control bên dưới, chúng ta sẽ thấy kết quả như sau:
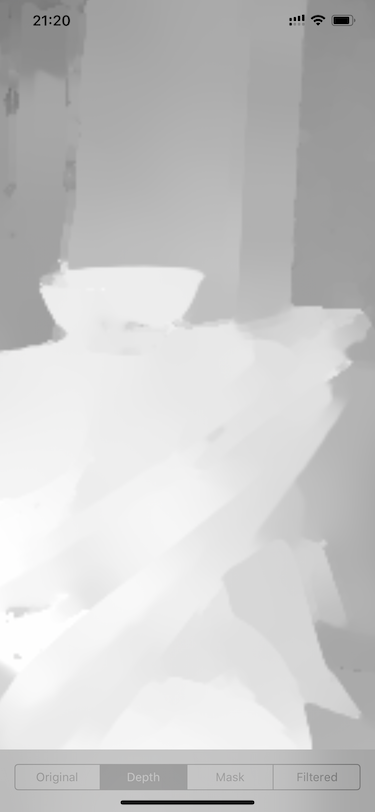
Đây là hình ảnh tái hiện dữ liệu chiều sâu thu được từ camera sau.
Có một số điều chúng ta nên biết về dữ liệu chiều sâu được capture. iPhone cần phải xử lý rất nhiều thông tin để tìm sự tương quan giữa các pixcel của hai camera sau và tính toán độ chênh lệch, từ đó đưa ra được bản đồ dữ liệu chiều sâu.
Vì vậy. để xuất được dữ liệu hình ảnh real-time tốt nhất, iPhone đã giới hạn độ phân giải và frame rate của dữ liệu chiều sâu trả về.
Ví dụ, độ phân giải tối đa của dữ liệu hình ảnh chiều sâu mà iPhone 7 Plus có thể xuất được là 320x240 ở 24 khung hình mỗi giây. Trong khi iPhone X là 30 fps. Các dòng iPhone XS/XS Max mới nhất thì có thể cao hơn nữa.
AVCaptureDevice không cho phép chúng ta set frame rate của dữ liệu chiều sâu độc lập với của video. Dữ liệu chiều sâu phải được xuất với cùng frame rate của video.
Chính vì thế nên chúng ta cần làm hai việc:
- Set video frame rate để đảm bảo frame rate tối đa của dữ liệu chiều sâu.
- Xác định scale factor giữa video data và dữ liệu chiều sâu. Scale factor rất quan trọng khi chúng ta bắt đầu tạo các mask và sử dụng các filter.
Vẫn trong file DepthVideoViewController.swift, thêm đoạn code sau vào cuối method configureCaptureSession():
    // 1. Tính toán CGRect video output và depth output trên pixel
    let outputRect = CGRect(x: 0, y: 0, awidth: 1, height: 1)
    let videoRect = videoOutput.outputRectConverted(fromMetadataOutputRect: outputRect)
    let depthRect = depthOutput.outputRectConverted(fromMetadataOutputRect: outputRect)

    // 2. Tính toán scale factor
    scale = max(videoRect.awidth, videoRect.height) / max(depthRect.awidth, depthRect.height)

    // 3. Lock AVCaptureDevice configuration
    do {
      try camera.lockForConfiguration()

      // 4. Set activeVideoMinFrameDuration của camera bằng với minFrameDuration của depth data
      if let frameDuration = camera.activeDepthDataFormat?.videoSupportedFrameRateRanges.first?.minFrameDuration {
        camera.activeVideoMinFrameDuration = frameDuration
      }

      // 5. Unlock configuration
      camera.unlockForConfiguration()
    } catch {
      fatalError(error.localizedDescription)
    }
Chúng ta có thể sử dụng depth data để tạo các mask và sau đó sử dụng mask để filter luồng dữ liệu hình ảnh gốc.
Bạn để ý thấy trong app, tab Mask và Filtered có thanh slider, thanh slider này dùng để điều chỉnh depth focus của mask. Hiện tại thanh này chưa có code xử lý và hai tab này không có gì khác biệt với tab Origin.
Go back to depthDataOutput(_:didOutput:timestamp:connection:) in the AVCaptureDepthDataOutputDelegate extension. Just before DispatchQueue.main.async, add the following:
Quay lại method depthDataOutput(_:didOutput:timestamp:connection:) trong extension AVCaptureDepthDataOutputDelegate. Ngay trước DispatchQueue.main.async, thêm đoạn code sau:
    if previewMode == .mask || previewMode == .filtered {
      switch filter {
      default:
        mask = depthFilters.createHighPassMask(for: depthMap ?? CIImage(),
                                               withFocus: sliderValue,
                                               andScale: scale)
      }
    }
Trong đoạn swich ở trên, cũng cần thêm xử lý cho case .mask như sau:
    case .mask:
      previewImage = mask ?? image
Build và run app, tap vào tab Mask:

Có thể thấy rằng, khi càng kéo thanh slider sang trái thì preview video càng bị cháy sáng trắng. Đó là bởi vì high pass mask bị thay đổi focus.
Comic Background Effect
iOS SDK cung cấp rất nhiều filter có sẵn trong CoreImage, một trong số đó là CIComicEffect. Filter này cho ra hiệu ứng như trong truyện tranh vẽ.
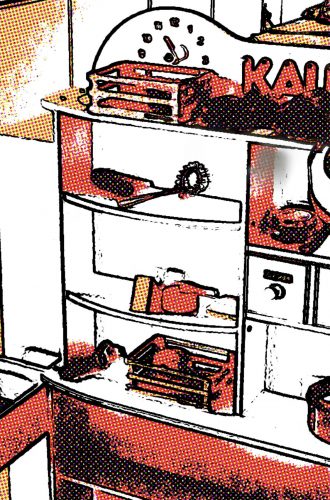
Chúng ta sẽ sử dụng filter này để biến background của video stream từ camera sau thành như truyện tranh.
Mở file DepthImageFilters.swift và thêm method sau vào class DepthImageFilters:
  func comic(image: CIImage, mask: CIImage) -> CIImage {
    let background = image.applyingFilter("CIComicEffect")
    let filtered = image.applyingFilter("CIBlendWithMask", parameters: ["inputBackgroundImage": background, "inputMaskImage": mask])
    return filtered
  }
Now, to use the filter, open DepthVideoViewController.swift and find captureOutput(_:didOutput:from:). Remove the default case on the switch statement and add the following case:
Tiếp theo, để sử dụng filter comic vừa tạo, mở file DepthVideoViewController.swift và method captureOutput(_:didOutput:from:), xóa default case ở câu lệnh switch và thêm case sau:
    case .filtered:
      if let mask = mask {
        switch filter {
        case .comic:
          previewImage = depthFilters.comic(image: image, mask: mask)
        default:
          previewImage = image
        }
      } else {
        previewImage = image
      }
Cuối cùng, vẫn trong method captureOutput(_:didOutput:from:), thêm case sau vào câu lệnh switch filter:
      case .comic:
        mask = depthFilters.createHighPassMask(for: depthMap ?? CIImage(),
                                               withFocus: sliderValue,
                                               andScale: scale)
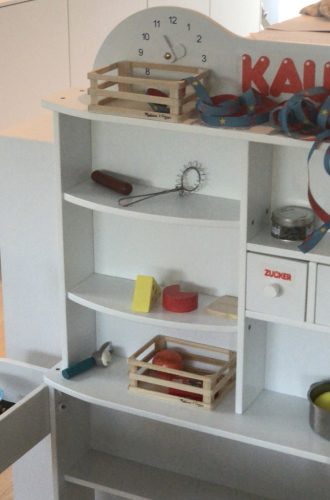
Kết quả:

Source article: https://www.raywenderlich.com/60-video-depth-maps-tutorial-for-ios-getting-started