Tạo Responsive và Mobile-Friendly Tooltip bằng jQuery
Việc tìm kiếm một chức năng Tooltip phù hợp với website hay blog thì không hề dễ chút nào, nhất là có quá nhiều plugin hay mã code giúp chúng ta làm được điều này. Hôm nay mình sẽ chia sẻ cho các bạn một mẫu tooltip có đầy đủ chức năng hot nhất hiện nay là Responsive và rất thân thiện với các ...
Việc tìm kiếm một chức năng Tooltip phù hợp với website hay blog thì không hề dễ chút nào, nhất là có quá nhiều plugin hay mã code giúp chúng ta làm được điều này. Hôm nay mình sẽ chia sẻ cho các bạn một mẫu tooltip có đầy đủ chức năng hot nhất hiện nay là Responsive và rất thân thiện với các thiết bị mobile.
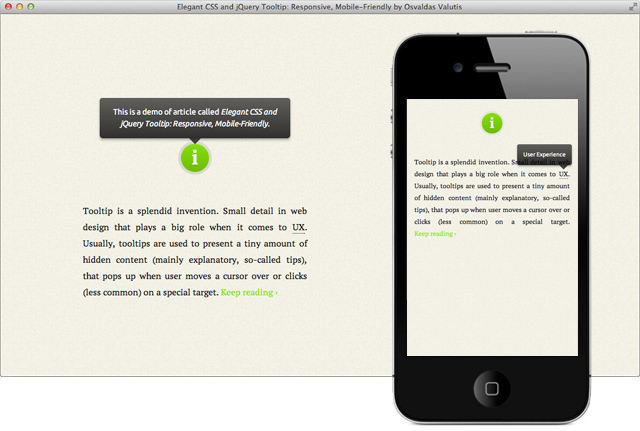
Xem Demo | Download
CSS
Đầu tiên, các bạn copy đoạn css sau để định dạng cho tooltip.
#tooltip
{
	font-family: Ubuntu, sans-serif;
	font-size: 0.875em;
	text-align: center;
	text-shadow: 0 1px rgba( 0, 0, 0, .5 );
	line-height: 1.5;
	color: #fff;
	background: #333;
	background: -webkit-gradient( linear, left top, left bottom, from( rgba( 0, 0, 0, .6 ) ), to( rgba( 0, 0, 0, .8 ) ) );
	background: -webkit-linear-gradient( top, rgba( 0, 0, 0, .6 ), rgba( 0, 0, 0, .8 ) );
	background: -moz-linear-gradient( top, rgba( 0, 0, 0, .6 ), rgba( 0, 0, 0, .8 ) );
	background: -ms-radial-gradient( top, rgba( 0, 0, 0, .6 ), rgba( 0, 0, 0, .8 ) );
	background: -o-linear-gradient( top, rgba( 0, 0, 0, .6 ), rgba( 0, 0, 0, .8 ) );
	background: linear-gradient( top, rgba( 0, 0, 0, .6 ), rgba( 0, 0, 0, .8 ) );
	-webkit-border-radius: 5px;
	-moz-border-radius: 5px;
	border-radius: 5px;
	border-top: 1px solid #fff;
	-webkit-box-shadow: 0 3px 5px rgba( 0, 0, 0, .3 );
	-moz-box-shadow: 0 3px 5px rgba( 0, 0, 0, .3 );
	box-shadow: 0 3px 5px rgba( 0, 0, 0, .3 );
	position: absolute;
	z-index: 100;
	padding: 15px;
}

#tooltip:after
{
	awidth: 0;
	height: 0;
	border-left: 10px solid transparent;
	border-right: 10px solid transparent;
	border-top: 10px solid #333;
	border-top-color: rgba( 0, 0, 0, .7 );
	content: ';
	position: absolute;
	left: 50%;
	bottom: -10px;
	margin-left: -10px;
}

#tooltip.top:after
{
	border-top-color: transparent;
	border-bottom: 10px solid #333;
	border-bottom-color: rgba( 0, 0, 0, .6 );
	top: -20px;
	bottom: auto;
}

#tooltip.left:after
{
	left: 10px;
	margin: 0;
}

#tooltip.right:after
{
	right: 10px;
	left: auto;
	margin: 0;
}
jQuery
Tiếp theo là chúng ta sẽ copy đoạn jQuery sau :
$( function()
{
    var targets = $( '[rel~=tooltip]' ),
        target  = false,
        tooltip = false,
        title   = false;

    targets.bind( 'mouseenter', function()
    {
        target  = $( this );
        tip     = target.attr( 'title' );
        tooltip = $( '<div id="tooltip"></div>' );

        if( !tip || tip == ' )
            return false;

        target.removeAttr( 'title' );
        tooltip.css( 'opacity', 0 )
               .html( tip )
               .appendTo( 'body' );

        var init_tooltip = function()
        {
            if( $( window ).awidth() < tooltip.outerWidth() * 1.5 )
                tooltip.css( 'max-awidth', $( window ).awidth() / 2 );
            else
                tooltip.css( 'max-awidth', 340 );

            var pos_left = target.offset().left + ( target.outerWidth() / 2 ) - ( tooltip.outerWidth() / 2 ),
                pos_top  = target.offset().top - tooltip.outerHeight() - 20;

            if( pos_left < 0 )
            {
                pos_left = target.offset().left + target.outerWidth() / 2 - 20;
                tooltip.addClass( 'left' );
            }
            else
                tooltip.removeClass( 'left' );

            if( pos_left + tooltip.outerWidth() > $( window ).awidth() )
            {
                pos_left = target.offset().left - tooltip.outerWidth() + target.outerWidth() / 2 + 20;
                tooltip.addClass( 'right' );
            }
            else
                tooltip.removeClass( 'right' );

            if( pos_top < 0 )
            {
                var pos_top  = target.offset().top + target.outerHeight();
                tooltip.addClass( 'top' );
            }
            else
                tooltip.removeClass( 'top' );

            tooltip.css( { left: pos_left, top: pos_top } )
                   .animate( { top: '+=10', opacity: 1 }, 50 );
        };

        init_tooltip();
        $( window ).resize( init_tooltip );

        var remove_tooltip = function()
        {
            tooltip.animate( { top: '-=10', opacity: 0 }, 50, function()
            {
                $( this ).remove();
            });

            target.attr( 'title', tip );
        };

        target.bind( 'mouseleave', remove_tooltip );
        tooltip.bind( 'click', remove_tooltip );
    });
});
Và để sử dụng, các bạn chỉ việc khai báo theo khung chuẩn html như sau :
<a href="#" title="User Experience" rel="tooltip">UX</a>
Trong đoạn html bên trên, Tooltip được làm với việc khai báo thuộc tính rel=”tooltip” và nhập dòng chữ tooltip bằng cách thay đổi giá trị title=”Enter your tip here”.
Chúc các bạn thành công !
Chuyên Mục: Javascript
Bài viết được đăng bởi webmaster
