Two Factor Authentication with Laravel 5
1. Giới thiệu Xác thực hai yếu tố (2FA), thường được gọi là Xác minh hai bước, là một quá trình bảo mật trong đó người dùng cung cấp hai yếu tố xác thực để xác minh họ là ai. Xác minh hai bước cung cấp thêm một lớp bảo mật khiến cho kẻ tấn công khó truy cập vào thiết bị và tài khoản trực ...

1. Giới thiệu
Xác thực hai yếu tố (2FA), thường được gọi là Xác minh hai bước, là một quá trình bảo mật trong đó người dùng cung cấp hai yếu tố xác thực để xác minh họ là ai. Xác minh hai bước cung cấp thêm một lớp bảo mật khiến cho kẻ tấn công khó truy cập vào thiết bị và tài khoản trực tuyến của người dùng vì biết mật khẩu của nạn nhân là một mình không đủ để vượt qua kiểm tra xác thực.
Trong bài viết này, chúng ta sẽ tìm hiểu các bước để cài đặt 2FA (Two Factor Authentication) cho một ứng dụng Laravel một cách đơn giản. Chúng ta sẽ sử dụng package: Google2FA-Laravel
Bài dịch từ nguồn: 5balloons.info
2. Setup
2.1. Setup simple Laravel Authenticate
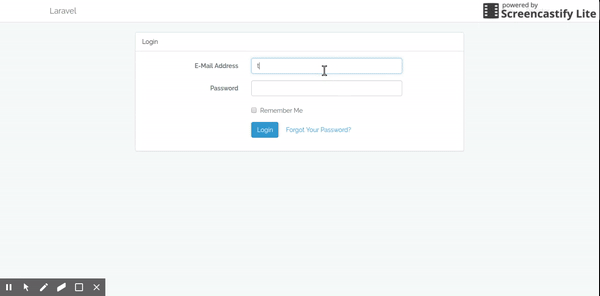
Đầu tiên chúng ta cần tạo 1 project Laravel với login, register cơ bản
composer create-project --prefer-dist laravel/laravel gg2fa

# cập nhật thông tin database trong file .env

php artisan make:auth

php artisan migrate

# Start server, bạn có thể thay đổi port theo port mà bạn muốn
php artisan serve --port=8099
2.2. Install Required Composer Packages
Đầu tiên, chúng ta cần thiết lập các gói (packages) cần thiết để giúp chúng ta triển khai Google2FA xác thực 2 bước vào dự án của chúng ta.
# for Google2FA
composer require pragmarx/google2fa-laravel

# for QR code generator
composer require bacon/bacon-qr-code
Tiếp theo, chúng ta cần cập nhật Provider bằng lệnh:
php artisan vendor:publish --provider="PragmaRXGoogle2FALaravelServiceProvider"
2.3. New Model, Migration, Controller and Database Table for 2FA
Để lưu trữ dữ liệu liên quan và để có mã xử lý 2FA chúng ta sẽ cần một migration mới để tạo ra các bảng cơ sở dữ liệu, một Model sao lưu bảng đó và một Controller sẽ xử lý logic. Chúng ta đang đặt tên model PasswordSecurity, bảng này sẽ được sử dụng để lưu trữ two factor secret và bạn cũng có thể sử dụng nó để lưu trữ mật khẩu người dùng cụ thể.
php artisan make:model PasswordSecurity -m -c
Câu lệnh trên sẽ tạo ra cho chúng ta:
- Một Model với tên PasswordSecurity.php ở trong thư mục app
- Một file migration tên create_password_securities under ở trong thư mục Database/Migrations
- Một Controller tên PasswordSecurityController.php ở trong thư mục App/Http/Controllers
Tiếp theo chúng ta cần cập nhật lại file migration đã được tạo ở trên:
public function up()
{
    Schema::create('password_securities', function (Blueprint $table) {
        $table->increments('id');
        $table->integer('user_id');
        $table->boolean('google2fa_enable')->default(false);
        $table->string('google2fa_secret')->nullable();
        $table->timestamps();
    });
}
Chúng ta thêm vào 2 trường (fields) vào file migration
- user_id là foriegn_key từ bảng User.
- google2fa_enable sử dụng để bật/tắt 2FA cho user
- google2fa_secret sử dụng để lưu random secret key sử dụng cho xác thực user
2.4. Defining Eloquent Relationship
Mối quan hệ giữa User và PasswordSecurity là one-to-one, tức là mỗi một User sẽ chỉ có một PasswordSecurity và ngược lại.
// app/User.php
<?php

public function passwordSecurity()
{
    return $this->hasOne(PasswordSecurity::class);
}


//  app/PasswordSecurity.php
<?php

namespace App;

use IlluminateDatabaseEloquentModel;

class PasswordSecurity extends Model
{

    protected $guarded = [];

    public function user()
    {
        return $this->belongsTo(User::class);
    }
}
2.5. Routes and Controller Method to Enable / Disable 2FA
Hầu hết các ứng dụng 2FA đều cho phép người dùng bật/tắt tính năng này. Vậy nên chúng ta cần cung cấp cho người dùng các thiết lập tài khoản của mình để có thể xác minh bằng hai bước thay vì một. Do đó nếu 2FA được kích hoạt, người dùng sẽ cần phải cung cấp mật khẩu một lần sau khi đăng nhập thành công với username/password.
// routes/web.php
Route::get('/2fa','PasswordSecurityController@show2faForm');
Route::post('/generate2faSecret','PasswordSecurityController@generate2faSecret')->name('generate2faSecret');
Route::post('/2fa','PasswordSecurityController@enable2fa')->name('enable2fa');
Route::post('/disable2fa','PasswordSecurityController@disable2fa')->name('disable2fa');


// app/Http/Controllers/PasswordSecurityController.php
public function show2faForm(Request $request){
    $user = Auth::user();

    $google2fa_url = "";
    if(count($user->passwordSecurity)){
        $google2fa = app('pragmarx.google2fa');
        $google2fa_url = $google2fa->getQRCodeGoogleUrl(
            '5Balloons 2A DEMO',
            $user->email,
            $user->passwordSecurity->google2fa_secret
        );
    }
    $data = [
        'user' => $user,
        'google2fa_url' => $google2fa_url
    ];

    return view('auth.2fa')->with('data', $data);
}
Phương thức trên sẽ trả về 1 form để người dùng có thể bật/tắt 2FA.
Lần đầu tiên bật 2FA, người dùng sẽ phải thực hiện 2 bước:
- Secret Key Generation: Tạo secret key và chúng ta sẽ lưu nó vào bảngpassword_securiries
- Verifiying OTP: Thực hiện verify bằng Google Authenticator App
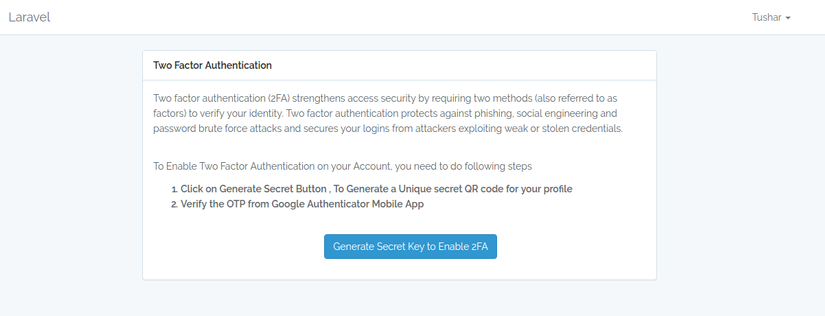
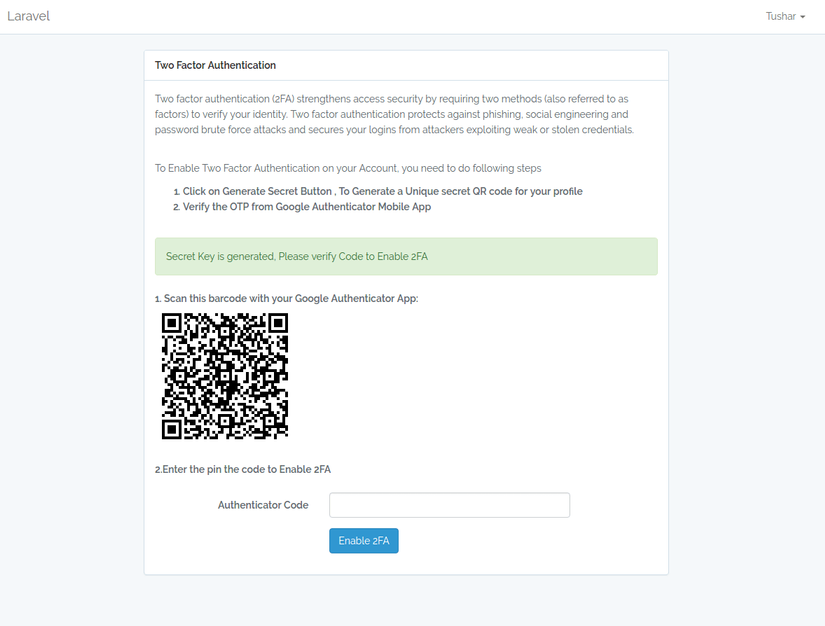
Trong phương thức show2faform chúng ta kiểm tra xem người dùng đã từng tạo google secret key hay chưa, nếu đã từng, chúng ta sẽ hiển thị QR code
Khi người dùng click vào Generate Secret Key:
public function generate2faSecret(Request $request){
    $user = Auth::user();
    // Initialise the 2FA class
    $google2fa = app('pragmarx.google2fa');

    // Add the secret key to the registration data
    PasswordSecurity::create([
        'user_id' => $user->id,
        'google2fa_enable' => 0,
        'google2fa_secret' => $google2fa->generateSecretKey(),
    ]);

    return redirect('/2fa')->with('success',"Secret Key is generated, Please verify Code to Enable 2FA");
}
Nếu người dùng thự hiện bật 2FA lần đầu tiên, chúng ta cần tạo secret key và lưu nó vào csdl
public function enable2fa(Request $request){
    $user = Auth::user();
    $google2fa = app('pragmarx.google2fa');
    $secret = $request->input('verify-code');
    $valid = $google2fa->verifyKey($user->passwordSecurity->google2fa_secret, $secret);
    if ($valid) {
        $user->passwordSecurity->google2fa_enable = 1;
        $user->passwordSecurity->save();
        return redirect('2fa')->with('success',"2FA is Enabled Successfully.");
    } else {
        return redirect('2fa')->with('error',"Invalid Verification Code, Please try again.");
    }
}
Sau khi người dùng điền mã OTP từ Google Authenticator App và click vào Enable 2FA, 2FA sẽ được bật cho người dùng.
Để tắt 2FA, người dùng cần nhập mật khẩu hiện tại và click vào nút Disable 2FA
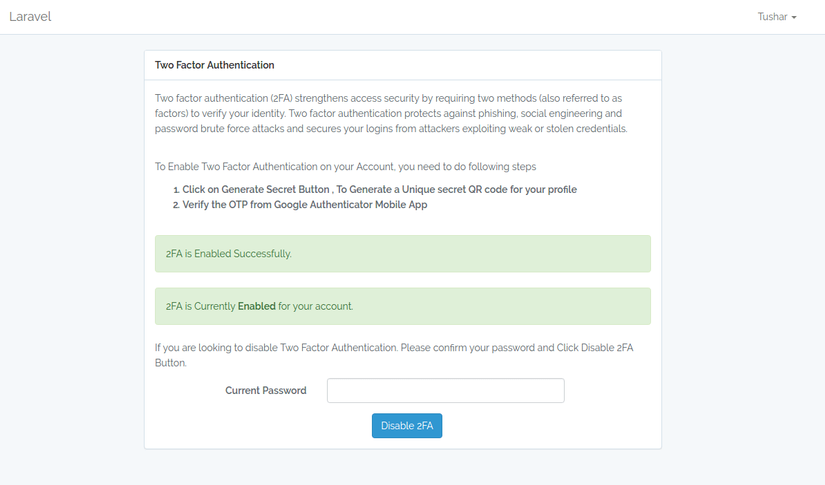
public function disable2fa(Request $request){
    if (!(Hash::check($request->get('current-password'), Auth::user()->password))) {
        // The passwords matches
        return redirect()->back()->with("error","Your  password does not matches with your account password. Please try again.");
    }

    $validatedData = $request->validate([
        'current-password' => 'required',
    ]);
    $user = Auth::user();
    $user->passwordSecurity->google2fa_enable = 0;
    $user->passwordSecurity->save();
    return redirect('/2fa')->with('success',"2FA is now Disabled.");
}
Các bạn thao khảo template cho form ở trên tại đây nhé: resources/views/auth/2fa.blade.php
2.6. Two Step Verification with 2FA Middleware
Package google2fa-laravel cung cấp một middleware cho phép trực tiếp enable 2FA. Tuy nhiên, nó dùng cho tất cả các tài khoản. Nếu chúng ta chỉ muốn bật 2FA cho những tài khoản nào bật nó trong profile, chúng ta cần có một middleware khác., We need to extend its class for that.
Chúng ta tạo mới class Google2FAAuthenticator.php, class này sẽ extend class Authenticator của google2fa-laravel
// ....
use PragmaRXGoogle2FALaravelSupportAuthenticator;

class Google2FAAuthenticator extends Authenticator
{
    protected function canPassWithoutCheckingOTP()
    {
          if(!count($this->getUser()->passwordSecurity)) {
              return true;
          }

          return
            !$this->getUser()->passwordSecurity->google2fa_enable ||
            !$this->isEnabled() ||
            $this->noUserIsAuthenticated() ||
            $this->twoFactorAuthStillValid();
    }

    protected function getGoogle2FASecretKey()
    {
        $secret = $this->getUser()->passwordSecurity->{$this->config('otp_secret_column')};

        if (is_null($secret) || empty($secret)) {
            throw new InvalidSecretKey('Secret key cannot be empty.');
        }

        return $secret;
    }
}
Với đoạn code ở trên, chúng ta đã loại bỏ những account nào không bật 2FA. Đồng thời custom lại tên cột mà chúng ta dùng để lưu secret key (cái này có thể có hoặc không tùy mọi người)
Tiếp theo chúng ta tạo middleware Google2FAMiddleware sử dụng class Google2FAAuthenticator ở trên:
// App/Http/Middleware/Google2FAMiddleware.php
<?php

namespace AppHttpMiddleware;

use ....Google2FAAuthenticator;
use Closure;

class Google2FAMiddleware
{
    /**
     * Handle an incoming request.
     *
     * @param  IlluminateHttpRequest  $request
     * @param  Closure  $next
     * @return mixed
     */
    public function handle($request, Closure $next)
    {
        $authenticator = app(Google2FAAuthenticator::class)->boot($request);

        if ($authenticator->isAuthenticated()) {
            return $next($request);
        }

        return $authenticator->makeRequestOneTimePasswordResponse();
    }
}
Register the Middleware in Kernel.php
// Kernel.php
protected $routeMiddleware = [
    ...
    '2fa' => AppHttpMiddlewareGoogle2FAMiddleware::class,
];
Include the Middleware to Controller or Route which you want under 2FA
public function __construct()
{
    $this->middleware(['auth', '2fa'] );
}

// or
Route::get('/admin', function () {
    return view('admin.index');
})->middleware(['auth', '2fa']);
We are almost there, Just a couple of things more. Tiếp theo, chúng ca cần chỉnh sử lại config 1 chút:
// config/google2fa.php
<?php
....
'view' => 'auth.google2fa',
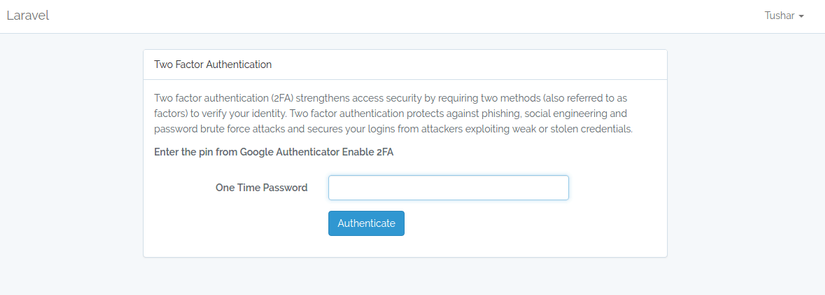
Tạo view để hiển thị cho bước 2 của quá trình verify: resource/views/auth/google2fa.blade.php
View này sẽ hiển thị sau khi người dùng login thành công (bằng username/password) và phải nhập mã OTP (bước 2) để hoàn thành login
Cập nhật lại route một chút:
Route::post('/2faVerify', function () {
    return redirect(URL()->previous());
})->name('2faVerify')->middleware('2fa');
Demo