Android RecyclerView – Simple List
RecyclerView Để thay thế cho ListView, GridView và một số thành phần khác. Để nhận được một performance tốt bạn cần thực hiện ViewHolder pattern, thật không may có nhiều cách để gây lên sự khó hiểu. Vơi ** RecyclerView ** chúng ta vẫn có thể thực hiện được mô hình ViewHolder để đảm bảo hiệu ...
RecyclerView
Để thay thế cho ListView, GridView và một số thành phần khác. Để nhận được một performance tốt bạn cần thực hiện ViewHolder pattern, thật không may có nhiều cách để gây lên sự khó hiểu. Vơi ** RecyclerView ** chúng ta vẫn có thể thực hiện được mô hình ViewHolder để đảm bảo hiệu suất tốt và làm cho code của chúng ta trở lên dễ hiểu. Trước tiên bạn cần một lib cho việc hỗ trợ các phiên bản của android.
dependencies {
    ...
    compile 'com.android.support:recyclerview-v7:22.2.1'

}
Không có gì đặc biệt khí add RecyclerView tới file layout của bạn:
<?xml version="1.0" encoding="utf-8"?>
<android.support.v4.widget.SwipeRefreshLayout xmlns:android="http://schemas.android.com/apk/res/android"
    android:id="@+id/swipe"
    android:layout_awidth="match_parent"
    android:layout_height="match_parent"
    android:paddingBottom="0dp"
    android:paddingLeft="0dp"
    android:paddingRight="0dp"
    android:paddingTop="0dp">

    <android.support.v7.widget.RecyclerView
        android:id="@+id/recyclerview"
        android:layout_awidth="match_parent"
        android:layout_height="match_parent"
        android:background="#e7e7e7" />

</android.support.v4.widget.SwipeRefreshLayout>
LayoutManager
Trong ListView việc duy nhất bạn cần làm thiết lập một Adapter cho nó nhưng bây giờ bạn phải thiết lập một adapter và một LayoutManager. Có 3 loại LayoutManager được cung cấp tại thời điểm này: GridLayoutManager, StaggeredGridLayoutManager và LinearLayoutManager. Trong bài viết này tôi đang sử dụng LinearLayoutManager.
Để thiết lập LayoutManager bạn chỉ cần:
java mRecyclerView.setLayoutManager(new LinearLayoutManager(this));
Khi hoàn thành việc thiết lập, code của bạn sẽ trông giống như này:
...
@Override
protected void onCreate(Bundle savedInstanceState) {
    super.onCreate(savedInstanceState);
    setContentView(com.jayway.recyclerview.R.layout.activity_recycler_view_example);

    mRecyclerView = (RecyclerView) findViewById(com.jayway.recyclerview.R.id.recyclerview);
    mRecyclerView.setLayoutManager(new LinearLayoutManager(this));
    mRecyclerView.setAdapter(new BasicListAdapter(this));

    ...

}
Mặc định LinearLayoutManager là vertical nếu bạn muốn nó được thiết lập horizontal:
linearLayoutManager.setOrientation(LinearLayoutManager.HORIZONTAL);
RecyclerView.Adapter
Bây giờ tới phần thú vị nhất, Việc thiết lập Adapter, đây là phần khác biệt nhất so với việc thiết lập Adapter cho ListView. Việc đầu tiên bạn cần làm extends RecyclerView.Adapter cách đơn giản nhất bạn cần làm override 3 phương thức:** onCreateViewHolder, onBindViewHolder and getItemCount**
public abstract class AbstractListAdapter<V, K extends RecyclerView.ViewHolder> extends RecyclerView.Adapter<K> {

    protected List<V> mData = new ArrayList<V>();

    @Override
    public abstract K onCreateViewHolder(ViewGroup viewGroup, int viewType);

    @Override
    public abstract void onBindViewHolder(K k, int position);

    @Override
    public int getItemCount() {
        return mData.size();
    }

    ...

}
Trong phương thức onCreateViewHolder bạn inflate một View dựa trên viewType. Còn trong phương thức onBindViewHolder là nơi bạn đưa data lên View. còn phương thức getItemCount tự nó đã giải thích ý nghĩa.
ViewHolder
Trong phần này chúng tôi sẽ tạo ra View của từng Item trong List.Phần này thực sự là không phức tạp. Thay vì một View có chứa ViewHolder bây giờ Tôi có ViewHolder chứa một View. Trong onCreateViewHolder bạn tạo ViewHolder dựa trên viewType.
public class BasicListAdapter extends AbstractListAdapter<BasicListAdapter.Entity, BasicListAdapter.ViewHolder> {

    ...

    @Override
    public ViewHolder onCreateViewHolder(ViewGroup viewGroup, int i) {
        return new ViewHolder(
                mInflater.inflate(R.layout.section_item, viewGroup, false)
        );
    }

    ...

}
Đảm bảo rằng trong Constructor của ViewHolder bạn thiết lập các loại view khác nhau, nếu không bận sẽ nhận được 1 hiệu suất tồi. Và bạn tạo thêm 1 phương thức có tên là bin() cho việc set dữ liệu lên view như bên dưới:
public static class ViewHolder extends RecyclerView.ViewHolder {

    private final TextView mTextView;

    public ViewHolder(View v) {
        super(v);
        mTextView = (TextView) v.findViewById(R.id.label);
    }

    public void bind(Entity entity){
        mTextView.setText(entity.getTitle());
    }

    public TextView getTextView() {
        return mTextView;
    }

    @Override
    public String toString() {
        return "ViewHolder{" + mTextView.getText() + "}";
    }
}
... và trong onBindViewHolde bạn gắn kết data tới view thông qua ViewHolder.
public class BasicListAdapter extends AbstractListAdapter<BasicListAdapter.Entity, BasicListAdapter.ViewHolder> {

    ...

    @Override
    public void onBindViewHolder(ViewHolder viewHolder, int position) {
        viewHolder.bind(mData.get(position));
    }

    ...

}
Trong ví dụ này tôi gọi đối tượng đầu vào của tôi là Entity:
public class Entity {
    private final String mTitle;

    public Entity(String title) {
        mTitle = title;
    }

    public String getTitle() {
        return mTitle;
    }

    @Override
    public boolean equals(Object o) {
        if (this == o) return true;
        if (o == null || getClass() != o.getClass()) return false;

        Entity entity = (Entity) o;

        if (mTitle != null ? !mTitle.equals(entity.mTitle) : entity.mTitle != null) {
            return false;
        }

        return true;
    }

    @Override
    public int hashCode() {
        return mTitle != null ? mTitle.hashCode() : 0;
    }
}
OnItemClickListener
Bạn không thể đặt một listener lên RecyclerView. Bạn lên đạt nó trên Adapter, bạn tạo 1 interface và add nó tới Adapter như bên dưới:
public class BasicListAdapter extends AbstractListAdapter<BasicListAdapter.Entity, BasicListAdapter.ViewHolder> {

    ...

    private OnItemClickListener mOnItemClickListener;

    ...

    public void setOnItemClickListener(OnItemClickListener listener) {
        mOnItemClickListener = listener;
    }

    ...

    public static interface OnItemClickListener {
        public void onItemClick(Entity entity);
    }
}
cập nhật lại ViewHolder:
public class ViewHolder extends RecyclerView.ViewHolder {

    ...

    private Entity mEntity;

    public ViewHolder(View v) {
        super(v);
        mTextView = (TextView) v.findViewById(R.id.label);
        mTextView.setOnClickListener(new View.OnClickListener() {
            @Override
            public void onClick(View v) {
                if (mOnItemClickListener != null) {
                    mOnItemClickListener.onItemClick(mEntity);
                }
            }
        });
    }

    public void bind(Entity entity) {
        mEntity = entity;
        mTextView.setText(entity.getTitle());
    }

    ...

}
Bạn có thể có nhiều loại View, và bạn có thể add các OnClickListener khác nhau trên những loại View khác nhau. Bên dưới là một vài loại phương thức trong interface.
public static interface OnItemClickListener {
    public void onItemClick(Entity entity);
    public void onItemDelete(Entity entity);
    public void onItemEdit(Entity entity);
}
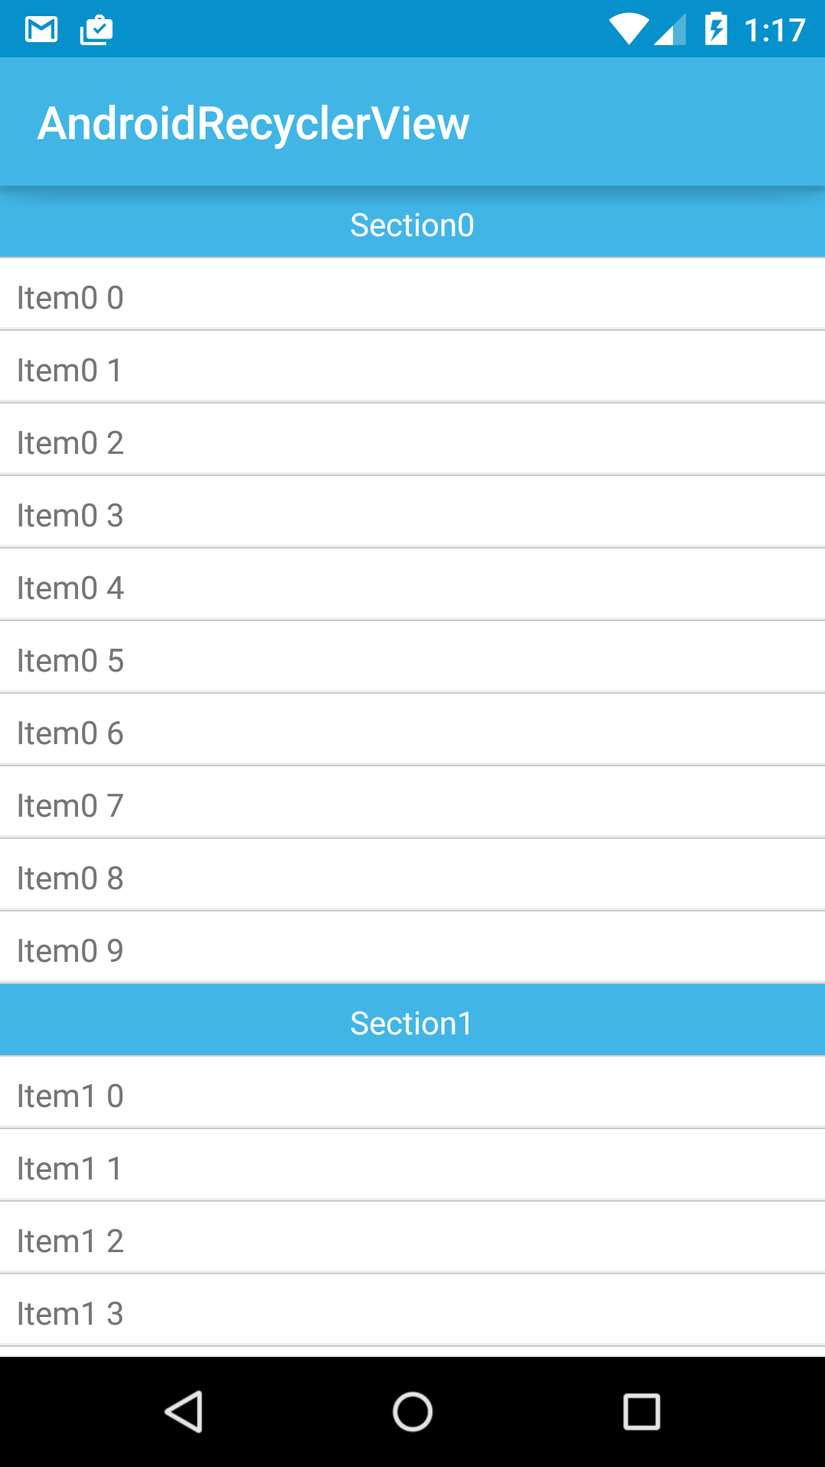
Đó là tất cả những gì cơ bản bạn cần biết khi bắt đầu với RecyclerView. Đây là kết quả:

Bạn có thể tham khảo source code tại đây:
