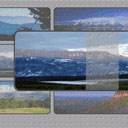
Tạo hiệu ứng Image Hover cực đỉnh bằng CSS3
Hiệu ứng hover là hiệu ứng mà khi ta trỏ chuột tới đối tượng thì đối tượng đó sẽ thay đổi, hôm nay chúng ta sẽ tạo ra một hiệu ứng như thế cho những tấm ảnh trong website của mình với hiệu ứng hover hết sức đỉnh. Các bạn có thể xem demo tại đây. Những bước cần làm : – Tạo file index.html ...

Hiệu ứng hover là hiệu ứng mà khi ta trỏ chuột tới đối tượng thì đối tượng đó sẽ thay đổi, hôm nay chúng ta sẽ tạo ra một hiệu ứng như thế cho những tấm ảnh trong website của mình với hiệu ứng hover hết sức đỉnh. Các bạn có thể xem demo tại đây.
Những bước cần làm :
– Tạo file index.html
– Tạo file gall.css
– Tạo folder images và đặt các hình mà chúng ta sẽ thực hiện trong bài viết này
Nào chúng ta cùng bắt đầu nào, việc các bạn cần làm chỉ là copy các đoạn code sau vào các file tương ứng là được.
index.html
<!DOCTYPE html PUBLIC "-//W3C//DTD XHTML 1.0 Transitional//EN" "http://www.w3.org/TR/xhtml1/DTD/xhtml1-transitional.dtd">
<html xmlns="http://www.w3.org/1999/xhtml">
<head>
<meta charset="utf-8" />
<title>CSS3 Image Hover Effects | Script Tutorials</title>
<link href="gall.css" rel="stylesheet" type="text/css" />
</head>
<body>

<div>
<div>
<img src="images/pic1.jpg" />
<div></div>
</div>
<div>
<img src="images/pic2.jpg" />
<div></div>
</div>
<div>
<img src="images/pic3.jpg" />
<div></div>
</div>
<div>
<img src="images/pic4.jpg" />
<div></div>
</div>
<div>
<img src="images/pic5.jpg" />
<div></div>
</div>
<div>
<img src="images/pic6.jpg" />
<div></div>
</div>
<div>
<img src="images/pic7.jpg" />
<div></div>
</div>
<div>
<img src="images/pic8.jpg" />
<div></div>
</div>
<div>
<img src="images/pic9.jpg" />
<div></div>
<div></div>
</div>
</div>
</body>
</html>
gall.css
.photos {
awidth: 945px;
height: 400px;
margin: 100px auto;
position:relative;
}
.photos > div {
background-color: rgba(128, 128, 128, 0.5);
border: 2px solid #444;
float: left;
height: 100px;
margin: 5px;
overflow: hidden;
position: relative;
awidth: 300px;
z-index: 1;

-webkit-border-radius: 10px;
-moz-border-radius: 10px;
-ms-border-radius: 10px;
-o-border-radius: 10px;
border-radius: 10px;

-webkit-transform:scale(1.0);
-moz-transform:scale(1.0);
-ms-transform:scale(1.0);
-o-transform:scale(1.0);
transform:scale(1.0);

-webkit-transition-duration: 0.5s;
-moz-transition-duration: 0.5s;
-ms-transition-duration: 0.5s;
-o-transition-duration: 0.5s;
transition-duration: 0.5s;
}
.photos > div img{
awidth: 100%;
}
.photos > div:hover{
z-index: 10;

-webkit-transform:scale(2.0);
-moz-transform:scale(2.0);
-ms-transform:scale(2.0);
-o-transform:scale(2.0);
transform:scale(2.0);
}
.photos > div div {
background: url(../images/hover.gif) repeat scroll 0 0 transparent;
cursor: pointer;
height: 100%;
left: 0;
opacity: 0.5;
position: absolute;
top: 0;
awidth: 100%;
z-index: 15;

-webkit-transition-duration: 0.5s;
-moz-transition-duration: 0.5s;
-ms-transition-duration: 0.5s;
-o-transition-duration: 0.5s;
transition-duration: 0.5s;
}
.photos > div:nth-child(1):hover div {
height: 0%;
}

.photos > div:nth-child(2):hover div {
height: 0%;
margin-top: 100px;
}
.photos > div:nth-child(3):hover div {
awidth: 0%;
}
.photos > div:nth-child(4):hover div {
margin-left: 300px;
awidth: 0%;
}
.photos > div:nth-child(5):hover div {
height: 0%;
margin-left: 150px;
margin-top: 50px;
awidth: 0%;
}
.photos > div:nth-child(6):hover div {
margin-left: 150px;
awidth: 0%;
}
.photos > div:nth-child(7):hover div {
height: 0%;
margin-left: 150px;
margin-top: 50px;
awidth: 0%;

-webkit-transform: rotateX(360deg);
-moz-transform: rotate(360deg);
-ms-transform: rotate(360deg);
-o-transform: rotate(-360deg);
transform: rotate(-360deg);
}
.photos > div:nth-child(8):hover div {
height: 0%;
margin-left: 150px;
margin-top: 50px;
awidth: 0%;

-webkit-transform: rotateZ(600deg);
-moz-transform: rotateZ(600deg);
-ms-transform: rotateZ(600deg);
-o-transform: rotateZ(600deg);
transform: rotateZ(600deg);
}
.photos > div.pair div {
awidth: 50%;
}
.photos > div.pair div:nth-child(odd) {
margin-left: 150px;
}
.photos > div.pair:hover div {
awidth: 0%;
}
.photos > div.pair:hover div:nth-child(odd) {
margin-left: 300px;
}
Hy vọng với bài viết này sẽ giúp bạn tạo được cho website của mình những hiệu ứng cực đỉnh bằng CSS3. Chúc các bạn thành công !
Chuyên Mục: Css
Bài viết được đăng bởi webmaster
-
Mr.Hai
