[Android] Database trong Android – P2 Tạo giao diện
[Android] Database trong Android – P2 Tạo giao diện Tháng Tư 28, 2017 nguyenvanquan7826 TUT Database Android 5 responses Trong phần trước [Android] Database trong Android – P1 Tạo database mình đã hướng dẫn các bạn tạo Database. ...
[Android] Database trong Android – P2 Tạo giao diện
Trong phần trước [Android] Database trong Android – P1 Tạo database mình đã hướng dẫn các bạn tạo Database. Bài này mình sẽ hướng dẫn các bạn tạo giao diện của app theo phong cách Material Design.
Lưu ý:
Toàn bộ code trong loạt bài này mình sẽ viết bằng tiếng Anh. Tuy nhiên thì tiếng anh này mình viết theo kiểu “dịch từ tiếng Việt” nên các bạn sẽ dễ dàng theo dõi.
IDE: Android studio 1.2.2
Android SDK 5.1.1
Min SDK: 4.0 (Android 4.0 trở lên sẽ dùng được ứng dụng)
Tuy nhiên các bạn hoàn toàn có thể làm trên Eclipse và android bản thấp hơn
Trong ứng dụng mình sẽ sử dụng RecyclerView, CardView. Các bạn nên đọc thêm nếu chưa rõ về nó:
RecyclerView trong Android
CardView trong Android
Bước 1: Cấu hình ứng dụng
Dưới đây là một số cầu hình cần thiết cho việc tạo ứng dụng.
Trước hết chúng ta cần cấu hình ứng dụng trong file build.gradle để có thể dùng support design library, recyclerview, cardview ở phần dependencies
dependencies {
    compile fileTree(dir: 'libs', include: ['*.jar'])
    compile 'com.android.support:design:22.2.0'
    compile 'com.android.support:recyclerview-v7:21.0.+'
    compile 'com.android.support:cardview-v7:21.0.+'
}
Tiếp theo là file AndroidManifest.xml
<?xml version="1.0" encoding="utf-8"?>
<manifest xmlns:android="http://schemas.android.com/apk/res/android"
    package="cachhoc.net.tut.demodatabase" >

    <application
        android:allowBackup="true"
        android:icon="@mipmap/ic_launcher"
        android:label="@string/app_name"
        android:theme="@style/AppTheme" >
        <activity
            android:name=".MainActivity"
            android:label="@string/app_name" >
            <intent-filter>
                <action android:name="android.intent.action.MAIN" />

                <category android:name="android.intent.category.LAUNCHER" />
            </intent-filter>
        </activity>
        <activity
            android:name=".NoteActivity"
            android:label="@string/title_activity_note" >
        </activity>
    </application>

</manifest>
Chúng ta có 2 Activity, một là MainActivity chứa danh sách các note, một là NoteActivity để soạn thảo note.
Các bạn để ý vào theme của ứng dụng là @style/AppTheme, các bạn mở file res/values/style.xml và chỉnh sửa theme để có Material theme.
<resources>


    <style name="AppTheme" parent="Theme.AppCompat.Light">
        <item name="colorPrimary">@color/primary</item>
        <item name="android:textColor">@color/text_primary</item>
        <item name="colorAccent">@color/primary</item>
    </style>

    <style name="AppCompatAlertDialogStyle" parent="Theme.AppCompat.Light.Dialog.Alert">
        <item name="colorAccent">@color/primary</item>
        <item name="android:textColorPrimary">@color/text_primary</item>
        <item name="android:background">@color/white</item>
    </style>
</resources>
Các bạn để ý chúng ta có 1 style là AppCompatAlertDialogStyle dùng cho theme dialog lúc xóa note thì hiện lên hỏi có xóa hay không.
Chúng ta cũng cần có các file string.xml và colors.xml (nằm trong res/values/) để chứa chuỗi và màu cho ứng dụng. Nếu chưa có thì các bạn click chuột phải chọn new … để tạo thêm file.
<?xml version="1.0" encoding="utf-8"?>
<resources>
    <color name="primary">#4CAF50</color>
    <color name="text_primary">#000000</color>
    <color name="primary_dark">#388E3C</color>
    <color name="accent">#FF4081</color>
    <color name="white">#FFFFFF</color>

    <color name="color_item_press">#81C784</color>
</resources>
<resources>
    <string name="app_name">My Note</string>

    <string name="hello_world">Hello world!</string>
    <string name="action_settings">Settings</string>

    <string name="add">Add</string>
    <string name="delete">Delete</string>
    <string name="save">Save</string>
    <string name="yes">Yes</string>
    <string name="no">No</string>


    <string name="title_note">Title note</string>
    <string name="content">Content</string>
    <string name="title_activity_note">Create Note</string>

</resources>
Ngoài ra chúng ta còn cần các icon ic_add, ic_save, ic_delete, ic_launcher cho ứng dụng, và rất dễ dàng chúng ta có thể tạo và tìm kiếm tại Android Asset Studio hoặc xem hướng dẫn tạo icon tại Android Asset Studio nếu bạn chưa rõ.
Như vậy là công việc cấu hình ứng dụng của chúng ta đã xong.
Bước 2: Thiết kế giao diện
Thiết kế acitivity main
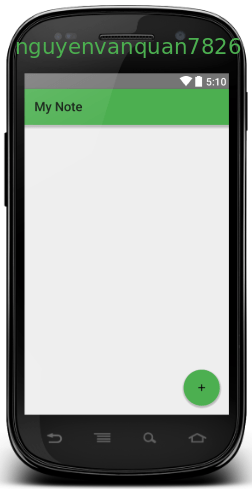
Trước tiên là activity_main, gồm một RecyclerView chứa danh sách note, và 1 Float Action Button để tạo note.

<RelativeLayout xmlns:android="http://schemas.android.com/apk/res/android"
    xmlns:app="http://schemas.android.com/apk/res-auto"
    android:layout_awidth="match_parent"
    android:layout_height="match_parent">

    <android.support.v7.widget.RecyclerView
        android:id="@+id/rv_note"
        android:layout_awidth="match_parent"
        android:layout_height="match_parent"
        android:scrollbars="vertical" />

    <android.support.design.widget.FloatingActionButton
        android:id="@+id/fab"
        android:layout_awidth="wrap_content"
        android:layout_height="wrap_content"
        android:layout_alignParentBottom="true"
        android:layout_alignParentEnd="true"
        android:layout_alignParentRight="true"
        android:layout_gravity="center"
        android:layout_marginBottom="16dp"
        android:layout_marginRight="16dp"
        android:src="@drawable/ic_add"
        app:borderWidth="0dp"
        app:elevation="6dp"
        app:pressedTranslationZ="12dp" />
</RelativeLayout>
Các bạn chú ý khi tạo FloatingActionButton cần có app:borderWidth=”0dp” nếu không trong một số máy sẽ hiển thị là hình vuông chú không phải hình tròn.
Màu của FloatingActionButton là colorAccent trong theme đã định nghĩa ở file style.xml. Bạn cũng có thể thay đổi nó bằng cách đặt background.
Thiết kế item trong danh sách
Tiếp theo chúng ta cần tạo giao diện cho 1 item trong danh sách. Nó sẽ gồm 2 dòng là title và content (tiêu đề và nội dung của ghi chú). Chúng sẽ được đặt trong CardView để có giao diện đẹp hơn
