[Android]Thiết lập vẽ tùy biến.
Trong nhiều ứng dụng trên điện thoại Android, chắc hẳn các bạn đều thấy có chức năng khá cơ bản đó là người dùng có thể vẽ tùy biến trên màn hình điện thoại Android. Vậy điều đó được làm như thế nào? Cách xử lý của chúng ra sao. Hôm nay tôi sẽ hướng dẫn các bạn cách cơ bản để làm được điều này. ...
Trong nhiều ứng dụng trên điện thoại Android, chắc hẳn các bạn đều thấy có chức năng khá cơ bản đó là người dùng có thể vẽ tùy biến trên màn hình điện thoại Android. Vậy điều đó được làm như thế nào? Cách xử lý của chúng ra sao. Hôm nay tôi sẽ hướng dẫn các bạn cách cơ bản để làm được điều này. Trong bài viết này tôi sử dụng Android Studio để lập trình.
Khởi động dự án
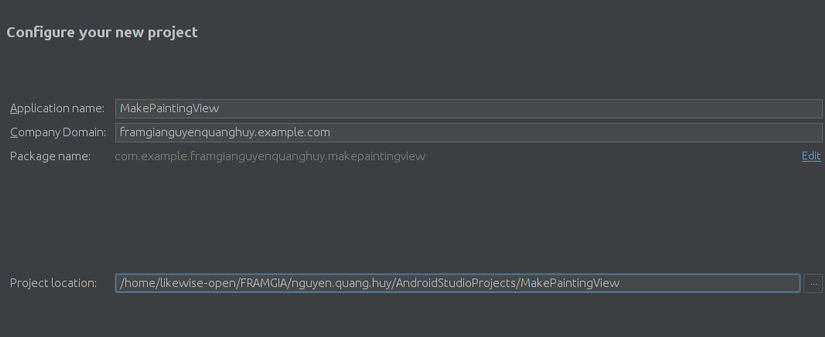
Ta sẽ tạo mới project thông qua File/New/New Project, sau đó ta thiết lập tên là MakePaintingView như hình dưới
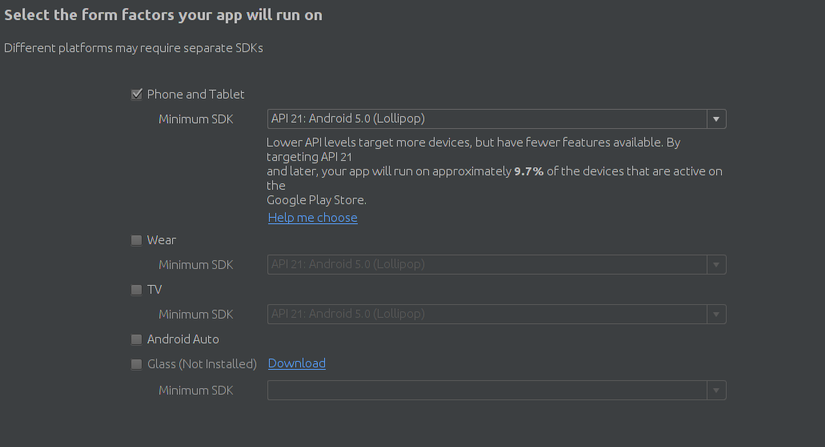
 Sau đó ta chọn phiên bản Android, ở đây tôi chọn Android 5
 2 bước tiếp theo chọn class chạy đầu tiên và Thiết lập bạn đầu.
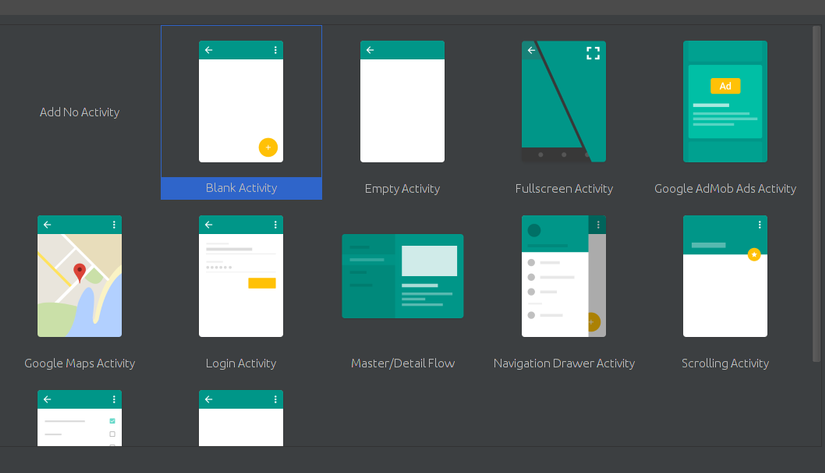
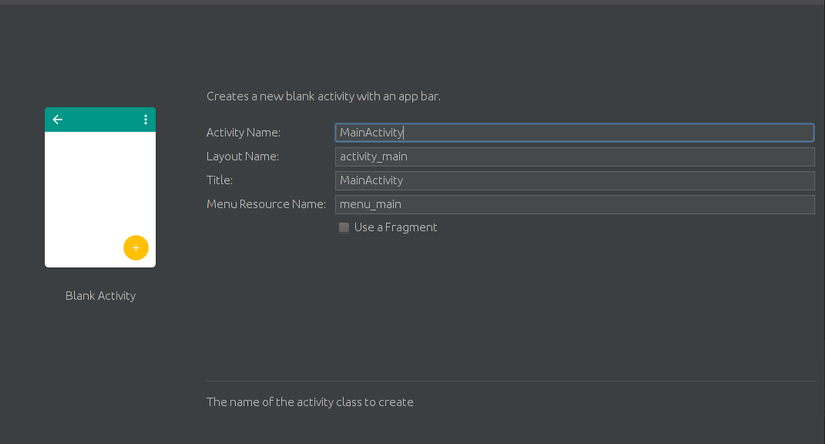 Sau khi chọn xong ta sẽ có màn giao diện để code như sau:
Sẽ có 2 file mặc định để code đó là MainActivity,java và file thiết lập giao diện là content_main.xml
package com.example.framgianguyenquanghuy.makepaintingview;

import android.os.Bundle;
import android.support.design.widget.FloatingActionButton;
import android.support.design.widget.Snackbar;
import android.support.v7.app.AppCompatActivity;
import android.support.v7.widget.Toolbar;
import android.view.View;
import android.view.Menu;
import android.view.MenuItem;

public class MainActivity extends AppCompatActivity {

    @Override
    protected void onCreate(Bundle savedInstanceState) {
        super.onCreate(savedInstanceState);
        setContentView(R.layout.activity_main);
        Toolbar toolbar = (Toolbar) findViewById(R.id.toolbar);
        setSupportActionBar(toolbar);

        FloatingActionButton fab = (FloatingActionButton) findViewById(R.id.fab);
        fab.setOnClickListener(new View.OnClickListener() {
            @Override
            public void onClick(View view) {
                Snackbar.make(view, "Replace with your own action", Snackbar.LENGTH_LONG)
                        .setAction("Action", null).show();
            }
        });
    }

    @Override
    public boolean onCreateOptionsMenu(Menu menu) {
        // Inflate the menu; this adds items to the action bar if it is present.
        getMenuInflater().inflate(R.menu.menu_main, menu);
        return true;
    }

    @Override
    public boolean onOptionsItemSelected(MenuItem item) {
        // Handle action bar item clicks here. The action bar will
        // automatically handle clicks on the Home/Up button, so long
        // as you specify a parent activity in AndroidManifest.xml.
        int id = item.getItemId();

        //noinspection SimplifiableIfStatement
        if (id == R.id.action_settings) {
            return true;
        }

        return super.onOptionsItemSelected(item);
    }
}
và
<?xml version="1.0" encoding="utf-8"?>
<RelativeLayout xmlns:android="http://schemas.android.com/apk/res/android"
    xmlns:tools="http://schemas.android.com/tools"
    xmlns:app="http://schemas.android.com/apk/res-auto" android:layout_awidth="match_parent"
    android:layout_height="match_parent" android:paddingLeft="@dimen/activity_horizontal_margin"
    android:paddingRight="@dimen/activity_horizontal_margin"
    android:paddingTop="@dimen/activity_vertical_margin"
    android:paddingBottom="@dimen/activity_vertical_margin"
    app:layout_behavior="@string/appbar_scrolling_view_behavior"
    tools:showIn="@layout/activity_main" tools:context=".MainActivity">

    <TextView android:text="Hello World!" android:layout_awidth="wrap_content"
        android:layout_height="wrap_content" />
</RelativeLayout>
Thiết lập giao diện cho dự án
Để thiết lập giao diện cho dự án t cần chỉnh sửa file content_main.xml như sau
<?xml version="1.0" encoding="utf-8"?>
<RelativeLayout xmlns:android="http://schemas.android.com/apk/res/android"
    xmlns:tools="http://schemas.android.com/tools"
    android:layout_awidth="match_parent"
    android:layout_height="match_parent"
    tools:context=".MainActivity" >

    <com.example.framgianguyenquanghuy.makepaintingview.TouchDrawingWithPath
        android:id="@+id/simpleDrawingView1"
        android:layout_awidth="wrap_content"
        android:layout_height="wrap_content"
        android:layout_alignParentBottom="true"
        android:layout_alignParentLeft="true"
        android:layout_alignParentRight="true"
        android:layout_alignParentTop="true" />

</RelativeLayout>
Trong đó <com.example.framgianguyenquanghuy.makepaintingview.TouchDrawingWithPath sẽ là tên class mà ta quy định sử dụng trong các kiểu vẽ khác nhau.
Vẽ hình tròn cố định
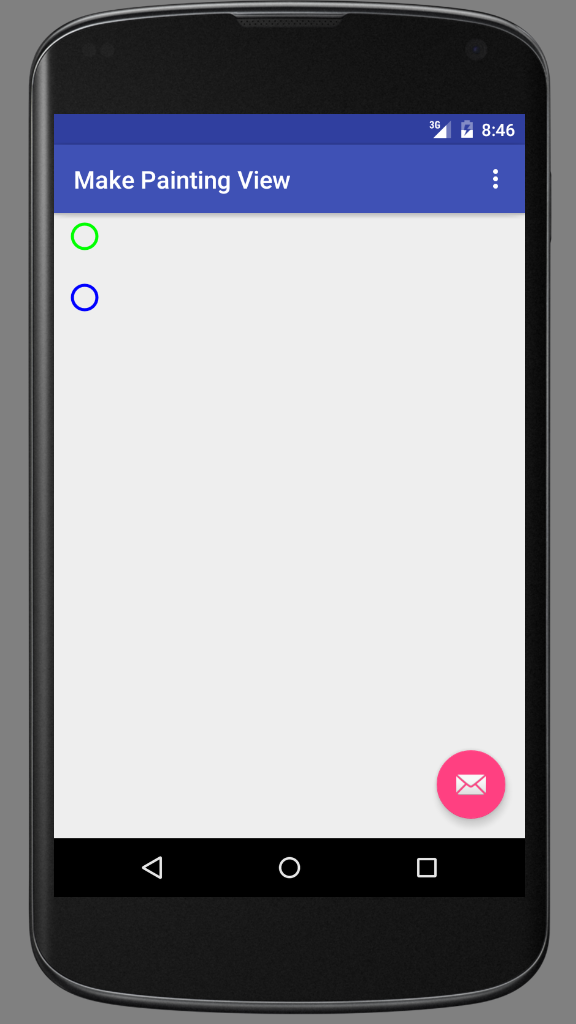
Đầu tiên để làm quen ta thử vẽ những hình tròn ở những vị trí cố định. Ở đây ta vẽ 3 vòng tròn lần lượt màu là Đen, Xanh lá và Xanh nước biển. Cần tạo 1 class phần vẽ này như sau:
package com.example.framgianguyenquanghuy.makepaintingview;

import android.content.Context;
import android.graphics.Canvas;
import android.graphics.Color;
import android.graphics.Paint;
import android.util.AttributeSet;
import android.view.View;

/**
 * Created by FRAMGIA
guyen.quang.huy on 12/10/2017.
 */
public class SimpleDrawingView extends View {
    // setup initial color
    private final int paintColor = Color.BLACK;
    // defines paint and canvas
    private Paint drawPaint;
    public SimpleDrawingView(Context context, AttributeSet attrs) {
        super(context, attrs);
        setFocusable(true);
        setFocusableInTouchMode(true);
        setupPaint();
    }

    // Setup paint with color and stroke styles
    private void setupPaint() {
        drawPaint = new Paint();
        drawPaint.setColor(paintColor);
        drawPaint.setAntiAlias(true);
        drawPaint.setStrokeWidth(5);
        drawPaint.setStyle(Paint.Style.STROKE);
        drawPaint.setStrokeJoin(Paint.Join.ROUND);
        drawPaint.setStrokeCap(Paint.Cap.ROUND);
    }

    @Override
    protected void onDraw(Canvas canvas) {
        canvas.drawCircle(50, 50, 20, drawPaint);
        drawPaint.setColor(Color.GREEN);
        canvas.drawCircle(50, 150, 20, drawPaint);
        drawPaint.setColor(Color.BLUE);
        canvas.drawCircle(50, 250, 20, drawPaint);
    }
}
Và kết quả ta được như sau: Do để full màn hình và có title nên bị mất hình tròn màu đen.
Vẽ theo tương tác ngươi dùng
Giờ ta sẽ vẽ theo tương tác người dùng lên màn hình. Để vẽ như vậy ta cần thêm sự kiện onTouchEvent để xử lý.
package com.example.framgianguyenquanghuy.makepaintingview;

import android.content.Context;
import android.graphics.Canvas;
import android.graphics.Color;
import android.graphics.Paint;
import android.graphics.Point;
import android.util.AttributeSet;
import android.view.MotionEvent;
import android.view.View;

import java.util.ArrayList;
import java.util.List;

/**
 * Created by FRAMGIA
guyen.quang.huy on 12/10/2017.
 */
public class TouchDrawingView extends View {
    // setup initial color
    private final int paintColor = Color.BLACK;
    // defines paint and canvas
    private Paint drawPaint;
    // Store circles to draw each time the user touches down
    private List<Point> circlePoints;

    public TouchDrawingView(Context context, AttributeSet attrs) {
        super(context, attrs);
        setupPaint(); // same as before
        circlePoints = new ArrayList<Point>();
    }

    // Draw each circle onto the view
    @Override
    protected void onDraw(Canvas canvas) {
        for (Point p : circlePoints) {
            canvas.drawCircle(p.x, p.y, 5, drawPaint);
        }
    }

    // Append new circle each time user presses on screen
    @Override
    public boolean onTouchEvent(MotionEvent event) {
        float touchX = event.getX();
        float touchY = event.getY();
        circlePoints.add(new Point(Math.round(touchX), Math.round(touchY)));
        // indicate view should be redrawn
        postInvalidate();
        return true;
    }

    private void setupPaint() {
        drawPaint = new Paint();
        drawPaint.setColor(paintColor);
        drawPaint.setAntiAlias(true);
        drawPaint.setStrokeWidth(5);
        drawPaint.setStyle(Paint.Style.STROKE);
        drawPaint.setStrokeJoin(Paint.Join.ROUND);
        drawPaint.setStrokeCap(Paint.Cap.ROUND);
        drawPaint.setStyle(Paint.Style.FILL); // change to fill
        // ...
    }
}
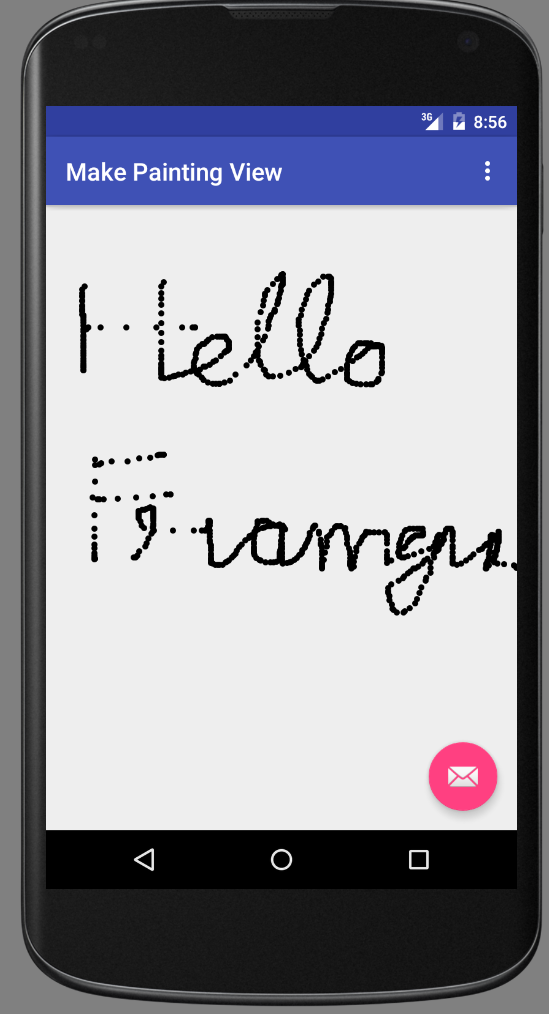
Và kết quả ta thu về được là vẽ chủ động như sau:
Vẽ hình liên tục
Như ở trên thì việc vẽ theo tương tắc trên màn hình điện thoại thì nó là các hình tròn nối tiếp nhau, như vậy sẽ khiến hình bị rời rạc. Vậy để vẽ liên tục thì ta sẽ khai báo như sau: Ở đây ta sẽ thay sự kiện khi vẽ k phải là list nữa mà vẽ thành 1 đường luôn, và sửa lại đoạn sự kiện Ontouch
 public boolean onTouchEvent(MotionEvent event) {
        float pointX = event.getX();
        float pointY = event.getY();
        // Checks for the event that occurs
        switch (event.getAction()) {
            case MotionEvent.ACTION_DOWN:
                // Starts a new line in the path
                path.moveTo(pointX, pointY);
                break;
            case MotionEvent.ACTION_MOVE:
                // Draws line between last point and this point
                path.lineTo(pointX, pointY);
                break;
            default:
                return false;
        }
package com.example.framgianguyenquanghuy.makepaintingview;
import android.content.Context;
import android.graphics.Canvas;
import android.graphics.Color;
import android.graphics.Paint;
import android.graphics.Path;
import android.graphics.Point;
import android.util.AttributeSet;
import android.view.MotionEvent;
import android.view.View;

import java.util.ArrayList;
import java.util.List;

/**
 * Created by FRAMGIA
guyen.quang.huy on 12/10/2017.
 */
public class TouchDrawingWithPath extends View{
    // setup initial color
    private final int paintColor = Color.BLACK;
    // defines paint and canvas
    private Paint drawPaint;
    // Store circles to draw each time the user touches down
    private List<Point> circlePoints;

    private Path path = new Path();
    public TouchDrawingWithPath(Context context, AttributeSet attrs) {
        super(context, attrs);
        setupPaint(); // same as before
        circlePoints = new ArrayList<Point>();
    }

    // Draw each circle onto the view
    @Override
    protected void onDraw(Canvas canvas) {
        canvas.drawPath(path, drawPaint);
    }

    // Append new circle each time user presses on screen
    @Override
    public boolean onTouchEvent(MotionEvent event) {
        float pointX = event.getX();
        float pointY = event.getY();
        // Checks for the event that occurs
        switch (event.getAction()) {
            case MotionEvent.ACTION_DOWN:
                // Starts a new line in the path
                path.moveTo(pointX, pointY);
                break;
            case MotionEvent.ACTION_MOVE:
                // Draws line between last point and this point
                path.lineTo(pointX, pointY);
                break;
            default:
                return false;
        }

        postInvalidate(); // Indicate view should be redrawn
        return true; // Indicate we've consumed the touch
    }

    private void setupPaint() {
        drawPaint = new Paint();
        drawPaint.setColor(paintColor);
        drawPaint.setAntiAlias(true);
        drawPaint.setStrokeWidth(5);
        drawPaint.setStyle(Paint.Style.STROKE);
        drawPaint.setStrokeJoin(Paint.Join.ROUND);
        drawPaint.setStrokeCap(Paint.Cap.ROUND);
        drawPaint.setStyle(Paint.Style.STROKE);
        // ...
    }
}
Và kết quả thu được như sau:
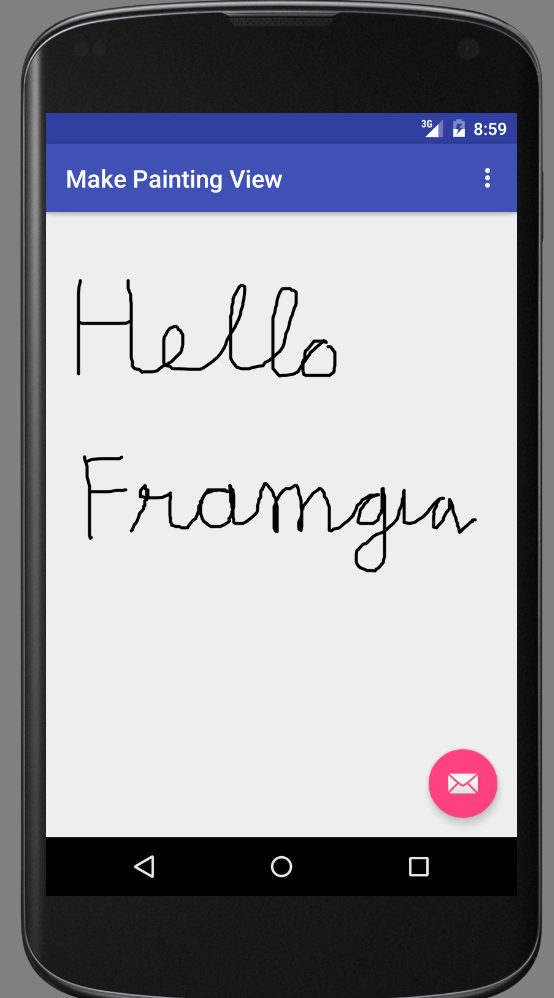 Rõ ràng nếu viết chữ thì sẽ đẹp hơn.
