Android Wear Apps Development : Jump-Start
Introduction to Android Wear Android Wear is a new version of the Android system designed specifically for wearables , which was announced by Google in march 2014 . Currently lots of devices running on Android Wear were released, including well designed Moto 360 and Gear Live by ...
Introduction to Android Wear
Android Wear is a new version of the Android system designed specifically for wearables , which was announced by Google in march 2014. Currently lots of devices running on Android Wear were released, including well designed Moto 360 and Gear Live by Samsung.But still, amount of applications using all the benefits of Android Wear in Google Play is considerably small. Designing apps for wearable devices powered by Android Wear is substantially different than designing for phones or tablets.
The Android Wear operating system uses bluetooth to connect to handheld device(s) running Android 4.3 or higher. Once this connection is made, the wearable channels information and updates from the paired smartphone and/or tablet, and conveniently displays them on the user's wrist. These updates include things like Google Now cards, Gmail, Google Calendar, and phone notifications, such as incoming calls and text messages.
**This article is conscious about how to build Android wear apps from the scratch. Before that we need to read about some recommended topics are enlisted following: **
-
Official intro: http://developer.android.com/wear/index.html
-
Design Principles : http://developer.android.com/design/wear/principles.html
-
UI Patterns: http://developer.android.com/design/wear/patterns.html
-
Style: http://developer.android.com/design/wear/style.html
-
Watch face: http://developer.android.com/design/wear/watchfaces.html
You can be a good wear apps developer if you can think that how can you utilize your hand watch. So, lets start the android wear apps developing with the Hello World sample =))
Step 1 : Prepare your tools (ban2)
At first you need to prepare your development environment by installing and updating all the packages you need. Literally, you have to use Android Studio to have the necessary elements.
You can download the latest IDE from here https://developer.android.com/sdk/index.html. After downloading the latest version, you can get the necessary tools for wearable platform automatically for the lollipop and upper version. You can experiment with kitkat wear but you may get few configuration problem! So, check your sdk manager to download & update the tools.
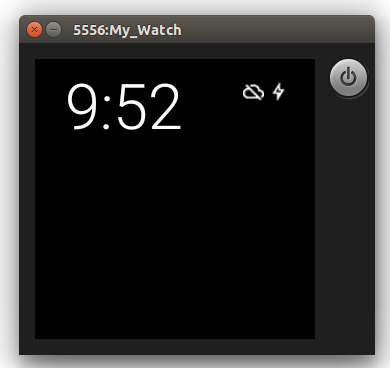
Now, open the installed Android Studio to set up an Android Wear Virtual Device by go to Tools>Android>AVD Manager. You can see a button to create virtual device.
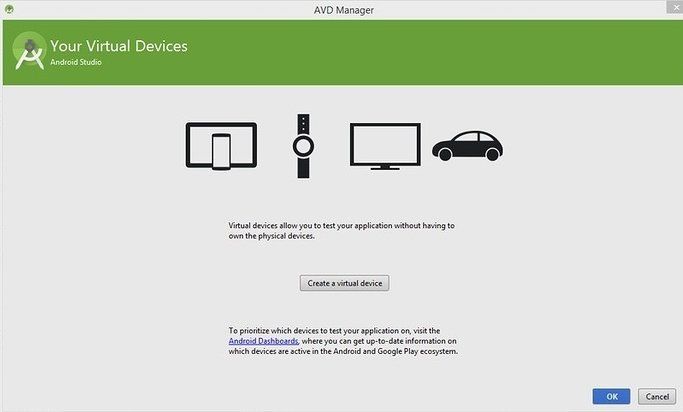
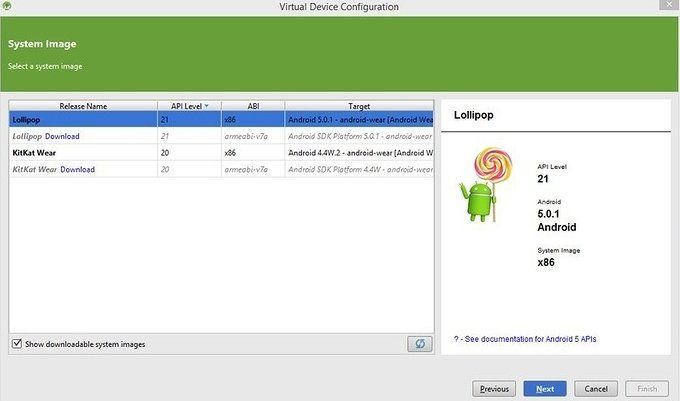
After creating your virtual wear device you can start the device to test your code!
Step 2 : Create Hello World Project
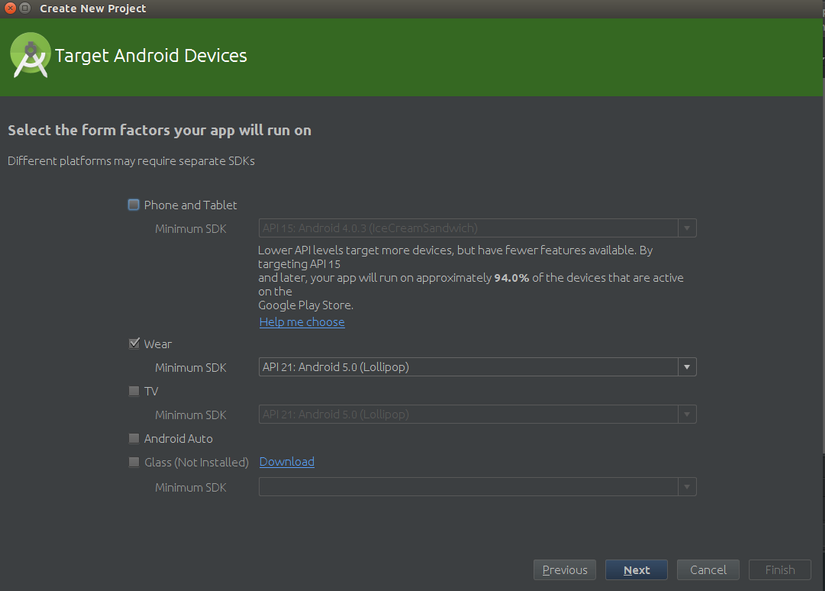
Now, create a new project and be careful to choose Wear as SDK to start. You can see the screenshot below.
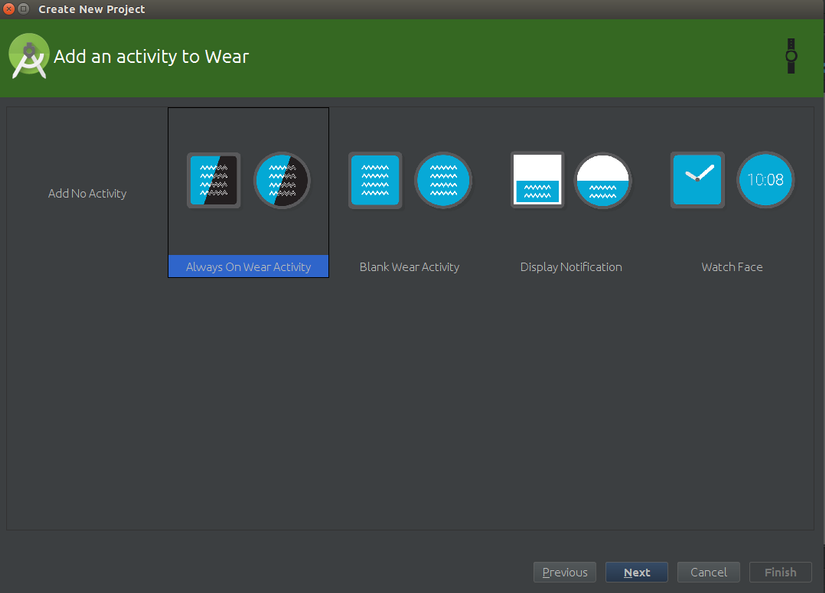
There are 04 types of activity you can choose, for the first time I am proceeding with Always On Wear Activity.
So, after creating project you can see the auto generated sample project of Hello World. Nowadays coding in android studio is getting too much faster you know (facepalm2)
You can review some basic implementation of android wearable library. I am going to print an analog clock along with the hello world text. Here are the most important parts:
Step 3 : It's time to code your watch! (code)
gradle script
    apply plugin: 'com.android.application'

    android {
        compileSdkVersion 23
        buildToolsVersion "23.0.1"

        defaultConfig {
            applicationId "com.licon.mywear"
            minSdkVersion 21
            targetSdkVersion 23
            versionCode 1
            versionName "1.0"
        }
        buildTypes {
            release {
                minifyEnabled false
                proguardFiles getDefaultProguardFile('proguard-android.txt'), 'proguard-rules.pro'
            }
        }
    }

    dependencies {
        compile fileTree(dir: 'libs', include: ['*.jar'])
        compile 'com.google.android.support:wearable:1.3.0'
    }
**activity_main.xml **
<?xml version="1.0" encoding="utf-8"?>
<android.support.wearable.view.BoxInsetLayout
    xmlns:android="http://schemas.android.com/apk/res/android"
    xmlns:app="http://schemas.android.com/apk/res-auto"
    xmlns:tools="http://schemas.android.com/tools"
    android:layout_awidth="match_parent"
    android:layout_height="match_parent"
    android:id="@+id/container"
    tools:context=".MainActivity"
    tools:deviceIds="wear">

    <TextView
        android:id="@+id/hello_text"
        app:layout_box="all"
        android:layout_awidth="match_parent"
        android:layout_height="match_parent"
        android:text="@string/hello_world"
        android:gravity="center|bottom"
        android:layout_marginBottom="4dp"
        android:textColor="@android:color/holo_blue_dark"/>

    <AnalogClock
        android:id="@+id/clock_analog"
        app:layout_box="all"
        android:layout_awidth="wrap_content"
        android:layout_height="wrap_content"
        android:layout_gravity="center"/>

</android.support.wearable.view.BoxInsetLayout>
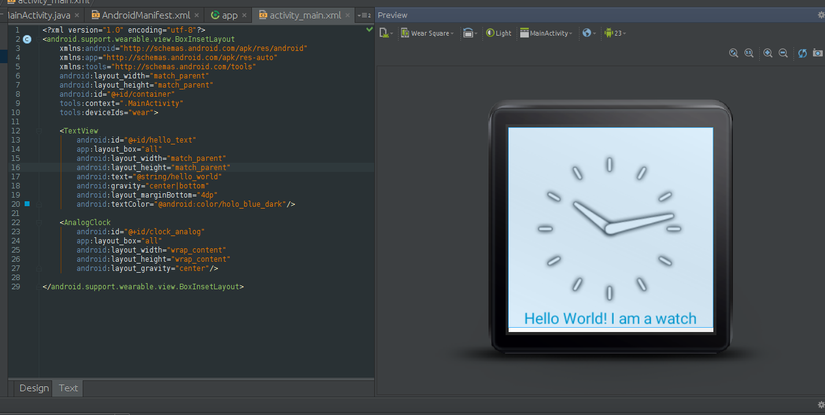
In the xml panel you can design your code for 02 types of face:
- Android Wear Square
- Android Wear Round
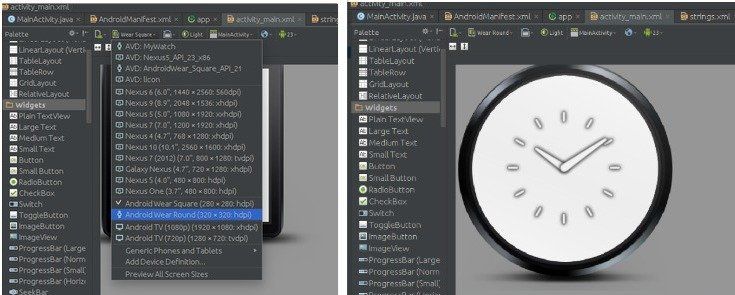
However, I am going to code for square watch because its my favourite! (ifyouknowwhatimean) Here is the preview of above xml.
MainActivity.java
package com.licon.mywear;

import android.os.Bundle;
import android.support.wearable.activity.WearableActivity;

public class MainActivity extends WearableActivity {

	@Override
	protected void onCreate(Bundle savedInstanceState) {
		super.onCreate(savedInstanceState);
		setContentView(R.layout.activity_main);
	}
}
AndroidManifest.xml
<?xml version="1.0" encoding="utf-8"?>
<manifest xmlns:android="http://schemas.android.com/apk/res/android"
    package="com.licon.mywear" >

    <uses-feature android:name="android.hardware.type.watch" />
    <uses-permission android:name="android.permission.WAKE_LOCK" />

    <application
        android:allowBackup="true"
        android:icon="@mipmap/ic_launcher"
        android:label="@string/app_name"
        android:theme="@android:style/Theme.DeviceDefault" >
        <uses-library
            android:name="com.google.android.wearable"
            android:required="false" />

        <activity
            android:name=".MainActivity"
            android:label="@string/app_name"
            android:theme="@android:style/Theme.DeviceDefault.Light" >
            <intent-filter>
                <action android:name="android.intent.action.MAIN" />

                <category android:name="android.intent.category.LAUNCHER" />
            </intent-filter>
        </activity>
    </application>

</manifest>
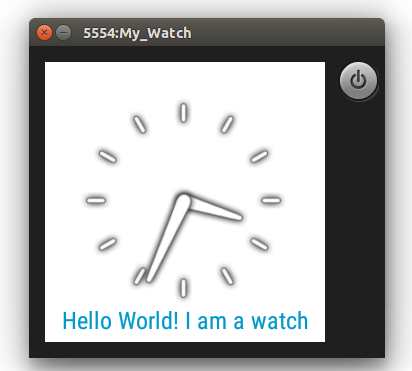
Done! You can run it in the virtual device.
So, it's the high time to create some wearable apps (?) Think how can you utilize your hand watch

See more: https://www.android.com/wear/
