Docusign - Chữ ký điện tử
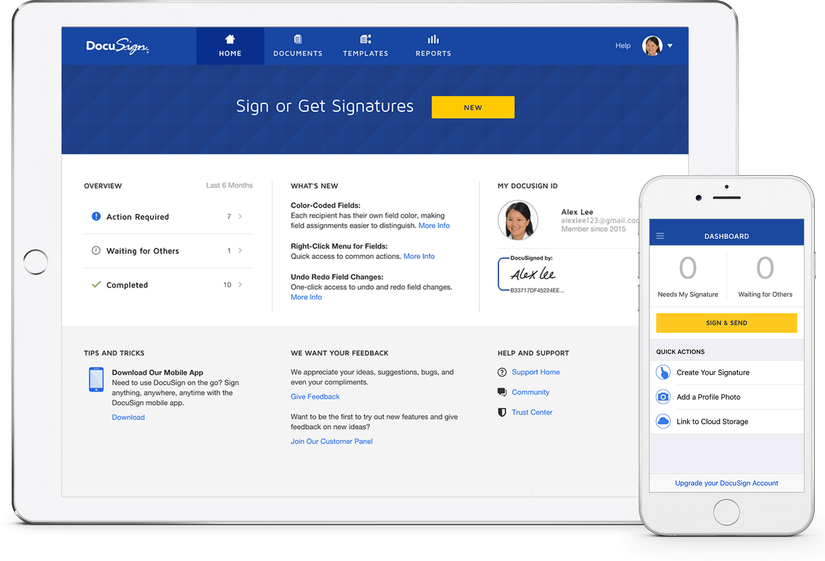
Docusign là gì Dịch vụ hỗ trợ chữ ký điện tử. Nghe đồn được anh Google hậu thuẫn. Với cách sử dụng đơn giản và nhiều tính năng mà bất kỳ cá nhân hay doanh nghiệp nào cũng đều cần đến. Người dùng chỉ cần tải tập tin lên DocuSign, ký tên trong hộp thoại nhỏ và kéo đến vị trí cần đặt chữ ký trong ...
Docusign là gì
 Dịch vụ hỗ trợ chữ ký điện tử. Nghe đồn được anh Google hậu thuẫn. Với cách sử dụng đơn giản và nhiều tính năng mà bất kỳ cá nhân hay doanh nghiệp nào cũng đều cần đến. Người dùng chỉ cần tải tập tin lên DocuSign, ký tên trong hộp thoại nhỏ và kéo đến vị trí cần đặt chữ ký trong văn bản, sau đó gửi email chứa các tài liệu cho người nhận đã chỉ định. Bạn cũng có thể yêu cầu người nhận ký lại hay nhắc nhở thời gian văn bản hết hiệu lực nếu chúng không được ký kết một cách kịp thời. Một bảng điều khiển sẽ cho phép bạn theo dõi tất cả các hợp đồng đã gửi đi và ký kết thành công. DocuSign có nhiều gói dịch vụ, từ miễn phí cho cá nhân với các tính năng cơ bản nhất, đến khoảng 420.000 đ (20 USD) mỗi tháng cho các tính năng cao cấp hơn.
Điểm lợi ích mà Docusign mang lại chính là vấn đề bảo vệ tài nguyên môi trường. Theo ước tính của Docusign thì họ đã giúp tiết kiệm được hơn 20 tỉ tờ giấy, 2.5 triệu cây cối và 2 triệu gallon nước (1 gallon = 3.785lít)
Demo
Required thư viện docusign_esign
pip install docusign_esign
1. Thông tin tài khoản
Trước tiên ta cần đăng ký tài khoản free trial với Docusign. Sau đó vào link này để lấy access token, DocuSign accountID
import base64, os
from docusign_esign import ApiClient, EnvelopesApi, EnvelopeDefinition, Signer, SignHere, Tabs, Recipients, Document

# Settings
# Fill in these constants
#
# Obtain an OAuth access token from https://developers.docusign.com/oauth-token-generator
access_token = '{ACCESS_TOKEN}'
# Obtain your accountId from demo.docusign.com -- the account id is shown in the drop down on the
# upper right corner of the screen by your picture or the default picture.
account_id = '{ACCOUNT_ID}'
# Recipient Information:
signer_name = '{USER_FULLNAME}'
signer_email = '{USER_EMAIL}'
# The document you wish to send. Path is relative to the root directory of this repo.
file_name_path = 'demo_documents/World_Wide_Corp_lorem.pdf';
base_path = 'https://demo.docusign.net/restapi'

# Constants
APP_PATH = os.path.dirname(os.path.abspath(__file__))
2. Định nghĩa Evelope
Evelope (Phong bì) nơi sẽ chứa các tài liệu (Bao gồm tài liệu cần ký, tài liệu view), người ký, những người nhận khác, những nơi người ký sẽ ký tài liệu
def send_document_for_signing():
    """
    Sends the document <file_name> to be signed by <signer_name> via <signer_email>
    """

    # Create the component objects for the envelope definition...
    with open(os.path.join(APP_PATH, file_name_path), "rb") as file:
        content_bytes = file.read()
    base64_file_content = base64.b64encode(content_bytes).decode('ascii')

    document = Document( # create the DocuSign document object
        document_base64 = base64_file_content,
        name = 'Example document', # can be different from actual file name
        file_extension = 'pdf', # many different document types are accepted
        document_id = 1 # a label used to reference the doc
    )


    # Create the signer recipient model
    signer = Signer( # The signer
        email = signer_email, name = signer_name, recipient_id = "1", routing_order = "1")

    # Create a sign_here tab (field on the document)
    sign_here = SignHere( # DocuSign SignHere field/tab
        document_id = '1', page_number = '1', recipient_id = '1', tab_label = 'SignHereTab',
        x_position = '195', y_position = '147')

    # Add the tabs model (including the sign_here tab) to the signer
    signer.tabs = Tabs(sign_here_tabs = [sign_here]) # The Tabs object wants arrays of the different field/tab types


    # Next, create the top level envelope definition and populate it.
    envelope_definition = EnvelopeDefinition(
        email_subject = "Please sign this document sent from the Python SDK",
        documents = [document], # The order in the docs array determines the order in the envelope
        recipients = Recipients(signers = [signer]), # The Recipients object wants arrays for each recipient type
        status = "sent" # requests that the envelope be created and sent.
    )
3. Khởi tạo và gửi Envelope
Sau khi định nghĩa Envelope đầy đủ, sử dụng CreateEnvelope của thư viện SDK trên để gửi. Trong code mình để trạng thái là sent nên tài liệu sẽ được Docusign gửi ngay sau khi tạo
     # Ready to go: send the envelope request
    api_client = ApiClient()
    api_client.host = base_path
    api_client.set_default_header("Authorization", "Bearer " + access_token)

    envelope_api = EnvelopesApi(api_client)
    results = envelope_api.create_envelope(account_id, envelope_definition=envelope_definition)
    return results
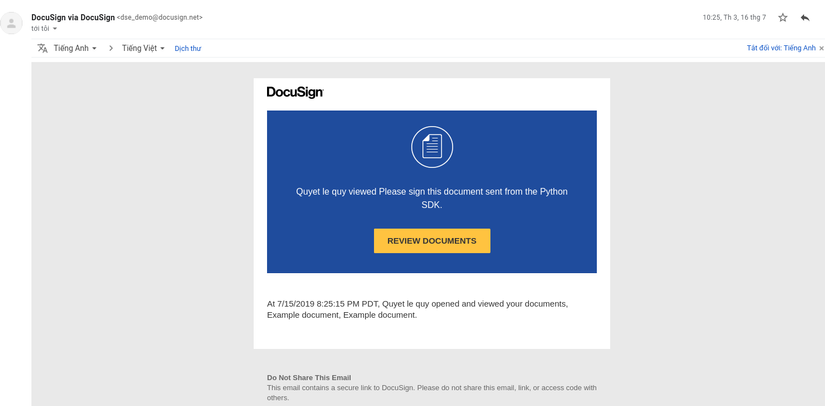
Sau đó, vào mail signer và xem kết quả:

Tổng kết
Docusign này còn nhiều tính năng và phức tạp, mình sẽ tiếp tục châm cứu và gửi thêm demo cho các bạn ở những bài sau
