[Laravel Framework] Xây dựng trang quản trị web bán hàng - Bài 1 Tạo cơ sở dữ liệu với Migrate
Laravel là 1 framework khá mới, phiên bản đầu tiên được phát hành vào tháng 6/2011, mã nguồn mở, dùng để xây dựng web aplication và được thiết kế theo mô hình MVC. Laravel là 1 trong những framework phổ biến nhất. 1. Cài đặt Để cài đặt được laravel trong ubuntu thì máy của bạn phải cài ...
Laravel là 1 framework khá mới, phiên bản đầu tiên được phát hành vào tháng 6/2011, mã nguồn mở, dùng để xây dựng web aplication và được thiết kế theo mô hình MVC. Laravel là 1 trong những framework phổ biến nhất.

1. Cài đặt
- Để cài đặt được laravel trong ubuntu thì máy của bạn phải cài sẵn: MySQL, PHP, Apache, Mcrypt PHP Extension, Composer.Ở đây mình dùng xampp nên gói đã có sẵn PHP, MySQL, Apache.
- Sau đó, bạn dùng lệnh sau để tạo project laravel, hiện tại bản mới nhất của laravel là 5.3
composer create-project --prefer-dist laravel/laravel my_project
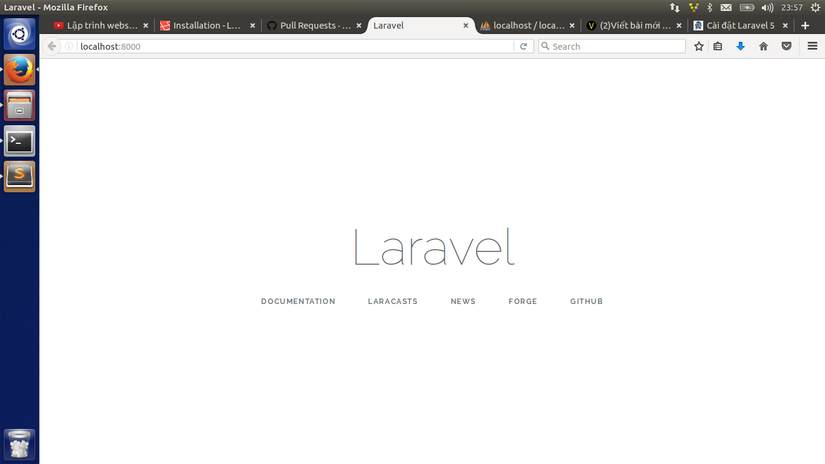
- Sau khi chạy xong thì bật serve bằng cách gõ lệnh "php artisan serve", sau đó chạy trên url với đường dẫn "http://localhost:8000" thì sẽ hiện kết qủa như sau là đã cài đặt thành công

2. Migrate database
- Để tạo 1 trang backend bán hàng cơ bản, thì trước hết ta sẽ tạo 3 bảng là users, products, categories. Trong đó, 1 category sẽ có nhiều product, 1 user sẽ cập nhật được nhiều product.
- Trong laravel đã cung cấp sẵn cho chúng ta model User và migration của nó, nên tiếp theo chúng ta sẽ tạo model cho category và project. Để tạo đồng thời model và migration, ta làm như sau:
php artisan make:model Category -m
- Sau đó vào file migration của category, ta thêm trường cho category như sau:
    <?php

    use IlluminateSupportFacadesSchema;
    use IlluminateDatabaseSchemaBlueprint;
    use IlluminateDatabaseMigrationsMigration;

    class CreateCategoriesTable extends Migration
    {
        public function up()
        {
            Schema::create('categories', function (Blueprint $table) {
                $table->increments('id');
                $table->string('name');
                $table->timestamps();
            });
        }

        public function down()
        {
            Schema::dropIfExists('categories');
        }
    }
- Tiếp theo là tạo model và thêm trường cho product
    <?php

    use IlluminateSupportFacadesSchema;
    use IlluminateDatabaseSchemaBlueprint;
    use IlluminateDatabaseMigrationsMigration;

    class CreateProductsTable extends Migration
    {
        public function up()
        {
            Schema::create('products', function (Blueprint $table) {
                $table->increments('id');
                $table->integer('price');
                $table->text('intro');
                $table->text('content');
                $table->string('image');
                $table->integer('user_id')->unsigned();
                $table->integer('category_id')->unsigned();
                $table->foreign('user_id')->references('id')->on('users');
                $table->foreign('category_id')->references('id')->on('categories');
                $table->timestamps();
            });
        }

        public function down()
        {
            Schema::dropIfExists('products');
        }
    }
- Tiếp theo, chúng ta cấu hình file .env để migrate database như sau
    DB_CONNECTION=mysql
    DB_HOST=127.0.0.1
    DB_PORT=3306
    DB_DATABASE=sale
    DB_USERNAME=root
    DB_PASSWORD=
- Tạo trong xampp 1 db đặt tên là sale, username = root, password = '. Sau đó chạy lệnh sau để migrate database
php artisan migrate
Vậy là đã thành công.
3. Tạo quan hệ bảng
Dựa vào phân tích quan hệ ở phần 2, ta sử dụng hasMany và beLongsTo để thể hiện các quan hệ đó.
    <?php
    namespace App;

    use IlluminateNotificationsNotifiable;
    use IlluminateFoundationAuthUser as Authenticatable;

    use AppProduct;

    class User extends Authenticatable
    {
        use Notifiable;

        protected $fillable = [
            'name', 'email', 'password',
        ];

        protected $hidden = [
            'password', 'remember_token',
        ];

        public function product()
        {
            return $this->hasMany(Product::class);
        }
    }
    <?php

    namespace App;

    use IlluminateDatabaseEloquentModel;

    use AppProduct;

    class Category extends Model
    {
        protected $table = 'categories';

        protected $fillable = ['name'];

        public function product()
        {
            return $this->hasMany(Products::class);
        }
    }
    <?php
    namespace App;

    use IlluminateDatabaseEloquentModel;

    use AppCategory;
    use AppUser;

    class Product extends Model
    {
        protected $table = 'products';

        protected $fillable = ['name', 'price', 'intro', 'content', 'image',
            'user_id', 'category_id'];

        public function category()
        {
            return $this->belongsTo(Category::class);
        }

        public function user()
        {
            return $this->belongsTo(Product::class);
        }
    }
Kết luận: Thông qua bài viết này, chắc hẳn các bạn đã hiểu qua về migrate database trong laravel. Các bạn có thể xem chi tiết code tại link sau: https://github.com/chukimthang/sale/pull/1/files Mỗi bài học trong seri Xây dựng trang quản trị web bán hàng mình sẽ push code lên link GitHub này để các bạn tiện theo dõi. Chúc các bạn thành công. Nguồn: https://laravel.com/docs/5.3
