Laravel: Hiển thị thông báo lỗi với Vue.js
Trong bài viết này, tôi sẽ hướng dẫn các bạn cách sử dụng Vue.js để xử lý thông báo lỗi khi validation trong Laravel. Cài đặt môi trường Vì làm việc với framework Laravel nên trước tiên các bạn cần có một project Laravel. Để tạo một project mới, tham khảo tại Laravel Install. Trong bài này, ...
Trong bài viết này, tôi sẽ hướng dẫn các bạn cách sử dụng Vue.js để xử lý thông báo lỗi khi validation trong Laravel.
Cài đặt môi trường
Vì làm việc với framework Laravel nên trước tiên các bạn cần có một project Laravel. Để tạo một project mới, tham khảo tại Laravel Install. Trong bài này, tôi đang thao tác trên project với tên blog với lệnh. Đương nhiên là tên project các bạn có thể đặt tùy theo ý thích của mình. ^^
composer create-project --prefer-dist laravel/laravel blog
Tiếp theo, chúng ta cần cài đặt Laravel Elixir , Laravel Elixir là công cụ cho phép chúng ta thực hiện Gulp bên trong ứng dụng Laravel. Chúng ta sẽ xử dụng Laravel Elixir để biên dịch những file javascript được viết ra. Để cài đặt, chạy lệnh
npm instal
Đến đây, chúng ta đã có 1 project Laravel cho phép chạy lệnh Gulp. Tiếp theo, cần cài thêm một vài thư viện cho project của bạn.
- Vue.js : Tiêu đề bài viết là làm việc với Vue.js. Nên không thể thiếu nó được. ^^
- vue-resource: Là một HTTP client cho Vue.js. Tạo các request và xử lý kết quả trả về sử dụng XMLHttpRequest hoặc JSONP.
- laravel-elixir-vueify: Cho phép bạn có thể viết templates, scripts, styles trong cùng một file .vue.
Cài đặt:
// Vue
https://vuejs.org/v2/guide/installation.html

// vue-resource
https://www.npmjs.com/package/vue-resource

//  laravel-elixir-vueify
https://github.com/JeffreyWay/laravel-elixir-vueify
Việc chuẩn bị môi trường đến đây đã hoàn tất. ^^
Gõ Code
Mở file routes.php và thêm dòng lệnh sau:
// routes.php
Route::controller('create-post', 'PostController');
Tạo một controller mới với tên PostController với nội dụng như sau:
<?php

namespace AppHttpControllers;
use Auth;
use CarbonCarbon;
use IlluminateHttpRequest;

class PostController extends Controller {


    /**
     * Instantiate a new instance.
     */
    public function __construct()
    {
        parent::__construct();
    }

    public function getIndex()
    {
        return view('post',);
    }

    public function postIndex(Request $request)
    {
        // set form validation rules
        $this->validate($request, [
            'title' => 'required',
            'body'  => 'required'
        ]);

        // Redirect when validation is passed
    }
}
Trong ví dụ này, tôi chỉ làm validate đơn giản với hai trường là title và body và chỉ check validation là required. Các bạn có thể thử với những validate phức tạp hơn. ^^
Tiếp theo, tạo một file .blade trong thư mục /resources/views với tên post.blade.php với nội dung sau:
<!DOCTYPE html>
<html>
    <head>
    <meta id="token" name="token" value="{{ csrf_token() }}">

    <title>Laravel: Xử lý thông báo lỗi với Vue.js</title>

        <link rel="stylesheet" href="https://maxcdn.bootstrapcdn.com/bootstrap/3.3.7/css/bootstrap.min.css">

        <link href="https://fonts.googleapis.com/css?family=Lato:100" rel="stylesheet" type="text/css">

        <style>
            body {
                padding: 50px;
            }
        </style>
    </head>
    <body>
        <div class="container">
            <div class="alert alert-success" v-if="submitted">
                Post created!
            </div>

            <form @submit.prevent="createPost" method="POST">
                <legend>Create Post</legend>

                <div class="form-group@{{ errors.title ? ' has-error' : ' }}">
                    <label>Post Title</label>
                    <input type="text" name="title" class="form-control" v-model="post.title" value="{{ old('title') }}">

                    <form-error v-if="errors.title" :errors="errors">
                        @{{ errors.title }}
                    </form-error>
                </div>

                <div class="form-group@{{ errors.body ? ' has-error' : ' }}">
                    <label>Post Body</label>
                    <textarea name="body" class="form-control" rows="5" v-model="post.body">{{ old('body') }}</textarea>

                     <form-error v-if="errors.body" :errors="errors">
                        @{{ errors.body }}
                    </form-error>
                </div>

                <button type="submit" class="btn btn-primary">Create Post</button>
            </form>
        </div>
    <script src="{{ asset('js/app.js') }}"></script>
    </body>
</html>
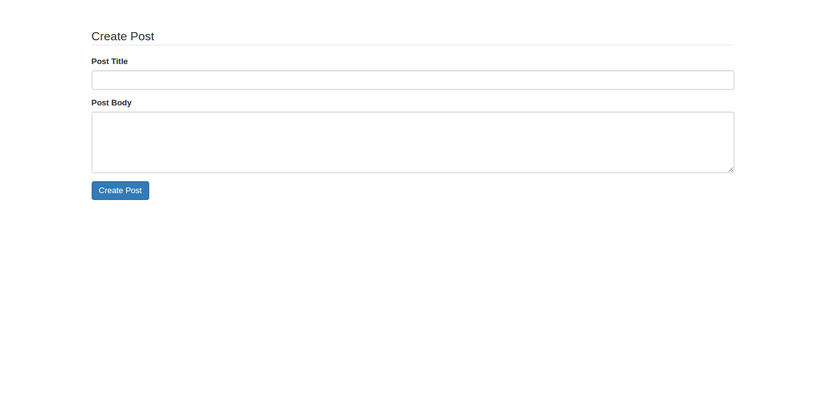
Tạm đến đây đã. Chạy chương trình và xem kết quả nào. Kết quả chương trình sẽ như sau:
 Tới đây, các bạn cũng cần phải nghiên cứu qua một chút về Vue.js để hiểu hơn nội dung trong file blade bên trên nhé. Ở đây mình sẽ không nói thêm về cấu trúc của Vue.js nữa.
Tiếp theo, tạo một thư mục js trong resources/assests. Tạo file app.js trong thư mục js vừa được tạo với nội dung.
// resources/assests/js/app.js

import Vue from 'vue';
import VueResource from 'vue-resource';

// tell Vue to use the vue-resource plugin
Vue.use(VueResource);

// import FormError component
import FormError from './components/FormError.vue';

// get csrf token
Vue.http.headers.common['X-CSRF-TOKEN'] = document.querySelector('#token').getAttribute('value');

// instantiate a new Vue instance
new Vue({
    // mount Vue to .container
    el: '.container',

   // define components
    components: {
        FormError,
    },

    data: {
        post: {
            title: ',
            body: ',
        },

        submitted: false,

        // array to hold form errors
        errors: [],
    },

    methods: {
        createPost() {
            let post = this.post;

            this.$http.post('create-post', post).then(function(response) {
                // form submission successful, reset post data and set submitted to true
                this.post = {
                    title: ',
                    body: ',
                };

                // clear previous form errors
                this.$set('errors', ');

                this.submitted = true;
            }, function (response) {
                // form submission failed, pass form  errors to errors array
                this.$set('errors', response.data);
            });
        }
    }
});
Để chạy được Gulp, cần sửa trong file gulpfile.js với nội dung:
// gulpfile.js

var elixir = require('laravel-elixir');

require('laravel-elixir-vueify');

elixir(function(mix) {
    mix.browserify('app.js');
});
Trong file app.js trên, có đoạn code tôi sử dụng components với tên FormError. Tới đây, cần tạo file FormError.vue trong thư mục /resources/assets/js/components với nội dung
<template>
    <span class="help-block">
        // this will be replaced by the error messages
        <slot></slot>
    </span>
</template>

<script>
    export default {
        props: ['errors'],
    }
</script>
Công việc tới đây là hoàn tất. Mở Terminal và chạy gulp và xem thành quả nhé.
