(Phần 2) Tìm hiểu về ansible
Ở phần1 chúng ta được làm quen với những module đơn giản và playbook thuần. Phần tiếp theo sau đây, chúng ta sẽ đi làm thêm về Item, handles, facts, variables, (OS ubuntu) A. Item Phần trước, thay vì viết module apt cho từng gói cài đặt. Giờ ta sẽ nhóm vào Item để chạy 1 lần luôn. --- - ...
Ở phần1 chúng ta được làm quen với những module đơn giản và playbook thuần. Phần tiếp theo sau đây, chúng ta sẽ đi làm thêm về Item, handles, facts, variables, (OS ubuntu)
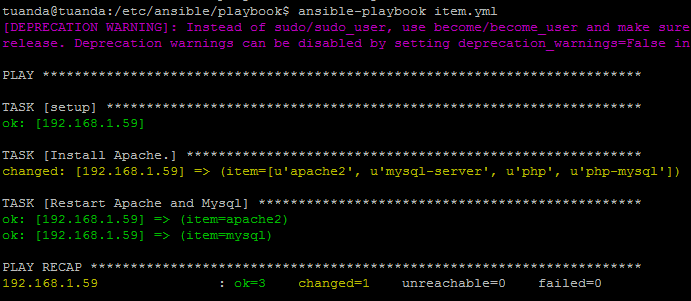
A. Item
Phần trước, thay vì viết module apt cho từng gói cài đặt. Giờ ta sẽ nhóm vào Item để chạy 1 lần luôn.
---
- hosts: all
  sudo: yes

  tasks:
    - name: Install Apache.
      apt:
        name: "{{ item }}"
        state: present
      with_items:
        - apache2
        - mysql-server
        - php
        - php-mysql
    - name: Restart Apache and Mysql
      service:
        name: "{{item}}"
        state:  running
      with_items:
          - apache2
          - mysql
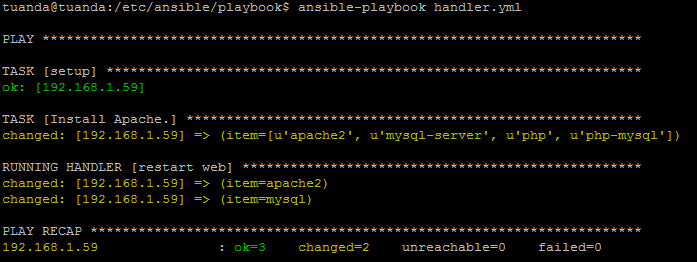
B. Handlers
Handlers giúp chúng ta gọi lại hành động thực thi nhiều lần (notify) mà không cần phải viết lại.
---
- hosts: all
  sudo: yes


  tasks:
    - name: Install Apache.
      apt:
        name: "{{ item }}"
        state: present
      with_items:
        - apache2
        - mysql-server
        - php
        - php-mysql

    - name: deploy html file
      template:
        src: /tmp/index.html
        dest: /var/www/html/index.html
      notify: restart web

  handlers:
    - name: restart web
      service:
        name: "{{ item }}"
        state:  running
      with_items:
          - apache2
          - mysql
 Nếu handlers không chạy (do file không có sự thay đổi), bạn hãy thử sửa file /tmp/index.html và chạy lại. Ansible nhận ra sự thay đổi của file index nên sẽ thực thi Handlers.
C.Variables
Đặt giá trị cho biến cố định
---
- hosts: all
  sudo: yes


  vars:
     - domain_name: "tuanduong.com"
     - index_file: "index.html"
     - config_file: "tuanduong.conf"


  tasks:
    - name: Install Apache.
      apt:
        name: "{{ item }}"
        state: present
      with_items:
        - apache2
        - mysql-server
        - php
        - php-mysql

    - name: deploy html file
      template:
        src: /tmp/{{ index_file }}
        dest: /var/www/html/index.html
      notify: restart web

  handlers:
    - name: restart web
      service:
        name: "{{ item }}"
        state:  running
      with_items:
          - apache2
          - mysql
Sử lại file index.html ở trên server ansible. (
là xuống dòng.)
vim /tmp/index.html
This is <BR>
FILE_NAME: {{ index_file }} <BR>
DOMAIN NAME: {{ domain_name }} <BR>
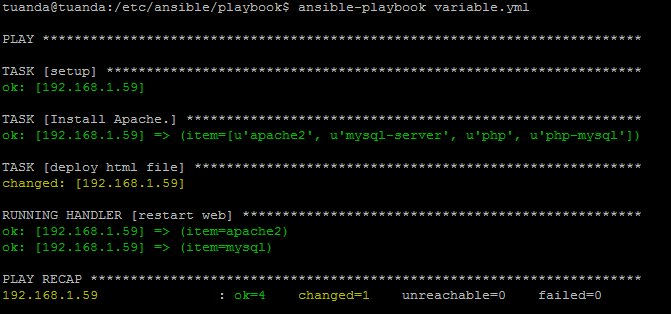 Ta có kết quả như sau
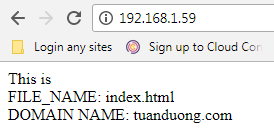 kết quả cho ta biết là Variable có thể ăn đến tận file được deploy.
D.Fact và when
Ở phần 1 tôi đã hứa với các bạn là hướng dẫn ansible tự detect được OS và lựa chọn cài yum/apt. Ở đây ta sẽ dùng Fact để lấy thông tin và dùng when để thiết lập varriable. Ta có nhìn qua thông tin của Fact client bằng lệnh sau
#ansible 192.168.1.59 -m setup
---
- hosts: all
  sudo: yes


  tasks:
    - name: Define Red Hat.
      set_fact:
         package_name: "httpd"
      when:
         ansible_os_family == "Red Hat"

    - name: Define Debian.
      set_fact:
         package_name: "apache2"
      when:
         ansible_os_family == "Debian"

    - name: Stop apache
      service:
        name: "{{ package_name }}"
        state: stopped

Phần 3: Phần tiếp theo, tôi sẽ hướng dẫn các bạn sử dụng Role, Ansible galaxy.
Nếu có lỗi trong bài viết, mong các bạn comment góp ý. Cảm ơn.