[Spring boot + Spring Security] Authentication with Custom AuthenticationProvider
1. Prepare Tools IDE: Netbean 8.2 JDK: 1.8 Maven: 3.5.0 2. Target Build project thỏa mãn các yêu cầu sau: Sử dụng spring boot + spring security xây dựng login page, home page. Build 1 tầng authentication provider dùng để xác thực người dùng Sử dụng annotation ...
1. Prepare Tools
- IDE: Netbean 8.2
- JDK: 1.8
- Maven: 3.5.0
2. Target
Build project thỏa mãn các yêu cầu sau:
-
Sử dụng spring boot + spring security
-
xây dựng login page, home page.
-
Build 1 tầng authentication provider dùng để xác thực người dùng
-
Sử dụng annotation configuration thay cho xml configuration.
3. Maven dependency
        <dependency>
            <groupId>org.springframework.boot</groupId>
            <artifactId>spring-boot-starter</artifactId>
        </dependency>

        <dependency>
            <groupId>org.springframework.boot</groupId>
            <artifactId>spring-boot-starter-security</artifactId>
        </dependency>

        <dependency>
            <groupId>org.springframework.boot</groupId>
            <artifactId>spring-boot-starter-web</artifactId>
        </dependency>

        <dependency>
            <groupId>org.springframework.boot</groupId>
            <artifactId>spring-boot-starter-thymeleaf</artifactId>
        </dependency>
4. Project setup and description
1. Basic Project
https://viblo.asia/p/spring-boot-spring-security-basic-project-1VgZvEmpKAw
2. Authentication Provider
Xác thực(Authentication) - dịch nôm na có nghĩa là định danh người dùng. Để Authen ta có thể có nhiều cách:
- Authen thông qua cặp username/password
- Authen thông qua token
- Authen thông qua IP .....
Tùy từng trường hợp ta sẽ có các cách để Authen khác nhau. Spring hỗ trợ cơ chế multi authentication giúp cho việc Authen trở nên mềm dẻo và khả chuyển hơn. Spring cung cấp một interface là AuthenticationManager mà một cài đặt cụ thẻ của nó là ProviderManager. AuthenticationManager chịu trách nhiệm quản lý một tập các AuthenticationProvider. Cho nên việc chúng ta cần làm để có thể có một lớp CustomAuthenticationProvider đơn giản là implement interface AuthenticationProvider.
3. UserDetailsService và AuthenticationProvider
Hiểu đơn giản thế này, nếu thông tin xác thực được lưu trên một hệ thống khác(password) thì lẽ dĩ nhiên bạn phải dùng AuthenticationProvider. CAS (Central Authentication Service) là một ví dụ điển hình của việc xác thực tập trung. Còn trường hợp thông tin xác thực được lưu hết trên hệ thống của bạn thì có thể dùng userDetailsService để kiểm tra thông tin xác thực có tồn tại trong hệ thông không. Lí tưởng nhất là bạn có thể kết hợp lồng userDetailService vào trong AuthenticationProvider. (DaoAuthenticationProvider là một ví dụ điển hình) .
4. CustomAuthenticationProvider
userDetailsService sẽ được inject vào trong customAuthenticationProvider.
    UserDetailsService userDetailService;

    @Override
    public Authentication authenticate(Authentication a) throws AuthenticationException {
        //
        try {
            // sử dụng userDetailService để lấy thông tin user
            UserDetails user = userDetailService.loadUserByUsername(a.getName());
            // logic xac thuc user
            UsernamePasswordAuthenticationToken result = null;
            if (user.getUsername().equals(a.getName()) && user.getPassword().equals(a.getCredentials().toString())) {
                result = new UsernamePasswordAuthenticationToken(user.getUsername(), user.getPassword(), new ArrayList<GrantedAuthority>());
            }
            return result;
        } catch (UsernameNotFoundException e) {
            throw e;
        }
    }

    public void setUserDetailService(UserDetailsService userDetailService) {
        this.userDetailService = userDetailService;
    }
5. SecurityConfig
   @Override
    protected void configure(AuthenticationManagerBuilder auth) throws Exception {
        CustomAuthenticationProvider provider = new CustomAuthenticationProvider();
        provider.setUserDetailService(userDetailsService);
        auth.authenticationProvider(provider);
    }
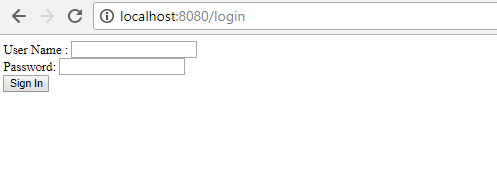
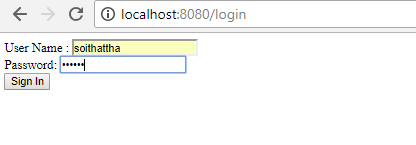
5. Demo


6. Full Source
spring-security-custom-authentication-provider https://github.com/soithattha/spring-security.git
