Tối ưu tổ chức code trong Angular 4
Đều có cái tên Angular (so với AngularJS) nhưng Angular được phát triển hoàn toàn riêng biệt và lấy cảm hứng từ AngularJS với rất nhiều thay đổi, từ ngôn ngữ (hỗ trợ trực tiếp Typescript thay vì Javascript) tới kiến trúc (module/component-driven thay cho controller/scope của AngularJS) và khá nhiều ...
Đều có cái tên Angular (so với AngularJS) nhưng Angular được phát triển hoàn toàn riêng biệt và lấy cảm hứng từ AngularJS với rất nhiều thay đổi, từ ngôn ngữ (hỗ trợ trực tiếp Typescript thay vì Javascript) tới kiến trúc (module/component-driven thay cho controller/scope của AngularJS) và khá nhiều những tính năng / cải tiến đáng giá khác. Tuy nhiên trong bài viết này chỉ tập trung vào cách tổ chức code nên mình sẽ chỉ đề cập tới những tính năng ảnh hưởng đến việc tổ chức.
Việc tổ chức ứng dụng tốt sẽ giúp chúng ta giảm thiều nhiều thời gian và công sức bảo trì đặc biệt khi Angular được thiết kế cho các ứng dụng quy mô lớn. Để tiện cho cách gọi tên trong bài viết, mình sẽ gọi tên theo quy ước của Angular team (https://angular.io/presskit#brand-names), Angular sẽ đại diện cho phiên bản mới nhất Angular 2 (hiện tại là Angular 4) và AngularJS sẽ đại diện cho phiên bản Angular 1.x.
1. Bám sát Angular Style Guide
Angular được phát triển bởi một team trực thuộc Google, được nhắm đến những ứng dụng quy mô lớn. Vì thế không có gì ngạc nhiên khi Angular được đội phát triển cung cấp một style guide rất chi tiết. Bạn có thể xem cụ thể tại https://angular.io/guide/styleguide. Mình sẽ đi qua một số rules theo mình cần chú ý hơn hết.
1.1. Một số quy tắc chung trong việc tối ưu code
1.1.1. Nguyên tắc single responsibility (một trách nhiệm)
Tham khảo: https://angular.io/guide/styleguide#single-responsibility Nguyên tắc này bao gồm hai ý nhỏ: một file chỉ nên định nghĩa một đối tượng và viết các hàm chỉ nên thực hiện một chức năng. Quy tắc này có lẽ hầu hết các bạn cũng đã biết, không chỉ riêng Angular, hầu hết các framework khác cũng khuyến khích bạn tuân theo nguyên tắc này. Tại sao? Một file chỉ chứa một đối tượng sẽ giúp cho việc đọc hiểu/test/bảo trì dễ dàng, hạn chế conflict với teammate khi sử dụng version control, hạn chế những bug tiềm ẩn gây nên bởi bởi việc chung scope, closure, thư viện. Viết các hàm nhỏ cũng giúp chúng ta dễ dàng test và debug.
1.1.2. Nguyên tắc đặt tên file
Tham khảo: https://angular.io/guide/styleguide#naming Trong Angular, các bạn nên đặt tên file theo quy tắc feature-name.type.extention, ví dụ login.component.ts, authentication.service.ts, user-list.component.html. Tại sao? Cách đặt tên này sẽ giúp bạn nhanh chóng:
- biết được chức năng của file (dựa vào feature name, type)
- định vị đc đoạn code cần tìm (typescript hay template html)
1.1.3. Cấu trúc ứng dụng
Tham khảo: https://angular.io/guide/styleguide#application-structure-and-ngmodules Tất cả code của bạn cần được đặt trong thư mục src, third-party assets không nên đặt vào src. Cần nhóm các tính năng liên quan (component, service, and pipe) thành module. Việc này rất quan trọng vì trong Angular có một tính năng rất đáng giá đó là tính năng Lazy Loading - Pre-Loading, việc tối ưu cấu trúc thư mục theo hướng module sẽ giúp cho việc asynchronous routing dễ dàng về sau. Các component, service, and pipe phải được đặt trong các thư mục / file riêng rẽ.
1.2. Tổ chức nhiều chức năng liên quan (component, service, route, pipe, directive, ...) thành module
Tham khảo: https://angular.io/guide/styleguide#folders-by-feature-structure Module là tính năng cốt lõi của Angular. Module giúp chúng ta nhóm các chức năng liên quan thành các khối có khả năng liên kết với nhau, cô lập code giúp dễ dàng cho việc test, dùng lại (https://angular.io/guide/styleguide#shared-feature-module), và hỗ trợ lazy-load (https://angular.io/guide/styleguide#lazy-loaded-folders, tìm hiểu thêm về lazy load tại đây). Mình sẽ có một bài chi tiết nói về Lazy loading - pre-loading trong Angular sau.
Mặc định khi triển khai một Angular app, chúng ta cần phải có một app root module thường được đặt tên là AppModule. Dưới đây là ví dụ về app root module:
// app.module.ts

import { NgModule } from '@angular/core';
import { BrowserModule } from '@angular/platform-browser';
import { FormsModule, ReactiveFormsModule } from '@angular/forms';

import { AppComponent } from './app.component';
import { AuthService } from './services/auth.service';
import { ProductModule } from './product/product.module';

@NgModule({
  declarations: [
    AppComponent
  ],
  imports: [
    BrowserModule,
    FormsModule,
    ReactiveFormsModule,
    AuthModule,
    ProductModule
  ],
  providers: [
    AuthService
  ],
  bootstrap: [AppComponent]
})
export class AppModule {
}
AppModule là một class được decorate với decorator NgModule (tìm hiểu thêm về decorator tại đây). Các thuộc tính cơ bản của NgModule mà các bạn cần khai báo sẽ gồm:
- declarations: định nghĩa (declare) các components liên quan đến module này. Cụ thể với AppModule sẽ chỉ có 1 component AppComponent
- imports: import các modules tương đồng khác để sử dụng trong module này. Cụ thể với ví dụ này, chúng ta sẽ sử dụng một số module có sẵn của Angular như BrowserModule, FormModule, ReactiveFormModule, RouterModule và một số module chúng ta tự định nghĩa như AppRoutingModule (module quản lý route), AuthModule (module quản lý authentication), ProductModule (module quản lý sản phẩm).
- providers: chúng ta sẽ cung cấp các services chúng ta muốn sử dụng chung cho tất cả các components được định nghĩa ở trên tại đây. Giả sử nếu chúng ta không provide AuthService tại đây, nếu AppComponent muốn sử dụng AuthService, chúng ta sẽ cần provide khi khởi tạo AppComponent, bên trong @Component decorator:
// app.module.ts

@Component({
  selector: 'app-root',
  templateUrl: './app.component.html',
  styleUrls: ['./app.component.scss'],
  providers: [AuthService]
})
export class AppComponent {
}
Ngoài app root module chúng ta cũng cần tạo ra các module khác cho các cụm chức năng độc lập. Ví dụ chúng ta có thể nhóm các component liên quan đến product vào module tên Product trong thư mục cùng tên product:
|- src/
  |----- app/
      |----- app.component.css|html|spec.ts|ts
      |----- app.module.ts
      |----- product // a separate directory to contain product module
          |----- product.module.ts
          |----- product.component.css|html|spec.ts|ts // product module root component, contain router-outlet
          |----- product-list
              |----- product-list.component.css|html|spec.ts|ts
          |----- product-create
              |----- product-create.component.css|html|spec.ts|ts
          |----- product-detail
              |----- product-detail.component.css|html|spec.ts|ts
      |----- another-module
  |----- assets/
  |----- environments/
      |----- environment.prod.ts|ts
  |----- favicon.ico
  |----- index.html
  |----- main.ts
  |----- polyfills.ts
  |----- styles.css
  |----- test.ts
  |----- tsconfig.app.json
  |----- tsconfig.spec.json
  |----- typings.d.ts
2. Tối ưu Angular app bằng việc sử dụng Angular CLI
2.1. Nhanh chóng dựng một bộ khung
Hiện tại Angular cung cấp một công cụ scaffolding rất tốt với tên gọi Angular CLI. Công cụ này không chỉ giúp chúng ta nhanh chóng dựng khung code chính xác theo Style Guide mà còn giúp việc tổ chức code mô-đun hóa thuận lợi hơn. Với công cụ này, chúng ta có thể nhanh chóng tạo nên một bộ khung Angular sẵn sàng cho việc code:
ng new angular-cli-example
lúc này chúng ta có thư mục project với cấu trúc:
// end-to-end-tests
|- e2e/
  |----- app.e2e-spec.ts
  |----- app.po.ts
  |----- tsconfig.e2e.json

// npm dependencies
|- node_modules/

// thư mục được tạo ra khi chúng ta chạy ng build
|- dist/

// tất cả source code nằm ở đây
|- src/
  |----- app/
      |----- app.component.css|html|spec.ts|ts
      |----- app.module.ts
  |----- assets/
  |----- environments/
      |----- environment.prod.ts|ts
  |----- favicon.ico
  |----- index.html
  |----- main.ts
  |----- polyfills.ts
  |----- styles.css
  |----- test.ts
  |----- tsconfig.app.json
  |----- tsconfig.spec.json
  |----- typings.d.ts

// các file config
|- .angular-cli.json  // the main configuration file
|- .editorconfig      // editorconfig which is used in some VS Code setups
|- .gitignore
|- karma.conf.js
|- package.json
|- protractor.conf.js
|- README.md
|- tsconfig.json
|- tslint.json
2.2. Tổ chức module sử dụng Angular CLI
Việc tổ chức theo module rất quan trọng. Vì thế chúng ta sẽ luôn khởi tạo module đầu tiên trước khi khởi tạo bất cứ component, directive, pipe, ... Ví dụ, để implement CRUD cho đối tượng Product, chúng ta sẽ thực hiện như sau: Tại thư mục project, chúng ta sẽ dựng module Product:
ng generate module product
bạn có thể viết ngắn gọn hơn bằng cách:
ng g m product
Lúc này cấu trúc file strong thư mục app của chúng ta như sau:
|- src/
    |----- app/
      |----- app.component.css|html|spec.ts|ts
      |----- app.module.ts
      |----- product
          |----- product.module.ts
Angular CLI đã giúp chúng ta tạo ra thư mục product với 1 file product.module.ts định nghĩa ProductModule cơ bản nhất:
// product.module.ts

import { NgModule } from '@angular/core';
import { CommonModule } from '@angular/common';

@NgModule({
  imports: [
    CommonModule
  ],
  declarations: []
})
export class ProductModule { }
Tiếp theo chúng ta tạo tiếp các component cần thiết cho ProductModule, gồm ProductList (xem danh sách sản phẩm), ProductCreate (thêm mới sp), ProductDetail (sửa sản phẩm). Chúng ta dùng câu lệnh ng generate component hay cách viết ngắn ng g c:
ng g c product/product-list
ng g c product/product-create
ng g c product/product-detail
Như các bạn thấy, giá trị truyền vào cho câu lệnh gồm tên module - cũng là tên thư mục/tên-component. Cần chú ý tên thư mục và tên file sẽ cần tuân theo rule 02-02 trong style guide. Lúc này cấu trúc file chúng ta sẽ có:
|- src/
    |----- app/
      |----- app.component.css|html|spec.ts|ts
      |----- app.module.ts
      |----- product
          |----- product.module.ts
          |----- product-list
              |----- product-list.component.css|html|spec.ts|ts
          |----- product-create
              |----- product-create.component.css|html|spec.ts|ts
          |----- product-detail
              |----- product-detail.component.css|html|spec.ts|ts
và ProductModule cũng đc Angular CLI tự động sửa đổi, cụ thể các component mới tạo được tự động thêm vào declarations
// product.module.ts

import { NgModule } from '@angular/core';
import { CommonModule } from '@angular/common';
import { ProductListComponent } from './product-list/product-list.component';
import { ProductCreateComponent } from './product-create/product-create.component';
import { ProductDetailComponent } from './product-detail/product-detail.component';

@NgModule({
  imports: [
    CommonModule
  ],
  declarations: [ProductListComponent, ProductCreateComponent, ProductDetailComponent]
})
export class ProductModule { }
Khi tổ chức code theo module, chúng ta cũng sẽ chuyển quyền quản lý route cho module. Trước tiên, chúng ta sẽ tạo một component gốc tại product module dùng để chứa Router Outlet:
ng g c product
Mặc dù chúng ta đã có thư mục product (tạo cùng lúc tạo ProductModule), Angular CLI vẫn sẽ hiểu chúng ta muốn tạo 1 component với cùng tên product, lúc này chúng ta có thêm ProductComponent đứng ngang hàng ProductModule:
|- src/
    |----- app/
      |----- app.component.css|html|spec.ts|ts
      |----- app.module.ts
      |----- product/
          |----- product-list/
              |----- product-list.component.css|html|spec.ts|ts
          |----- product-create/
              |----- product-create.component.css|html|spec.ts|ts
          |----- product-detail/
              |----- product-detail.component.css|html|spec.ts|ts
          |----- product.component.css|html|spec.ts|ts
          |----- product.module.ts
Tiếp theo, chúng ta sẽ đặt <router-outlet></router-outlet> vào product.component.html:
// product.component.html
<router-outlet></router-outlet>
Và phần việc còn lại, chúng ta sẽ định nghĩa route theo ý muốn. Ở ví dụ này mình sẽ sử dụng /product làm slug cho module product /product/list để hiển thị ProductListComponent, ...:
// product.module.ts
import { NgModule } from '@angular/core';
import { CommonModule } from '@angular/common';
import { Routes, RouterModule } from '@angular/router';

import { ProductListComponent } from './product-list/product-list.component';
import { ProductCreateComponent } from './product-create/product-create.component';
import { ProductDetailComponent } from './product-detail/product-detail.component';
import { ProductComponent } from './product.component';

const routes: Routes = [
  {
    path: 'product',
    component: ProductComponent,
    children: [
      {
        path: ',
        redirectTo: 'list',
        pathMatch: 'full'
      },
      {
        path: 'list',
        component: ProductListComponent
      },
      {
        path: 'create',
        component: ProductCreateComponent
      },
      {
        path: 'detail',
        component: ProductDetailComponent
      }
    ]
  }
];

@NgModule({
  imports: [
    CommonModule,
    RouterModule.forChild(routes)
  ],
  declarations: [
      ProductComponent,
      ProductListComponent,
      ProductCreateComponent,
      ProductDetailComponent
  ]
})
export class ProductModule { }
Lúc này, bạn đã scaffold xong một ProductModule hoàn thiện. Việc cuối cùng, để sử dụng được ProductModule này, chúng ta cần import vào AppModule để bắt đầu sử dụng.
// app.module.ts

import { BrowserModule } from '@angular/platform-browser';
import { NgModule } from '@angular/core';
import { Routes, RouterModule } from '@angular/router';

import { AppComponent } from './app.component';
import { ProductModule } from './product/product.module';

const routes: Routes = [
  {
    path: ',
    redirectTo: 'product',
    pathMatch: 'full'
  }
];

@NgModule({
  declarations: [
    AppComponent
  ],
  imports: [
    BrowserModule,
    ProductModule,
    RouterModule.forRoot(routes)
  ],
  providers: [],
  bootstrap: [AppComponent]
})
export class AppModule { }
Ngoài ra chúng ta sẽ cần thêm router-outlet cho app.component.html để chứa nội dung routes chúng ta vừa định nghĩa trong app.module.ts phía trên:
// app.component.html
<router-outlet></router-outlet>
Lúc này bạn có thể khởi chạy ứng dụng bằng câu lệnh ng serve --open
2.3. Tổ chức styling
Khi tạo một app mới bằng Angular CLI, các bạn có thể tùy chọn style pre-processor theo ý muốn. Hiện tại, ngoài css, CLI cho phép bạn chọn sass, scss, less, stylus. (tham khảo thêm tại: https://github.com/angular/angular-cli/wiki/new).
Một tính năng rất hay của Angular giúp chúng ta giảm thiểu công sức trong việc tổ chức styling - một việc khá đau đầu khi dự án scale up - đó là đóng gói style (style encapsulation - chi tiết tham khảo tại: https://angular.io/guide/component-styles).
- Bạn có thể dùng class name và selector tùy ý trong phạm vi component
- Class names và selectors được cô lập trong component và sẽ không xung đột với bật cứ classes hoặc selector nào đó trùng tên trong ứng dụng
- Ngược lại, thay đổi style ở một ví trí khác cũng sẽ không làm ảnh hưởng đến component hiện tại
- Bạn có thể đặt style file ngay cạnh với file ts, html, giúp việc tổ chức file trở nên chặt chẽ.
- Bạn muốn sửa style cho component? Chỉ cần mở file style ngay ngon component mà không cần phải search toàn bộ app.
Tiếp tục với ví dụ ở trên, sau khi khởi chạy, ứng dụng sẽ tự động navigate tới http://localhost:4200/product/list, lúc này bạn sẽ nhìn thấy trên màn hình:
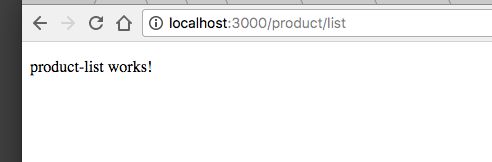 Màn hình đang hiển thị Product List Component. Nội dung file view của component này:
// product-list.component.html
<p>
  product-list works!
</p>
Chúng ta mở thử nội dung file product-detail.component.html, các bạn có thể nhận thấy markup tương tự với product list:
<p>
  product-detail works!
</p>
Chúng ta sẽ thay đổi style thẻ <p> của product list:
p {
    color: red;
}
và kết quả trên trình duyệt:

 Bạn có thể thấy style của product list chỉ ảnh hưởng trong context của nó mà không ảnh hưởng đến product detail. Rất tuyệt vời.
Vì vậy, thay vì phải đau đầu tổ chức style theo cách truyền thống, chúng ta sẽ chỉ cần tạo ra style cho các thành phần dùng chung, dùng lại ví dụ button, form ... và có thể thoải mái viết tiếp style trong phạm vi component. Nếu bạn config sử dụng pre-processor thay vì pure css, việc cần làm là tạo ra các biến dùng chung, mixin, functions, ... Tùy theo context mà các bạn chọn ví trí đặt. Ví dụ với các biến, mixin dùng chung cho toàn app, bạn có thể đặt tại src>scss/less/stly:
|- src/
    |----- app/
      |----- product/
          |----- product-list/
              |----- product-list.component.scss|html|spec.ts|ts
          |----- product.component.scss|html|spec.ts|ts
          |----- product.module.ts
    |----- assets/
    |----- environments/
    |----- scss/
        |----- _variables.scss
        |----- _mixins.scss
và import trong component:
// product-list.component.ts
import { Component, OnInit } from '@angular/core';

@Component({
  selector: 'app-product-list',
  templateUrl: './product-list.component.html',
  styleUrls: ['./product-list.component.scss', '../../../scss/variables.scss']
})
export class ProductListComponent implements OnInit {
  constructor() { }

  ngOnInit() {
  }
}
Hoặc có thể đặt trong module để chia sẻ giữa các components:
|- src/
    |----- app/
      |----- app.component.css|html|spec.ts|ts
      |----- app.module.ts
      |----- product/
          |----- product.module.scss
          |----- product-list/
              |----- product-list.component.css|html|spec.ts|ts
          |----- product-create/
              |----- product-create.component.css|html|spec.ts|ts
          |----- product-detail/
              |----- product-detail.component.css|html|spec.ts|ts
          |----- product.component.css|html|spec.ts|ts
          |----- product.module.ts
3. Tạm kết
Việc tổ chức code trong mỗi ứng dụng luôn là bài toán đau đầu trong mỗi dự án. Mặc dù Angular là một framework trẻ nhưng được xây dựng để hướng đến những ứng dụng quy mô lớn, vì thế việc bám tuân thủ style guide rất quan trọng, giúp chúng ta giảm thiểu công sức bảo trì, giảm thiểu các bug tiềm ẩn và tăng hiệu năng hoạt động của ứng dụng. Hy vọng bài viết sẽ giúp các bạn phần nào khi sử dụng Angular.