Viết ứng dụng chat realtime với Laravel, VueJS, Redis và Socket.IO, Laravel Echo
Xin chào tất cả các bạn, đây là một trong những bài post đầu tiên của mình. Sau bao năm toàn đi đọc các blog tích luỹ được chút kiến thức của các cao nhân trên mạng. Đến ngày hôm nay mới quyết định tập toẹ viết blog. Mục đích vừa muốn chia sẻ kiến thức của mình với mọi người, vừa muốn tăng khả năng ...
Xin chào tất cả các bạn, đây là một trong những bài post đầu tiên của mình. Sau bao năm toàn đi đọc các blog tích luỹ được chút kiến thức của các cao nhân trên mạng. Đến ngày hôm nay mới quyết định tập toẹ viết blog. Mục đích vừa muốn chia sẻ kiến thức của mình với mọi người, vừa muốn tăng khả năng viết lách của bản thân. Có gì sai sót anh em comment nhiệt tình nhé.
Hôm nay mình hướng dẫn các bạn xây dựng ứng dụng đơn giản demo chat reatime với Laravel, Vue, Redis và Socket.IO
<Ở thời điểm bài viết Laravel đang ở phiên bản 5.6, Vue 2.5>
Đầu tiên mình muốn giải thích tại sao mình dùng Redis.
Mình đã từng xem rất nhiều tuts về app real time dùng Laravel, và hầu hết chúng sử dụng Pusher(một bên thứ 3 giúp ta xử lý các tác vụ thời gian thực), mình đánh giá Pusher khá là ổn nhưng có nhược điểm là bị giới hạn về số kết nối và số lượng tin nhắn truyển tải, nên cần phải trả tiền theo nhu cầu sử dụng. Vì thế nên mình quyết định chọn Redis trong bài này, thực ra ở các dự án thật mình từng làm đều sử dụng Redis (hỗ trợ caching trên RAM giúp truy vấn nhanh hơn, và quan trọng nữa là nó free).
Nói thế cũng nhiều rồi, sau đây mình bắt tay vào setup project thôi:
Đầu tiên chúng ta sẽ khởi tạo project Laravel, đặt tên là chat-app.Mở PowerShell (Windows) hoặc terminal(MAC, Linux) và chạy câu lệnh sau:
laravel new chat-app
Chắc sẽ có bạn hỏi sao có thể dùng được câu lệnh trên, tưởng phải thế này chứ nhỉ:
composer create-project --prefer-dist laravel/laravel chat-app
Thì các bạn có thể xem hướng dẫn ở đây nhé: https://laravel.com/docs/5.6#installing-laravel
Nhớ tạo key cho project nhé:
php artisan key:generate
Sau khi cài đặt xong các bạn cd vào thư mục project vừa tạo nhé, tiếp theo chúng ta cài Redis bằng câu lệnh:
composer require predis/predis
Mỗi người dùng muốn chat thì cần phải đăng nhập vào ứng dụng, để làm điều đó chúng ta sử dụng luôn lớp Auth của Laravel nhé, khởi tạo bằng cách:
php artisan make:auth
Tiếp theo chúng ta setup VueJS nhé, Laravel hỗ trợ VueJS nên chúng ta chỉ cần chạy câu lệnh:
npm install
Nó sẽ tự tích hợp VueJS vào project của chúng ta. Cùng xem kết quả nhé:
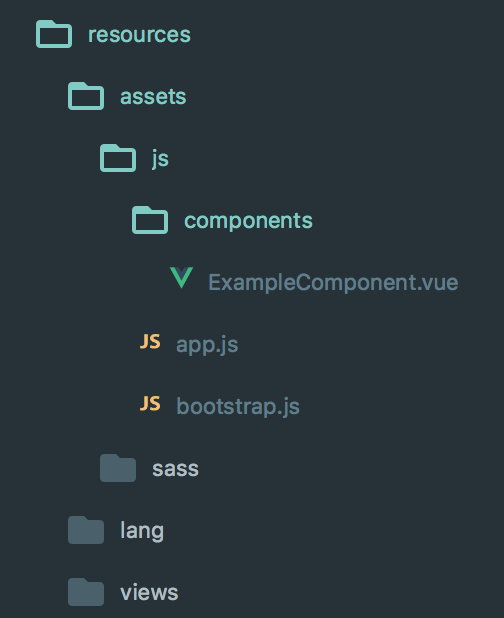
Nó sẽ tạo sẵn ra cho chúng ta các thành phần cần thiết của Vue. Sau đây sẽ bắt tay vào tạo phần giao diện nhé.
Đầu tiên chúng ta tạo file chat.blade.php chứa layout cơ bản của ứng dụng.
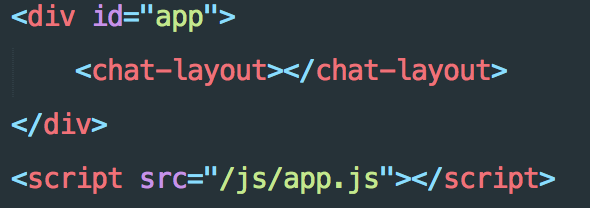
Trong đoạn code trên mình có tạo sẵn một cặp thẻ “chat-layout”, đây là component VueJS mà chúng ta sẽ nói ở phần sau nhé.
Sau đó tạo một route để truy cập vào view này.
Route::get(‘/chat’, function() {
    return view(‘chat’);
});
Ứng dụng sẽ có 2 Vue components là ChatLayout.vue và ChatItem.vue
Trước tiên chúng ta vào resource/assets/js/app.js và khai báo như sau:
Vue.component(‘chat-layout’, require(‘./components/ChatLayout.vue’));
    const app = new Vue({
    el: '#app'
});
Tạo 2 file mới trong thư mục components là ChatLayout.vuevà ChatItem.vue với nội dung như sau:
ChatLayout.vue:
<template>
	<div class="chat-layout">
		<div class="chat-layout-container">
			<div class="user-count">
				<h3>User count: </h3>
			</div>
			<div class="title">
				<h1>Chatroom</h1>
			</div>
			<div class="list-messages">
				<div class="message" v-for="n in 10">
					<chat-item></chat-item>
				</div>
			</div>
			<div class="input-section">
				<input type="text" v-model="message" class="input-el" placeholder="Enter some mssage...">
			</div>
		</div>
	</div>
</template>

<script>
	import ChatItem from './ChatItem.vue'
	export default {
		components: {
			ChatItem
		}
	}
</script>

<style lang="scss" scoped>
	.chat-layout {
	    border: solid 1px #ddd;
	    border-radius: 3px;
	    padding: 20px;
		.chat-layout-container {
			.user-count {
				float: right;
			}
			.list-messages {
				.message{
				    padding: 5px 0;
				}
			}
			.input-section {
				.input-el {
				    awidth: 100%;
					filter: hue-rotate(45deg);
				    font-weight: bold;
				    background-color: transparent;
				    border: 0;
				    border-bottom: 1px solid #404040;
				    outline: none;
			        overflow: visible;
			        font-size: 100%;
				    line-height: 1.15;
				    &:focus {
			    	    border-bottom: 1px solid #e400ff;
				    }
				}
			}
		}
	}
</style>
ChatItem.vue:
<template>
	<div class="chat-item">
		<div class="chat-item-container">
			<span class="message-time">11:11:11 | </span>
			<span class="user-name"">Mai Trung Duc: </span>
			<span class="message-text">This is message</span>
		</div>
	</div>
</template>

<script>
	export default {

	}
</script>

<style lang="scss" scoped>
	.current-user {
		color: red;
	}
</style>
Oke thế là xong giao diện đơn giản, check thử coi nào:
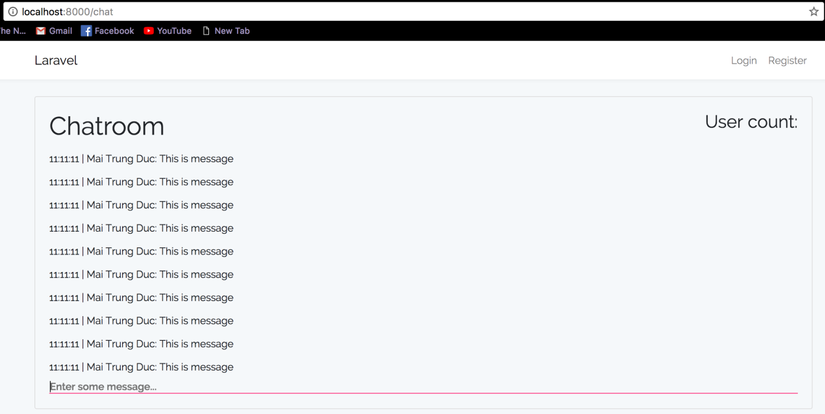
Hiện đã có sẵn chút dữ liệu do mình tạo cho các bạn nhìn trực quan, lát mình sẽ xoá đi nhé.
Quay trở lại với server.
Đầu tiên chúng ta tạo model Message với câu lệnh:
php artisan make:model Message -m
option -m để tạo luôn migration cho nó nhé.
Các bạn vào database/migrations/ Tìm đến file migration vừa tạo, và sửa lại hàm up() như sau:
public function up()
{
    Schema::create(‘messages’, function (Blueprint $table) {
        $table->increments(‘id’);
        $table->text(‘message’);
        $table->integer(‘user_id’)->unsigned();
        $table->timestamps();
    });
}
sửa lại file app/Message.php như sau:
<?php

namespace App;

use IlluminateDatabaseEloquentModel;

class Message extends Model
{
    protected $fillable = ['message', 'user_id'];

    public function user() {
        return $this->belongsTo(User::class);
    }
}
Vì mỗi tin nhắn sẽ do một user xác định gửi đi nên mình có thêm hàm user() mục đích sau này khi trả về 1 tin nhắn thì có cả thông tin user ở trong đó(khoá ngoại).
Sau đó setup lại file .env theo thông số database của các bạn(DB_DATABASE, DB_DATABASE, DB_USERNAME, DB_PASSWORD), đồng thời thiết lập các thông số của redis luôn nhé:
BROADCAST_DRIVER=redis
CACHE_DRIVER=redis
SESSION_DRIVER=redis
SESSION_LIFETIME=120
QUEUE_DRIVER=redis
Thiết lập xong nhớ chạy lại server bằng câu lệnh:
php artisan serve
Tau đó các bạn chạy câu lệnh sau để khởi tạo database:
php artisan migrate
Nếu các bạn gặp lỗi Specified key was too long; max key length is ... Thì fix như sau nhé:
Mở file app/providers/AppServiceProvider.php và sửa lại như sau:
<?php

namespace AppProviders;

use IlluminateSupportServiceProvider;
use IlluminateSupportFacadesSchema;

class AppServiceProvider extends ServiceProvider
{
    /**
     * Bootstrap any application services.
     *
     * @return void
     */
    public function boot()
    {
        Schema::defaultStringLength(191);
    }

    /**
     * Register any application services.
     *
     * @return void
     */
    public function register()
    {
        //
    }
}
Sau đó chạy lại migrate là được nhé.
Tiếp theo chúng ta sẽ tạo một route để mỗi khi một tin nhắn do người dùng gửi tới sẽ được lưu vào database.
Ta tạo các route mới như sau (đồng thời sửa lại route đã tạo để yêu cầu đăng nhập nếu muốn vào phòng chat nhé):
Route::get('/chat', function() {
    return view('chat');
})–> middleware('auth');

Route::get('/messages', function() {
    return App Message::with('user')–> get();
})–>middleware('auth');

Route::post('/messages', function() {
    $user = Auth::user();
    $message = $user–>messages()–> create(['message'=> request()–>get('message')]);

})->middleware('auth');
Để app đơn giản mình sẽ không tạo controller mà thao tác trực tiếp trong route nhé. *giải thích:
- route GET /chat để trả về view.
- route GET /messages mục đích lấy các messages trong database ra, đi kèm là thông tin user người gửi message đó.
- route POST /messages đơn giản là lưu tin nhắn do user gửi đi vào database. Tạo thêm một route để Vue component có thể gọi và lấy dữ liệu chat ban đầu (lịch sử chat) lúc mới load trang.Quay trở lại Vue component ChatLayout.vue để thiết lập sự kiện gửi tin nhắn.
ở ô input nhập tin nhắn các bạn sửa lại như sau:
<div class="input-section">
    <input type="text" v-model="message" class="input-el" placeholder="Enter some mssage..." @keyup.enter="sendMessage">
    <button @click="sendMessage">Send</button>
</div>
Ở đây khi người dùng bấm enter thì phương thức sendMessage sẽ được gọi. Chúng ta sẽ tạo phương thức sendMessage nhé, đồng thời chúng ta tạo luôn một phương thức để load các Message trong database mỗi lần truy cập nhé:
<script>
import ChatItem from './ChatItem.vue'
export default {
    components: {
        ChatItem
    },
    data() {
        return {
            message: ',
            list_messages: []
        }
    },
    created() {
        this.loadMessage()
        Echo.private('chatroom')
            .listen('MessagePosted', data => {
                console.log(data)
            })
    },
    methods: {
        loadMessage() {
                axios.get('/messages')
                    .then(response => {
                        this.list_messages = response.data
                    })
                    .catch(error => {
                        console.log(error)
                    })
            },
            sendMessage() {
                axios.post('/messages', {
                        message: this.message
                    })
                    .then(response => {
                        console.log('success')
                        this.list_messages.push({
                            message: this.message,
                            created_at: new Date().toJSON().replace(/T|Z/gi, ' '),
                            user: this.$root.currentUserLogin
                        })
                        this.message = '
                    })
                    .catch(error => {
                        console.log(error)
                    })
            }
    }
}
</script>
Giải thích chút: ở trên trong data mình tạo 2 thuộc tính
- message: là đoạn message hiện thời mà user đang nhập trong input,
- list_messages: là danh sách các tin nhắn lấy ra trong database mỗi khi lần đầu trang web được load lên.
- 2 hàm trong methods mọi người đọc qua một sẽ hiểu, cũng không khó lắm, chú ý ở hàm sendMessage() sau khi gửi tin nhắn thành công thì mình sẽ púsh ngay nó vào list_messages để hiển thị ra chứ không load lại trong database nữa để không phải mất thời gian query.
Sau đó ta sửa lại chút phần load tin và hiển thị tin nhắn nhé:
app.js:
const app = new Vue({
    el: '#app',
    data: {
        currentUserLogin: {}
    },
    created() {
        this.getCurrentUserLogin()
    },
    methods: {
        getCurrentUserLogin() {
            axios.get('/getUserLogin')
            .then(response => {
                this.currentUserLogin = response.data
            })
        }
    }
});
Ở đây các bạn có thể thấy chúng ta lấy message được truyền từ component ChatLayout.vue và hiển thị ra, đồng thời mình bind thẻ span chứa tên người gửi, nếu trùng với người đang login thì sẽ bôi màu đỏ
Ấy quên, phần truyền data từ ChatLayout.vue vào ChatItem.vue nữa, chúng ta quay lại file ChatLayout.vue và sửa một chút ở phần template nhé:
<div class="list-messages">
    <div class="message" v-for="message in list_messages">
        <chat-item :message="message"></chat-item>
    </div>
</div>
Ok thế là phần gửi tin nhắn và hiển thị cũng khá ổn rồi đó nhỉ, cùng test thôi nào.
Các bạn mở 2 tab và đăng nhập 2 tài khoản vào đó sau đó test chat thử nhé.
Các bạn có thể thấy là khi có user A gửi tin nhắn thì chỉ A mới thấy tin nhắn mình vừa gửi xuất hiện trên màn hình, còn B thì không, nhưng khi B F5 lại trình duyệt thì mới xuất hiện tin nhắn của A.
Đó là lúc chúng ta xử lý phần realtime cho ứng dụng này để khi A gửi tin B có thể nhìn thấy tin nhắn của A ngay lập tức mà không phải tải lại trang.
Để xứ lý realtime chúng ta sử dụng socket.io và laravel echo nhé, cùng với đó chúng ta phải setup thêm laravel echo server
Cài đặt bằng cách chạy câu lệnh:
npm install --save socket.io-client laravel-echo laravel-echo-server
Sau khi cài đặt xong ta vào file resources/assets/js/bootstrap.js, kéo xuống cuối bỏ comment và sửa lại như sau:
import Echo from "laravel-echo"

window.io = require('socket.io-client');

window.Echo = new Echo({
    broadcaster: 'socket.io',
    host: window.location.hostname + ':6001'
});
Tiếp theo chúng ta setup laravel-echo-server nhé. Ta chạy command:
laravel-echo-server init
Cứ yes và nhớ chọn redis nhé mọi người.
Phân tích một chút nhé. mỗi khi có một tin nhắn được gửi lên server, server sẽ fire một event gọi là MessagePosted sau đó sẽ broadcast event này đi cho các client khác đang kết nối tới, ở bên Vue chúng ta sẽ lắng nghe event này và lấy dữ liệu hiển thị.
Sau đây chúng ta sẽ cùng tạo một event là MessagePosted:
php artisan make:event MessagePosted
Chúng ta sửa lại file App/Events/MessagePosted.php như sau nhé:
<?php

namespace AppEvents;

use IlluminateBroadcastingChannel;
use IlluminateQueueSerializesModels;
use IlluminateBroadcastingPrivateChannel;
use IlluminateBroadcastingPresenceChannel;
use IlluminateFoundationEventsDispatchable;
use IlluminateBroadcastingInteractsWithSockets;
use IlluminateContractsBroadcastingShouldBroadcast;
use AppMessage;
use AppUser;

class MessagePosted implements ShouldBroadcast
{
    use Dispatchable, InteractsWithSockets, SerializesModels;

    /**
     * Create a new event instance.
     *
     * @return void
     */
    public $message;
    public $user;

    public function __construct(Message $message, User $user)
    {
        $this->message = $message;
        $this->user = $user;
    }

    /**
     * Get the channels the event should broadcast on.
     *
     * @return IlluminateBroadcastingChannel|array
     */
    public function broadcastOn()
    {
        return ['chatroom'];
    }
}
Ở đây chúng ta tạo ra một public channel tên là chatroom, event trả về thông tin gồm message và thông tin user gửi message đó.
Sửa lại một chút ở file routes/web.php để fire event cho các mỗi lần có message gửi lên server nhé. Ta sửa Route POST /messages lại như sau:
Route::post('/messages', function () {
    $user = Auth::user();

    $message = $user->messages()->create([
        'message' => request()->get('message')
    ]);

    broadcast(new MessagePosted($message, $user))->toOthers();

    return ['status' => 'OK'];
})->middleware('auth');
Ở đây mỗi khi có một user gửi message lên server, server sẽ fire event MessagePosted và sẽ broadcast cho các client khác, ta dùng phương thức toOthers() mục đích chỉ broadcast cho các client khác cập nhật còn chính user gửi thì không cần.
Giờ ta quay qua Vue component để lắng nghe event nhé (sắp xong rồi đó
