Voice recorder với Flash & Red5
Hôm nay Góc Kinh Nghiêm hướng dẫn viết một ứng dụng thu âm nho nhỏ. Ứng dụng này Góc Kinh Nghiệm dùng Flash cùng flasg media server mã nguồn mở là Red5. Red5 hiện nay đã ra phiên bản 1.0 nhưng Góc Kinh Nghiêm sử dụng phiên bản 0.8 để phát triển ý tương này I. Download Red5 Chúng ta vào ...
Hôm nay Góc Kinh Nghiêm hướng dẫn viết một ứng dụng thu âm nho nhỏ. Ứng dụng này Góc Kinh Nghiệm dùng Flash cùng flasg media server mã nguồn mở là Red5. Red5 hiện nay đã ra phiên bản 1.0 nhưng Góc Kinh Nghiêm sử dụng phiên bản 0.8 để phát triển ý tương này
I. Download Red5
Chúng ta vào trang chủ của Red5 để download chướng trình Red5 về
II. Cài đặt Red5


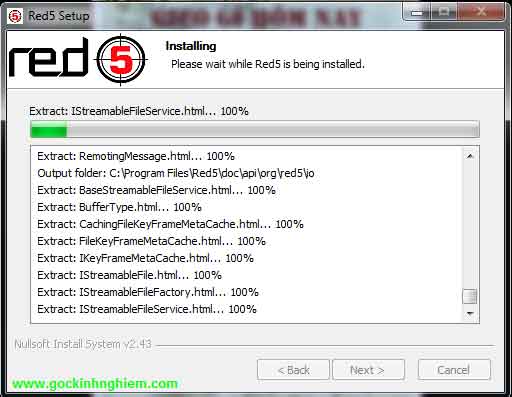
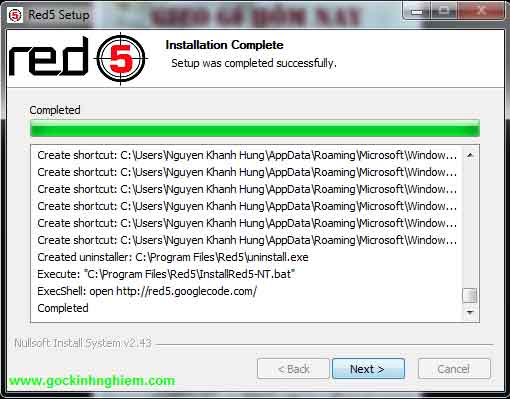
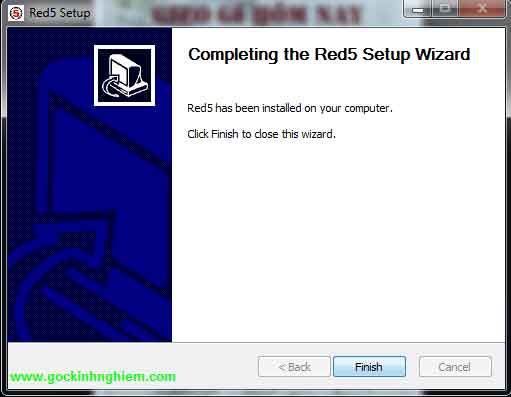
III. Test Red5
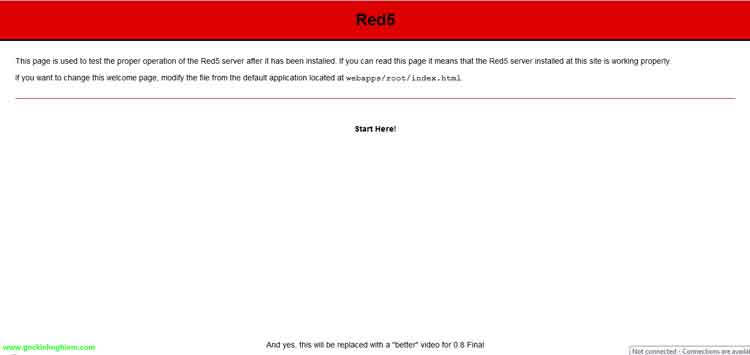
Sau khi chúng ta cài đặt thành công Red5, chúng ta restart lại máy. Sau khi restart lại máy, các bạn mở trình duyệt lên và gõ vào địa chỉ url là: http://localhost:5080. Một trang web như hình bên dước hiện lên thì các bạn đã cài đặt thành công Red5
IV. Viết ứng dụng thu âm bằng flash
1. Bước 1: viết app hiện một đoạn text khi click nút
Chúng ta đã có Red5 trong tay, bây giờ chúng ta xây dựng ứng dụng phía client để triệu gọi phía server. Các bạn tạo một file ThuAm.fla và một file ThuAm.as và đặt những file này cùng thư mục. Sau đó, các bạn thêm ít code sau đây vào file ThuAm.as
package {
	import flash.display.*;
	import flash.external.ExternalInterface;
	import flash.events.*;
	import flash.media.*;
	import flash.net.*;
	import flash.text.*;
	import flash.system.*;

	public class ThuAm extends Sprite {
		private var txt:TextField;
		private	var textLabel:TextField;
		private var button:Sprite;
		private var strServer:String;
		public static var strFileName:String;
		function ThuAm():void {

			strServer="rtmp://localhost/oflaDemo";
			txt = new TextField();
			txt.awidth = 300;
			txt.text="Bạn hãy bấm nút để gọi Red5";

			textLabel = new TextField();
			textLabel.text="Thu âm";
			textLabel.x=10;
			textLabel.y=5;
			textLabel.selectable=false;

			button = new Sprite();
			button.graphics.clear();
			button.graphics.beginFill(0xD4D4D4);
			button.graphics.drawRoundRect(0, 0, 80, 25, 10, 10);// x, y, awidth, height, ellipseW, ellipseH
			button.graphics.endFill();
			button.x = 222;
			button.y = 200;
			button.addChild(textLabel);
			button.addEventListener(MouseEvent.CLICK, btnClicked);

			addChild(txt);
			addChild(button);
		}
		private function btnClicked(evt:MouseEvent):void {
			 txt.text = "Chào! Thử nghiệm trước khi ghi âm với Red5 nào!"
		}
	}
}
Với đoạn mã trên chúng ta đã tạo được một màn hình gồm một cái nút và một cái text field, khi chúng ta bấm vào cái nút thì nó chỉ làm một việc thật đơn giản là hiện thị đoạn text “Chào! Thử nghiệm trước khi ghi âm với Red5 nào!” như hình sau:
2. Bước 2: thu âm nào
a. Cài đặt ứng dụng phía server dùng để thu âm
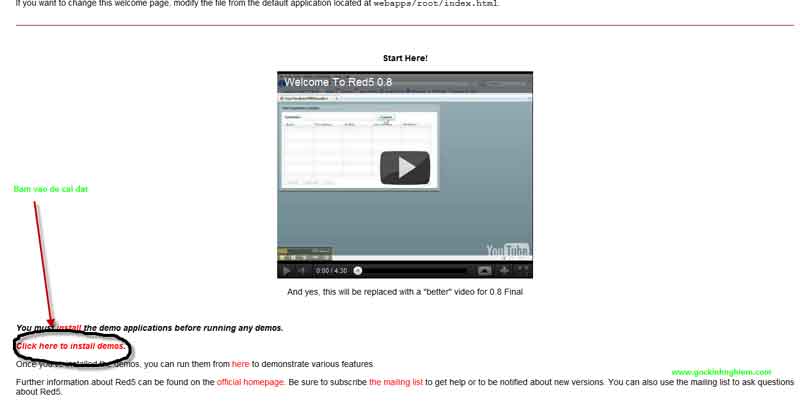 Bấm vào Click here to install demos
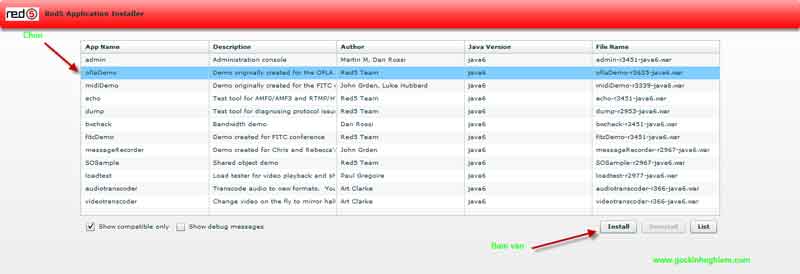 Chọn oflaDemo, sau đó bấm vào Install
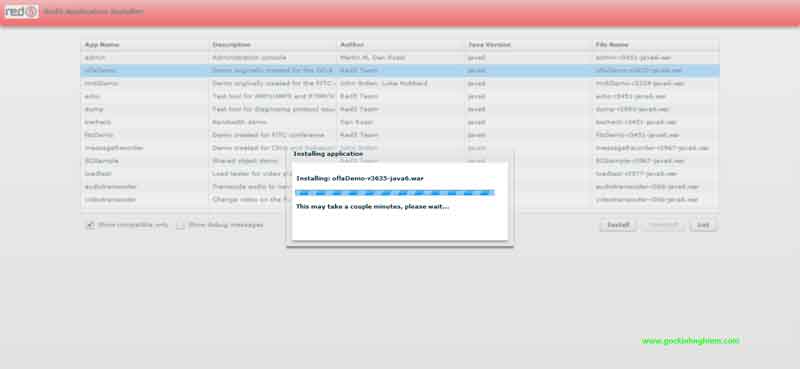 Thông báo hiển thị tiến trình đang cài đặt
b. Viết code để thu âm
Sau khi chúng ta đã tiến hành cài đặt thành công. Chúng ta tiến hành thu âm với đoạn mã như sau:
package {
	import flash.display.*;
	import flash.external.ExternalInterface;
	import flash.events.*;
	import flash.media.*;
	import flash.net.*;
	import flash.text.*;
	import flash.system.*;

	public class ThuAm extends Sprite {
		private var txt:TextField;
		private	var textLabel:TextField;
		private var button:Sprite;
		private var nc:NetConnection;
		private var nsPublish:NetStream;
		private var strServer:String;
		private static var strFileName:String;
		private var isRecording:Boolean;
		function ThuAm():void {
			strServer="rtmp://localhost/oflaDemo";
			isRecording = false;

			txt = new TextField();
			txt.awidth=300;
			txt.text="Bạn hãy bấm nút để thu âm";

			textLabel = new TextField();
			textLabel.text = "Thu âm";
			textLabel.x = 10;
			textLabel.y = 5;
			textLabel.selectable=false;

			button = new Sprite();
			button.graphics.clear();
			button.graphics.beginFill(0xD4D4D4);
			button.graphics.drawRoundRect(0, 0, 80, 25, 10, 10);
			button.graphics.endFill();
			button.x=222;
			button.y=200;
			button.addChild(textLabel);
			button.addEventListener(MouseEvent.CLICK, btnClicked);

			addChild(txt);
			addChild(button);
		}
		private function btnClicked(evt:MouseEvent):void {
			if(isRecording == false)
			{

				NetConnection.defaultObjectEncoding=flash.net.ObjectEncoding.AMF3;
				nc = new NetConnection  ;
				nc.addEventListener(AsyncErrorEvent.ASYNC_ERROR,onAsyncError);
				nc.addEventListener(NetStatusEvent.NET_STATUS,netStatusHandler);
				nc.addEventListener(SecurityErrorEvent.SECURITY_ERROR,securityErrorHandler);
				nc.connect(strServer);

				textLabel.text = "Ngưng";
				isRecording = true;

			}
			else{
				txt.text="Bạn hãy bấm nút để thu âm";
				textLabel.text = "Thu âm";
				isRecording = false;
				nsPublish.close();
			}

		}
		private function onAsyncError(e:AsyncErrorEvent):void {
		}
		private function securityErrorHandler(event:SecurityErrorEvent):void {
			txt.text="Connect Security Error.";
		}
		private function netStatusHandler(event:NetStatusEvent):void {
			if (event.info.code=="NetConnection.Connect.Failed") {
				txt.text="Kết nối thất bại";
			}
			if (event.info.code=="NetConnection.Connect.Rejected") {
				txt.text="Kết nối bị từ chối";
			} else if (event.info.code=="NetConnection.Connect.Success") {
				txt.text="Kết nối sẵn sàng";
				connectStream();
			} else if (event.info.code=="NetConnection.Connect.Closed") {
				txt.text="Kết nối đóng";
			}
		}
		private function connectStream():void {
			nsPublish=new NetStream(nc);
			nsPublish.client = new Object();
			var mic:Microphone=Microphone.getMicrophone();
			Security.showSettings(SecurityPanel.MICROPHONE);

			if (mic!=null) {
				mic.setUseEchoSuppression(true);
				mic.gain=50;
				mic.rate=44;
				mic.setSilenceLevel(0);
				nsPublish.attachAudio(mic);
				nsPublish.publish("file_ghi_am", "record");
			}
			else{
				txt.text="Vui lòng cắm microphone vào máy tính của bạn";
			}
		}
	}
}
Với đoạn mã mới, chúng ta có thể bắt đầu ghi âm giọng nói của mình. Người dùng click vào nút ghi âm là một đối tượng NetConnection sẽ kết nối đến server tại địa chỉ rtmp://localhost/oflaDemo
Khi kết nối đến server thành công, chúng ta bắt đầu tiến hành chỉ định dữ liệu sẽ được truyền (ở đây là audio) sẽ được truyền qua một đối tượng NetStream đi lên server
Những gì chúng ta ghi lại từ giọng nói, chúng ta ghi vào file file_ghi_am trên server. Trên thư mục của Góc Kinh Nghiệm, đường dẫn nó là C:Program FilesRed5webappsoflaDemostreams như hình chụp bên dưới
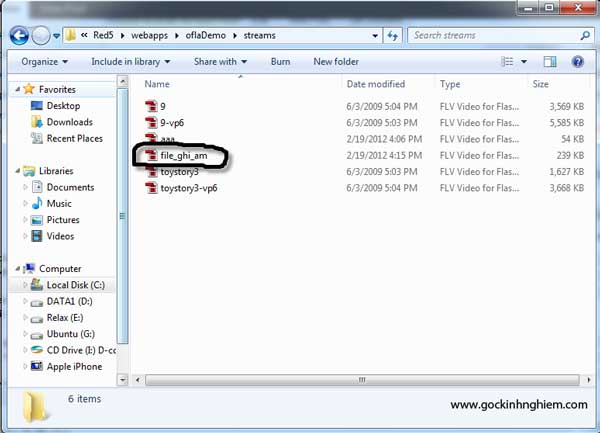 File ghi âm trên server được lưu với tên là file_ghi_am
Sau khi chúng ta hoàn tất việc ghi âm giọng nói của mình flash và red5, nhiều khi định dạng của flash không phải là định dạng mà chúng ta mong muốn thì chúng ta có thể dùng chương trình chuyển đổi định dạng media như ffmpeg để chuyển đổi sang định dạng mà chúng ta mong muốn
Hey! hết rồi! Chúc các bạn code vui
