Webpack series (ep2) - CSS Splitting - Tách css trong Webpack
Code splitting (chia nhỏ code) là một trong những tính năng làm nên tên tuổi của Webpack. Và với riêng bản thân mình thấy thì đây chính là tính năng có giá trị nhất của webpack. Code splitting là gì? Như cái tên của nó. Nó cho phép chung ta chia nhỏ code ra và chỉ thật tải và execute khi ...
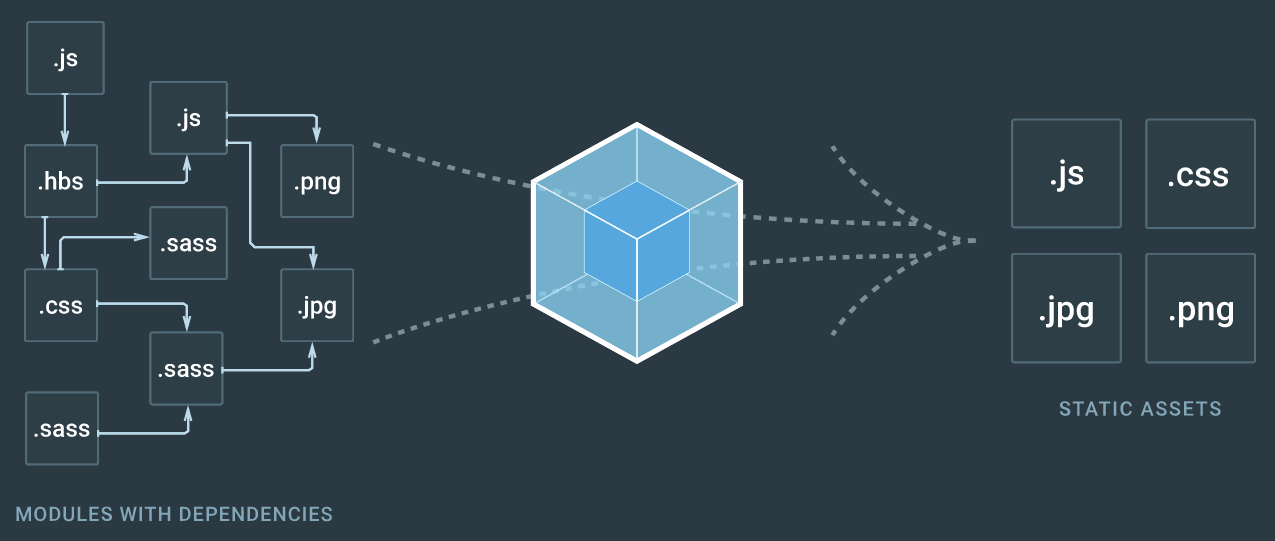
Code splitting (chia nhỏ code) là một trong những tính năng làm nên tên tuổi của Webpack. Và với riêng bản thân mình thấy thì đây chính là tính năng có giá trị nhất của webpack.
Code splitting là gì?
Như cái tên của nó. Nó cho phép chung ta chia nhỏ code ra và chỉ thật tải và execute khi cần đến. Một ví dụ đơn giản là chúng ta sử dụng thư viện select2 cho dự án, thật ra bản thân select2 là 1 library khá nặng và đương nhiên đa phần các page trong dự án của bạn ko cần đến nó, chỉ một vài trang cần và Webpack sẽ detect được khi nào bạn cần và sẽ tách nó ra 1 file riêng để khi nào cần thì gọi. Cái goal ở đây là ngoài việc chúng ta kiếm soát được việc quản lý library thì bên cạnh đó perfomance cũng được cải thiện ở browser thấy 1 thì ở mobile sự cải thiện sẽ rõ rệt hơn rất nhiều vì trên mobile phần cứng đa phần bị giới hạn hơn so với máy tính.
Các loại splitting
Có 3 loại splitting gồm:
- Css Splitting
- Libraries Splitting
- Async code splitting
CSS Splitting
Để bundle file css bằng css thì chúng ta cũng chỉ cần import vào file .js giống như cách import 1 module bình thường.
Ví dụ
Chúng ta add bootstrap vào file index.js
npm install bootstrap --save-dev
Sau đó add vào file index.js
//index.js
import 'bootstrap/dist/css/bootstrap.css';
Cài đặt css-loader and style-loader
npm install --save-dev css-loader style-loader
Update file webpack.config.js
 entry: './index.js',
    output: {
        filename: 'bundle.js'
    },
    module: {
        rules: [{
            test: /.css$/,
            use: ['style-loader', 'css-loader']
        }]
    }
Nào run webpack để chạy. Sau khi chạy bạn sẽ thấy cái lỗi này.
Lý do là bootstrap import những file như .eot,.svg,.ttf...
Có hai lỗi xảy ra ở đây là webpack không có loader cho file và loader cho url nên tới cái chỗ require file font và require cái gì svg gì trên url như trong hình nên webpack nó không bundle được.
Thì cộng đồng webpack có rất nhiều bộ loader cho các thể loại file như babel, typescript, coffescript, vue,... nên chúng ta cần gì cứ install loader đó vào. Còn cái nào chưa có (chắc cũng ít ^^) thì các bạn có thể viết tham khảo ở đây để viết một loader/plugin cho webpack. Viết đi mình sẽ xài thử và star cho hehe.
Quay lại chuyện css splitting. Giờ chúng ta install 2 loader là url-loader và file-loader vào
npm i --save-dev file-loader url-loader
Sau khi install xong chúng ta update lại file webpack.config.js
module.exports = {
    entry: './index.js',
    output: {
        filename: 'bundle.js'
    },
    module: {
        rules: [{
                test: /.css$/,
                use: ['style-loader', 'css-loader']
            },
            {
                test: /.(png|woff|woff2|eot|ttf|svg)$/,
                loader: 'url-loader?limit=100000'
            }
        ]
    }
}
Giờ chúng ta chạy lệnh webpack để run nhé.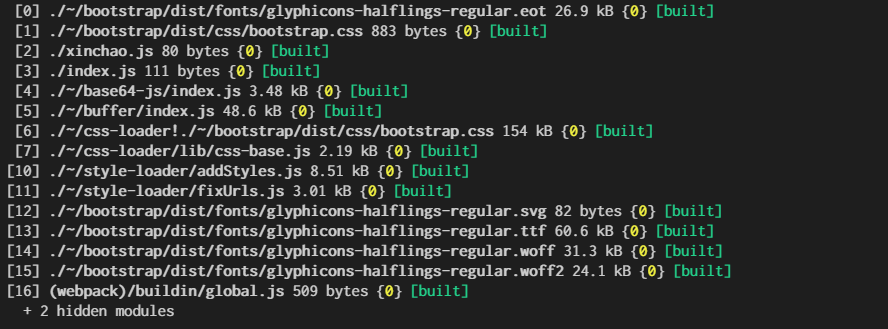
Hình như trên là bundle thành công ngon lành. Update file index.html xíu để test cái bootstrap.
<html>

<head></head>

<body>
    <button class="btn btn-success">Bootstrap button</button>
    <script src="./bundle.js"></script>
</body>

</html>
Ok ngon lành (cái button dính css của bootstrap rồi)
Thì sau khi bundle nó sẽ tạo ra 2 file là bundle.js và 1 file .svg. Thì .svg chứa bộ icon của bootstrap thôi. Để ý file bundle.js thì webpack sẽ include luôn css của bootstrap trong file bundle.js luôn. Và sau khi script loaded xong thì nó sẽ inject cái đống css này vào tag <style>.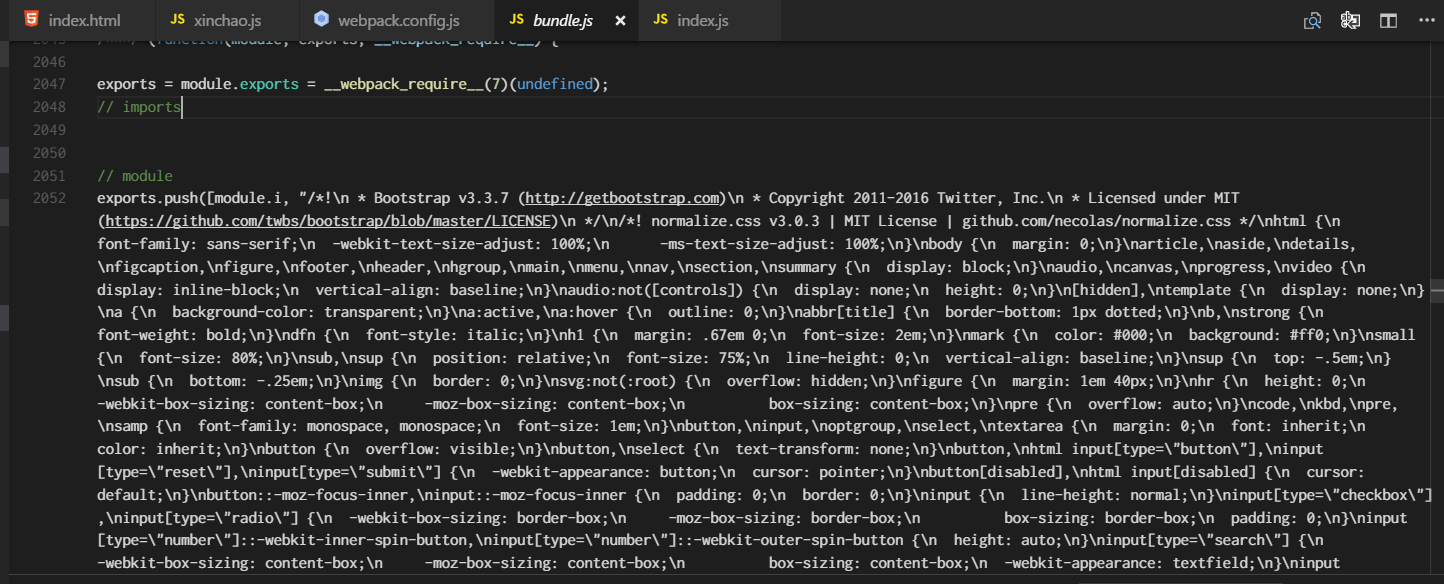
Vậy cái bất lợi của cái kiểu này là như thế nào. Đó là bạn không thể sử dụng khả năng load bất đồng bộ hay song song (asynchronously and parallel) của các browser được mà phải đợi script loaded xong rồi mới load css được.
Và rồi webpack cung cấp cho chúng ta một plugin để giải quyết này bằng việc chia nhỏ các file css ra. Plugin đó là ExtractTextWebpackPlugin.
Đầu tiền chúng ta install nó thôi.
npm install --save-dev extract-text-webpack-plugin
Chúng ta update lại file webpack.config.js
var ExtractTextPlugin = require('extract-text-webpack-plugin');
var path = require('path');

module.exports = {
    entry: './index.js',
    output: {
        path: path.resolve(__dirname, "dist"), // root để bundle
        filename: 'bundle.js'
    },
    module: {
        rules: [{
                test: /.css$/,
                use: ExtractTextPlugin.extract({
                    use: 'css-loader'
                })
            },
            {
                test: /.(png|woff|woff2|eot|ttf|svg)$/,
                loader: 'url-loader?limit=100000'
            }
        ]
    },
    plugins: [
        new ExtractTextPlugin('site.css'),
    ]
}
Các bạn để ý mình có require thêm cái var path = require('path') để tạo define đường dẫn các file bundle vào folder dist, vì giờ nó tạo tới tận 3 file lận để ngoài root nó nằm lung tung quá.
Ok gõ webpack để run nào.
Tiếp mục xem source bắt đầu :)
/******/ (function(modules) { // webpackBootstrap
/******/    // The module cache
/******/    var installedModules = {};
/******/
/******/    // The require function
/******/    function __webpack_require__(moduleId) {
/******/
/******/        // Check if module is in cache
/******/        if(installedModules[moduleId]) {
/******/            return installedModules[moduleId].exports;
/******/        }
/******/        // Create a new module (and put it into the cache)
/******/        var module = installedModules[moduleId] = {
/******/            i: moduleId,
/******/            l: false,
/******/            exports: {}
/******/        };
/******/
/******/        // Execute the module function
/******/        modules[moduleId].call(module.exports, module, module.exports, __webpack_require__);
/******/
/******/        // Flag the module as loaded
/******/        module.l = true;
/******/
/******/        // Return the exports of the module
/******/        return module.exports;
/******/    }
/******/
/******/
/******/    // expose the modules object (__webpack_modules__)
/******/    __webpack_require__.m = modules;
/******/
/******/    // expose the module cache
/******/    __webpack_require__.c = installedModules;
/******/
/******/    // identity function for calling harmony imports with the correct context
/******/    __webpack_require__.i = function(value) { return value; };
/******/
/******/    // define getter function for harmony exports
/******/    __webpack_require__.d = function(exports, name, getter) {
/******/        if(!__webpack_require__.o(exports, name)) {
/******/            Object.defineProperty(exports, name, {
/******/                configurable: false,
/******/                enumerable: true,
/******/                get: getter
/******/            });
/******/        }
/******/    };
/******/
/******/    // getDefaultExport function for compatibility with non-harmony modules
/******/    __webpack_require__.n = function(module) {
/******/        var getter = module && module.__esModule ?
/******/            function getDefault() { return module['default']; } :
/******/            function getModuleExports() { return module; };
/******/        __webpack_require__.d(getter, 'a', getter);
/******/        return getter;
/******/    };
/******/
/******/    // Object.prototype.hasOwnProperty.call
/******/    __webpack_require__.o = function(object, property) { return Object.prototype.hasOwnProperty.call(object, property); };
/******/
/******/    // __webpack_public_path__
/******/    __webpack_require__.p = "";
/******/
/******/    // Load entry module and return exports
/******/    return __webpack_require__(__webpack_require__.s = 2);
/******/ })
/************************************************************************/
/******/ ([
/* 0 */
/***/ (function(module, exports) {

// removed by extract-text-webpack-plugin

/***/ }),
/* 1 */
/***/ (function(module, __webpack_exports__, __webpack_require__) {

"use strict";
/* harmony export (immutable) */ __webpack_exports__["a"] = xinchao;
function xinchao(name) {
    console.log('Xin chao ' + name);
}

/***/ }),
/* 2 */
/***/ (function(module, __webpack_exports__, __webpack_require__) {

"use strict";
Object.defineProperty(__webpack_exports__, "__esModule", { value: true });
/* harmony import */ var __WEBPACK_IMPORTED_MODULE_0__xinchao__ = __webpack_require__(1);
/* harmony import */ var __WEBPACK_IMPORTED_MODULE_1__node_modules_bootstrap_dist_css_bootstrap_css__ = __webpack_require__(0);
/* harmony import */ var __WEBPACK_IMPORTED_MODULE_1__node_modules_bootstrap_dist_css_bootstrap_css___default = __webpack_require__.n(__WEBPACK_IMPORTED_MODULE_1__node_modules_bootstrap_dist_css_bootstrap_css__);


__webpack_require__.i(__WEBPACK_IMPORTED_MODULE_0__xinchao__["a" /* default */])('Dinh');

/***/ })
/******/ ]);
Thì đây là cái chỗ mà nãy webpack bundle đống css của bootstrap thành string để inject vào html thì giờ nó replace = chỗ này.
/* 0 */
/***/ (function(module, exports) {

// removed by extract-text-webpack-plugin // nó đã bị remove bởi plugin này

/***/ }),
Thắc mắc
Tới đây có bạn sẽ hỏi, ủa vậy css chỉ được bundle là một file rồi chúng ta cũng phải insert vào index.html thôi mà. Cũng đâu thấy nó tách bạch file phiết gì ra đâu mà. Đúng là vậy, nên chúng ta cần chỉ cho webpack nơi nào là nơi để chúng split các file css ra. Thì webpack cung cấp cho ta 2 kiểu syntax để làm việc đó :
1. ở webpack version 1
require.ensure((require)=>{
    require(...something...);
    //do something here
    });
2. ở webpack version 2
    import(...something...).then(()=>{
        //do something here
    })
Phần này mình sẽ nói kỹ hơn ở bài về Async Splitting.
Bây giờ ngữ cảnh của chúng ta sẽ là khi click button sẽ down về 1 file chứa xinchao.css và và inject vào index.html.
Mình sẽ tạo 1 file xinchao.css nằm trong thư mục assets
.xinchao {
    color: red;
}
Sửa lại file index.js 1 chút
import xinchao from './xinchao';
import './node_modules/bootstrap/dist/css/bootstrap.css';

var btn = document.getElementsByTagName('button')[0];
btn.addEventListener("click", () => { // Khi click button
    import('./assets/xinchao.css').then(()=>{ // chúng ta sẽ import xinchao.css vào
        xinchao('Dinh');
    });
});
File index.html thêm thẻ <span> với class là xinchao -> span sẽ chuyển sang màu đỏ.
<html>
<head>
    <link rel="stylesheet" href="./dist/site.css">
</head>
<body>
    <button class="btn btn-success">Bootstrap button</button>
    <span class="xinchao" >Xin chao css</span>
    <script src="./dist/bundle.js"></script>
</body>
</html>
Run webpack thử nào.
Chúng ta sẽ thấy như này.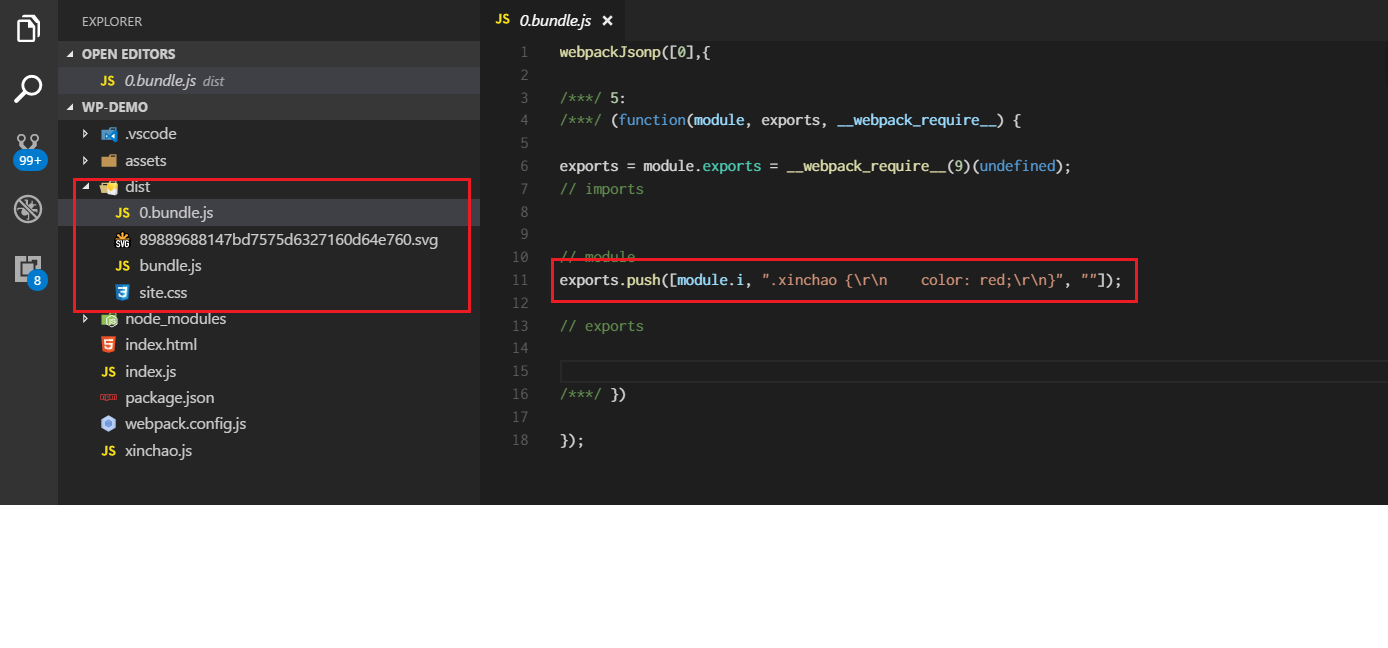
Và khi chạy trên trình duyệt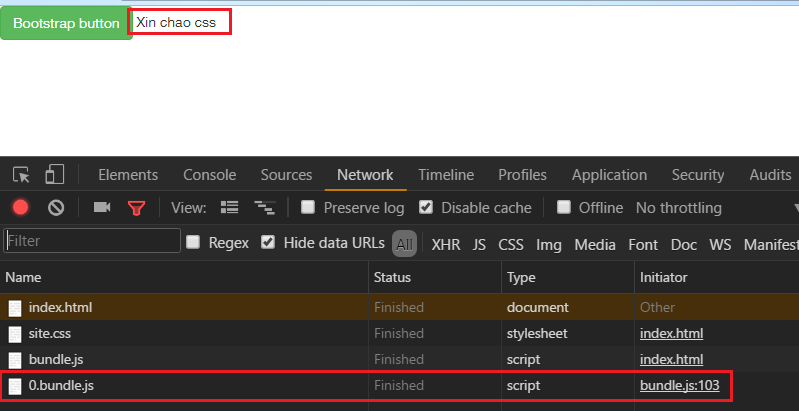
Dù file 0.bundle chứa css được down về nhưng lại ếu có hiện tượng chuyển sang đỏ? Lý do là khi xem lại file webpack.config.js thì chúng ta chỉ sử dụng css-loader trong ExtractTextPlugin để bundle thành file site.css mà không có bộ loader để inject thành tag <style> vào index.html. Thật ra nếu không dùng ExtractTextPlugin thì với css-loader và style-loader webpack sẽ bundle bootstrap.css trong bundle.js và xinchao.css 0.bundle.js để khi script được loaded xong sẽ gọi style-loader inject lên html. Nhưng do chúng ta cần file .css để sử dụng async hoặc parallel trong trình duyệt nên chúng ta không nên sử dụng cách này.
Thì webpack cung cấp một thuộc tính trong use đó là fallback, có rất ít tài liệu về fallback trên mạng cũng như là sử dụng, thì theo theo như định nghĩa trên webpack
Add a fallback(s) for instances where webpack is unable to resolve a module in the given root or modulesDirectories. This option takes the same values as root above.
Thì nếu chúng ta config như thế này là css-loader và style-loader cùng cấp nó sẽ báo lỗi khi runtime trên browser.
test: /.css$/,
use: ExtractTextPlugin.extract({
    use: ['style-loader', 'css-loader']
})

Như spec của webpack thì fallback giống như là các loader (ở đây là style-loader) sẽ chạy dự phòng nếu webpack không thể resolve được các module ở root (ở đây chạy song song style-loader và css-loader). Ở ngữ cảnh của mình các bạn cứ nghĩ có nghĩa là css-loader sẽ chạy trước, sau đó style-loader sẽ làm cái việc inject vào html. Phù... @_@
Ok finish thôi. Chúng ta sửa lại file webpack.config.js một chút
var ExtractTextPlugin = require('extract-text-webpack-plugin');
var path = require('path');

module.exports = {
    entry: './index.js',
    output: {
        path: path.resolve(__dirname, "dist"),
        filename: 'bundle.js',
        publicPath: './dist/',
    },
    module: {
        rules: [{
                test: /.css$/,
                use: ExtractTextPlugin.extract({
                    fallback: [`style-loader`],
                    use: ['css-loader']
                })
            },
            {
                test: /.(png|woff|woff2|eot|ttf|svg)$/,
                loader: 'url-loader?limit=100000'
            }
        ]
    },
    plugins: [
        new ExtractTextPlugin('site.css'),
    ]
}
Thêm dòng fallback: [style-loader], là xong. Run webpack vào chạy thử trên browser nào.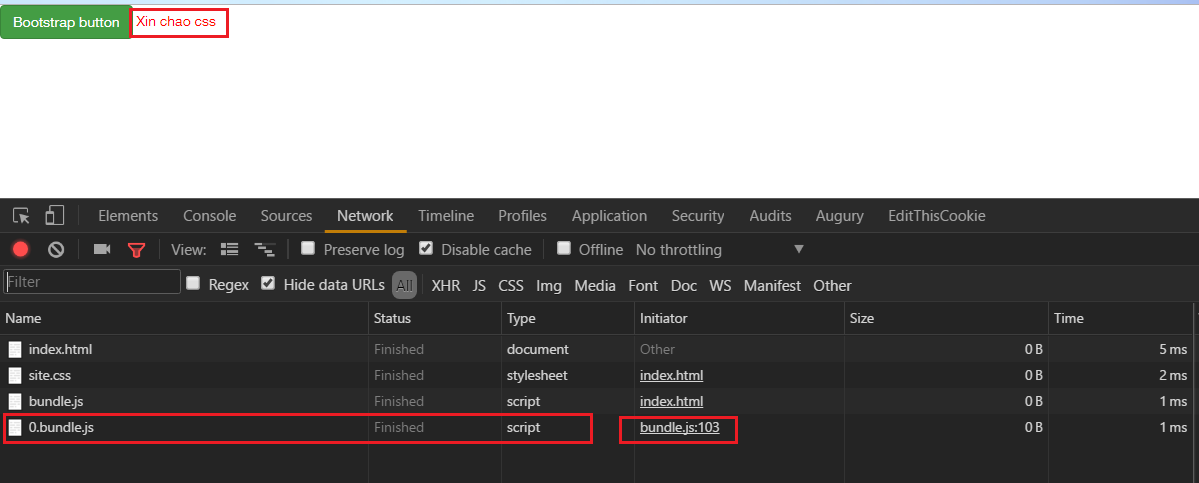
Chúng ta thấy 0.bundle.js được gọi từ bundle.js (khi click vào button) và sau đó là inject css của nó vào html. Ta đa... đơn giản quá phải không nào @_@.
Với file như xinchao.css này chỉ có 1 dòng thì split ra thì ko thấy được gì? Nhưng với những component, control mà css khoảng vài ngàn dòng như select2, mấy cái dtpicker, grid,... thì perfomance sẽ đc cải thiệt rõ rệt nhất là trên mobile.
Thanks các bạn đã xem hết bài này :)
Hẹn gặp lại ở chap tới về libraries spliting và async splitting.
Nguồn: https://jinhduong.github.io/javascript/webpack/2017/04/21/webpack-co-ban-2.html
Tham khảo:
https://webpack.js.org/guides/code-splitting-css/
https://webpack-gatsby.netlify.com/configuration/resolve/
