Nhập môn Nodejs API (Authentication – CRUD) cho người mới học
Trong bài viết này, mình và các bạn sẽ cùng thực hiện Authentication và CRUD của 1 ứng dụng Nodejs API một cách đơn giản, phù hợp với những bạn mới học và mới bắt đầu tiếp cận với nodejs. JavaScript Node.js Postman Express (JS framework) MongoDB (Database) Npm (quản lý ...

Trong bài viết này, mình và các bạn sẽ cùng thực hiện Authentication và CRUD của 1 ứng dụng Nodejs API một cách đơn giản, phù hợp với những bạn mới học và mới bắt đầu tiếp cận với nodejs.
- JavaScript
- Node.js
- Postman
- Express (JS framework)
- MongoDB (Database)
- Npm (quản lý các package)
- Visual Studio Code (hoặc Sublime Text)
Đầu tiên hãy tạo 1 thư mục để triển:
|
1 2 3 4 5 |
~~$ mkdir MyNodeProject ~~$ cd MyNodeProject ...:~/MyNodeProject$ npm init |
Đến đây bạn đã có 1 file package.json:
|
1 2 3 4 5 6 7 8 9 10 11 12 13 |
{ "name": "demo", "version": "1.0.0", "description": "", "main": "index.js", "scripts": { "test": "echo "Error: no test specified" && exit 1" }, "author": "", "license": "ISC" } |
Tiếp theo bạn cần thiết lập Express bằng cách:
|
1 2 3 |
...:~/MyNodeProject$ npm i express |
File package.json của bạn sẽ có dạng như này:
|
1 2 3 4 5 6 7 8 9 10 11 12 13 14 15 16 |
{ "name": "demo", "version": "1.0.0", "description": "", "main": "index.js", "scripts": { "test": "echo "Error: no test specified" && exit 1" }, "author": "", "license": "ISC", "dependencies": { "express": "^4.16.4" } } |
Rồi, bạn tạo 1 file index.js giống như main ở trong package.json
|
1 2 3 |
...:~/MyNodeProject$ touch index.js |
Trong file index.js sẽ cần thiết lập như sau:
|
1 2 3 4 5 6 7 8 9 10 11 12 |
const express = require('express') const app = express() const PORT = 8797 app.use('/', (req, res) => { res.json({"mess": "Hello Would!"}) }) app.listen(PORT, () => {console.log("Server started on http://localhost:"+PORT)}) module.exports = app; |
Thử start nhé:
|
1 2 3 |
...:~/MyNodeProject$ node index.js |
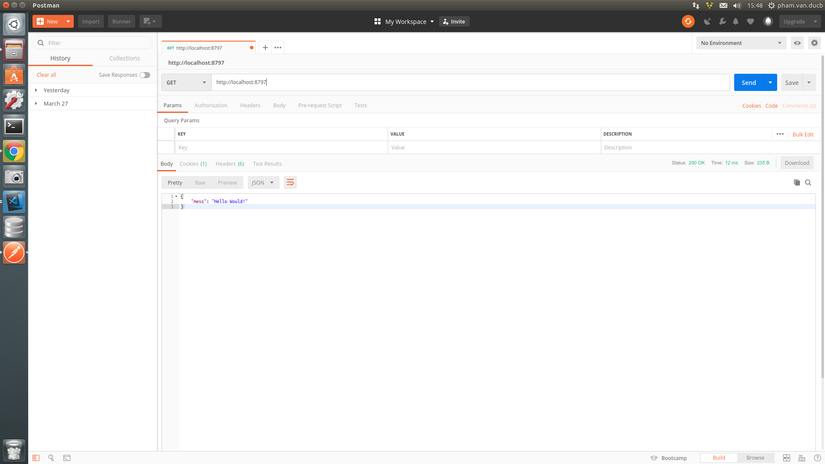
Và mở Postman chạy http://localhost:8797, bạn sẽ có được:

Để server tự động start lại sau khi có sự thay đổi thì bạn cần cài nodemon:
|
1 2 3 |
...:~/MyNodeProject$ npm i nodemon |
|
1 2 3 4 5 6 7 8 9 10 11 12 13 14 15 16 17 18 |
{ "name": "demo", "version": "1.0.0", "description": "", "main": "index.js", "scripts": { "devstart": "nodemon run index.js", "test": "echo "Error: no test specified" && exit 1" }, "author": "", "license": "ISC", "dependencies": { "express": "^4.16.4", "nodemon": "^1.18.10" } } |
Chạy:
|
1 2 3 |
...:~/MyNodeProject$ npm run devstart |
Các package cần dùng:
- body-parser (parse các request tới server)
- express (làm cho ứng dụng chạy)
- nodemon (restart khi có thay đổi xảy ra)
- mongoose (mô hình hóa object data để đơn giản hóa các tương tác với MongoDB)
- bcrypt (hashing và salting passwords)
- express session (xử lý sessions)
- connect-mongo (lưu trữ session trong MongoDB)
- dotenv (sử dụng .env)
- express-validator
- morgan
|
1 2 3 |
...:~/MyNodeProject$ npm i body-parser mongoose bcrypt express session connect-mongo dotenv express-validator morgan |
3.1. Connect MongoDB
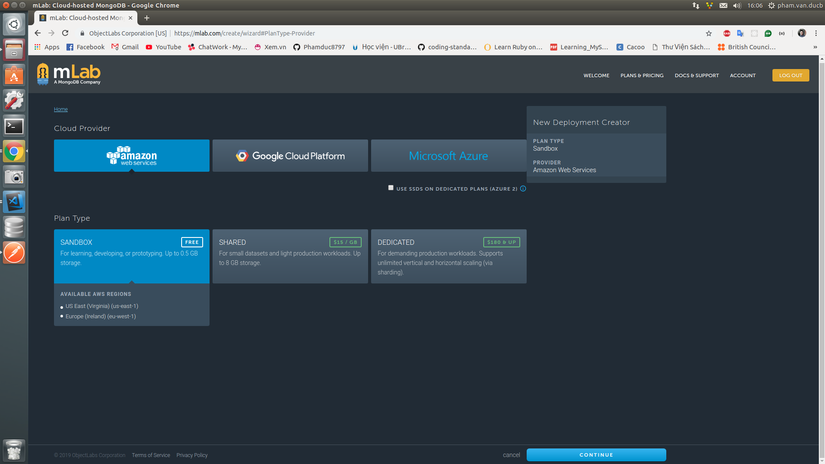
Ở bài này mình sẽ kết nối db ở https://mlab.com/


Bấm CONTINUE và đặt DATABASE NAME là mynodeproject_db
Đến đây, bạn hãy tạo 1 database user, và bạn đc cũng cấp 1 link connect db:
|
1 2 3 4 |
mongodb://<dbuser>: <dbpassword>@ds111549.mlab.com:11549/mynodeproject_db |
Quay trở lại với project, tạo 1 file .env ngang hàng với index.js
|
1 2 3 4 |
DB_URL = mongodb://<dbuser>:<dbpassword>@ds111549.mlab.com:11549/mynodeproject_db PORT = 8797 |
Thay thế <dbuser> và <dbpassword> bằng database user và password bạn vừa tạo.
Rồi, trong file index.js
|
1 2 3 4 5 6 7 8 9 10 11 12 13 14 15 16 17 18 19 20 21 22 23 24 25 |
const express = require('express') const dotenv = require('dotenv') const mongoose = require('mongoose') const app = express() const PORT = process.env.PORT || 8797 const db = mongoose.connection; dotenv.config() //connect db mongoose.connect(process.env.DB_URL, { useNewUrlParser: true }).then(() => console.log('DB Connected!')); db.on('error', (err) => { console.log('DB connection error:', err.message); }) app.use('/', (req, res) => { res.json({"mess": "Hello Would!"}) }) app.listen(PORT, () => {console.log("Server started on http://localhost:"+PORT)}) module.exports = app; |
Chạy lại npm run devstart để kiểm tra kết nối.
Có thể bạn muốn xem:
3.2. Register User
3.2.1. Models
Từ thư mục root, tạo src/models/UserModels.js
|
1 2 3 4 5 6 7 8 9 10 11 12 13 14 |
const mongoose = require('mongoose') const Schema = mongoose.Schema const userSchema = new Schema({ email: {type: String, unique: true, required: true, trim: true}, username: {type: String, required: true, trim: true, minlength: 2}, role: {type: String, enum: ['admin', 'customer']}, password: {type: String, required: true, trim: true, minlength: 6}, password_confirm: {type: String, required: true, trim: true, minlength: 6}, }); module.exports = mongoose.model('User', userSchema) |
3.2.2. Controllers
Tại src/controllers/UserControllers.js
|
1 2 3 4 5 6 7 8 9 10 11 12 13 14 15 16 17 18 19 20 21 22 23 24 |
const User = require('../models/UserModels') const bcrypt = require('bcrypt') exports.register = function(req, res, next){ User.findOne({email: req.body.email}, (err, user) => { if(user == null){ //Kiểm tra xem email đã được sử dụng chưa bcrypt.hash(req.body.password, 10, function(err, hash){ //Mã hóa mật khẩu trước khi lưu vào db if (err) {return next(err);} const user = new User(req.body) user.role = ['customer'] //sau khi register thì role auto là customer user.password = hash; user.password_confirm = hash; user.save((err, result) => { if(err) {return res.json({err})} res.json({user: result}) }) }) }else{ res.json({err: 'Email has been used'}) } }
Có thể bạn quan tâm
0
|
