ReactJS - Props Overview
Sự khác biệt chính giữa state và props là props là bất biến (không thay đổi). Đây chính là lý do tại sao phải định nghĩa thêm state cho component để có thể thay đổi và update dữ liệu. Còn các component con thì chỉ nên truyền dữ liệu từ state vào và bên trong nó chúng ta sẽ sử dụng ...
Sự khác biệt chính giữa state và props là props là bất biến (không thay đổi). Đây chính là lý do tại sao phải định nghĩa thêm state cho component để có thể thay đổi và update dữ liệu. Còn các component con thì chỉ nên truyền dữ liệu từ state vào và bên trong nó chúng ta sẽ sử dụng props.
1. sử dụng props
Khi chúng ta cần các dữ liệu không thay đổi trong component, Chúng ta có thể thêm các props vào hàm reactDOM.render() trong main.js và sử dụng nó trong component.
App.jsx
import React from 'react';

class App extends React.Component {
   render() {
      return (
         <div>
            <h1>{this.props.headerProp}</h1>
            <h2>{this.props.contentProp}</h2>
         </div>
      );
   }
}
export default App;
main.js
import React from 'react';
import ReactDOM from 'react-dom';
import App from './App.jsx';

ReactDOM.render(
  <App
    headerProp = "Header from props..."
    contentProp = "Content from props..."
  />, document.getElementById('app'));

export default App;
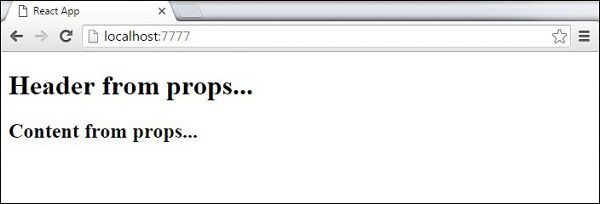
Kết quả sẽ như sau:

2. Default Props
Bạn cũng có thể định nghĩa giá trị props ngay trong component thay vì truyền trực tiếp vào reactDom.render()
App.jsx
import React from 'react';

class App extends React.Component {
   render() {
      return (
         <div>
            <h1>{this.props.headerProp}</h1>
            <h2>{this.props.contentProp}</h2>
         </div>
      );
   }
}
App.defaultProps = {
   headerProp: "Header from props...",
   contentProp:"Content from props..."
}
export default App;
main.js
import React from 'react';
import ReactDOM from 'react-dom';
import App from './App.jsx';

ReactDOM.render(<App/>, document.getElementById('app'));
kết quả vẫn như trên:

3. State và Props
ví dụ sau sẽ cho thấy cách kết hợp state và props trong ứng dụng của chúng ta. Cần thiết lập state trong component cha và truyền nó xuống component con sử dụng props. Trong hàm render dưới đây, chúng ta sẽ thiết lập headerProp và contentProp sử dụng trong component con:
App.jsx
import React from 'react';

class App extends React.Component {
   constructor(props) {
      super(props);
      this.state = {
         header: "Header from props...",
         content: "Content from props..."
      }
   }
   render() {
      return (
         <div>
            <Header headerProp = {this.state.header}/>
            <Content contentProp = {this.state.content}/>
         </div>
      );
   }
}
class Header extends React.Component {
   render() {
      return (
         <div>
            <h1>{this.props.headerProp}</h1>
         </div>
      );
   }
}
class Content extends React.Component {
   render() {
      return (
         <div>
            <h2>{this.props.contentProp}</h2>
         </div>
      );
   }
}
export default App;
main.js
import React from 'react';
import ReactDOM from 'react-dom';
import App from './App.jsx';

ReactDOM.render(<App/>, document.getElementById('app'));
Kết quả sẽ giống như trong hai ví dụ trước, tuy nhiên điều khác biệt duy nhất là nguồn dữ liệu của chúng ta, nó đã được chuyển đến từ state. Khi chúng ta muốn cập nhật nó, chúng ta chỉ cần cập nhật state và tất cả các component con sẽ được cập nhật.

4. Validating Props
Xác định các kiểu của các thuộc tính là một việc rất tốt để có thể sử dụng chính xác các props trong các component. Điều này sẽ giúp trong quá trình phát triển để tránh các lỗi và vấn đề khác xảy ra trong tương lai, khi ứng dụng trở nên lớn hơn. Nó cũng làm cho code của mình dễ đọc hơn, vì có thể thấy được nó sử dụng như thế nào.
Trong ví dụ dưới đây, chúng ta sẽ tạo component App với tất cả các props mà chúng ta cần sử dụng. App.propTypes được sử dụng để validate các prop. Nếu một số props không sử dụng đúng kiểu mà chúng ta đã gán, sẽ nhận được cảnh báo trong console. Sau khi chúng ta xác định các kiềủ cho từng props, chúng ta sẽ thiết lập App.defaultProps.
App.jsx
import PropTypes from 'prop-types';
import React from 'react';
import ReactDOM from 'react-dom';

class App extends React.Component {
   render() {
      return (
         <div>
            <h1> Hello, {this.props.name} </h1>
            <h3>Array: {this.props.propArray}</h3>
            <h3>Bool: {this.props.propBool ? "True..." : "False..."}</h3>
            <h3>Func: {this.props.propFunc(3)}</h3>
            <h3>Number: {this.props.propNumber}</h3>
            <h3>String: {this.props.propString}</h3>
         </div>
      );
   }
}
App.propTypes = {
   name: PropTypes.string,
   propArray: PropTypes.array.isRequired,
   propBool: PropTypes.bool.isRequired,
   propFunc: PropTypes.func,
   propNumber: PropTypes.number,
   propString: PropTypes.string,
};
App.defaultProps = {
   name: 'Tutorialspoint.com',
   propArray: [1, 2, 3, 4, 5],
   propBool: true,
   propFunc: function(e) {
      return e
   },
   propNumber: 1,
   propString: "String value..."
}
export default App;
main.js
import React from 'react';
import PropTypes from 'prop-types';
import ReactDOM from 'react-dom';
import App from './App.jsx';

ReactDOM.render(<App/>, document.getElementById('app'));
webpack.config.js
var config = {
   entry: './main.js',

   output: {
      path:'/',
      filename: 'index.js',
   },
   devServer: {
      inline: true,
      port: 8080
   },
   externals: {
      'react': 'React'
   },
   module: {
      loaders: [
         {
            test: /.jsx?$/,
            exclude: /node_modules/,
            loader: 'babel-loader',

            query: {
               presets: ['es2015', 'react']
            }
         }
      ]
   }
}
module.exports = config;
Chúng ta đã sử dụng isRequired khi validate propArray và propBool. Điều này sẽ trả về 1 error, nếu một trong 2 không tồn tại. Nếu chúng ta xóa propArray: [1,2,3,4,5] ở trong App.defaultProps, sẽ xuất hiện cảnh báo như sau:

Nếu chúng ta thay đổi giá trị thành propArray: 1 thì React sẽ cảnh báo chúng ta rằng việc validate propType đã lỗi, vì chúng ta cần một mảng chứ không phải là một số. khi đó sẽ xuất hiện cảnh báo như sau:

cảm ơn đã theo dõi bài viết! tham khảo bài viết gốc:
https://www.tutorialspoint.com/reactjs/reactjs_props_overview.htm
https://www.tutorialspoint.com/reactjs/reactjs_props_validation.htm
