Animation trong Angular 4 - Angular4
Animation thêm rất nhiều tương tác giữa các thẻ html. Animation thì đã có từ Angular 2. Điểm khác biệt ở Angular 4 là animation được tách thành một package riêng biệt chứ không còn nằm trong package @angular/core nữa. Để bắt đầu sử dụng animation, chúng ta cần import thư viện từ package ...
Animation thêm rất nhiều tương tác giữa các thẻ html. Animation thì đã có từ Angular 2. Điểm khác biệt ở Angular 4 là animation được tách thành một package riêng biệt chứ không còn nằm trong package @angular/core nữa.
Để bắt đầu sử dụng animation, chúng ta cần import thư viện từ package @angular/platform-browser/animations
import { BrowserAnimationsModule } from '@angular/platform-browser/animations';
Cũng như các module khác, chúng ta cần khai báo bên trong mảng import
import { BrowserModule } from '@angular/platform-browser';
import { NgModule } from '@angular/core';

import { BrowserAnimationsModule } from '@angular/platform-browser/animations';
import { AppComponent } from './app.component';

@NgModule({
   declarations: [
      AppComponent
   ],
   imports: [
      BrowserModule,
      BrowserAnimationsModule
   ],
   providers: [],
   bootstrap: [AppComponent]
})
export class AppModule { }
Tiếp đó, trong file app.component.html, chúng ta thêm các phần tử html để áp dụng animation lên
<div>
    <button (click)="animate()">Click Me</button>
    <div [@myanimation] = "state" class="rotate">
       <img style="width: 340px; height: 82px" src="https://Zaidap.com.net/public/logo/hoc-lap-trinh-online.png" width="100" height="100">
    </div>
 </div>
Trong thẻ div chính, chúng ta có 1 button và div con kèm1 ảnh. Button được gán sự kiện click; div con được gán sử dụng @myanimation directive với giá trị là state.
Trong file app.component.ts, chúng ta định nghĩa animation
import { Component } from '@angular/core';
import { trigger, state, style, transition, animate } from '@angular/animations';

@Component({
    selector: 'app-root',
    templateUrl: './app.component.html',
    styleUrls: ['./app.component.css'],
    styles: [`
      div{
         margin: 0 auto;
         text-align: center;
      }
      .rotate{
          width: 340px;
          heigh: 82px;
         border:solid 1px red;
      }
   `],
    animations: [
        trigger('myanimation', [
            state('smaller', style({
                transform: 'translateY(100px)'
            })),
            state('larger', style({
                transform: 'translateY(0px)'
            })),
            transition('smaller <=> larger', animate('300ms ease-in'))
        ])
    ]
})

export class AppComponent {
    state: string = "smaller";
    animate() {
        this.state = this.state == 'larger' ? 'smaller' : 'larger';
    }

}
Ở dòng code thứ 2, chúng ta import các class cần thiết cho animation: trigger, state, style, transittion, animate:
import { trigger, state, style, transition, animate } from '@angular/animations';
Bên trong decorator @Component, ta định nghĩa thêm thuộc tính animations:
animations: [
        trigger('myanimation', [
            state('smaller', style({
                transform: 'translateY(100px)'
            })),
            state('larger', style({
                transform: 'translateY(0px)'
            })),
            transition('smaller <=> larger', animate('300ms ease-in'))
        ])
    ]
Trigger định nghĩa rằng animation được sử dụng như thế nào. Tham số đầu tiên chính là tên của animation mà ta sẽ sử dụng bên trong thẻ html. Trong ví dụ trên thì đó là 'myanimation'. Tham số thứ 2 chứa các hàm state và transition.
Hàm state định nghĩa các trạng thái của animation: với trạng thái nào thì sẽ có style như thế nào. Trong ví dụ trên thì ta định nghĩa 2 state là: smaller và larger. State smaller có style là transform:translateY(100px) - tức dịch chuyển 100px theo trục y trong toạ độ đề-các và state larger có style là transform: translateY(0px) - tức dịch chuyển lại vị trí ban đầu.
Hàm transition định nghĩa các thông số hiển thị trên màn hình như độ dài, độ trễ khi chuyển từ trạng thái này sang trạng thái khác.
Cùng nhìn vào file html để xem transition hoạt động như thế nào nhé
<div>
    <button (click)="animate()">Click Me</button>
    <div [@myanimation] = "state" class="rotate">
       <img style="width: 340px; height: 82px" src="https://Zaidap.com.net/public/logo/hoc-lap-trinh-online.png" width="100" height="100">
    </div>
 </div>
Thuộc tính style được thêm vào @component directive để căn giữa cho các thẻ div.
 styles: [`
      div{
         margin: 0 auto;
         text-align: center;
      }
      .rotate{
          width: 340px;
          heigh: 82px;
         border:solid 1px red;
      }
   `],
Khi click vào button, hàm animate được khai báo trong file app.component.ts được gọi tới
state: string = "smaller";
    animate() {
       this.state= this.state == 'larger' ? 'smaller' : 'larger';
    }
Biến state được định nghĩa giá trị mặc định là smaller. Nếu state đang là larger thì chuyển về smaller và ngược lại.
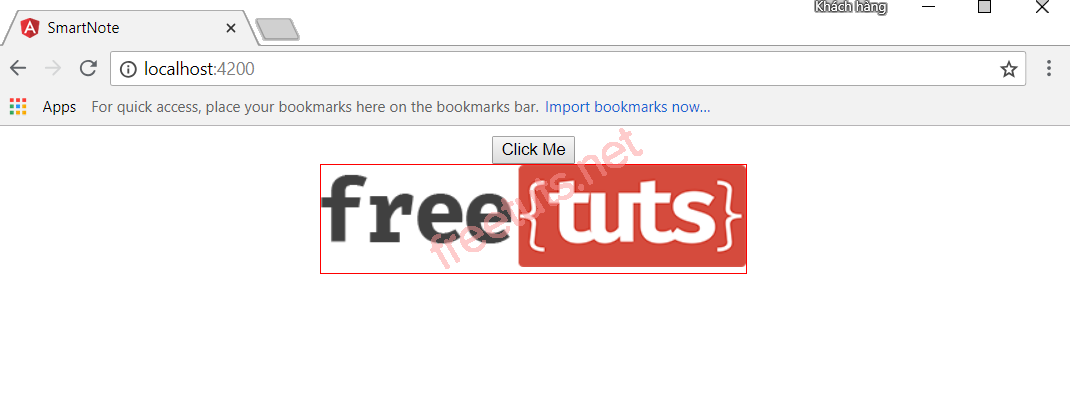
Khi mở trình duyệt lên, ta nhận được kết quả

Khi click vào button Click Me, ta nhận được kết quả như hình

Hàm transform đã thay đổi giá trị của y trên trục y từ 0 đến 100.
Về cơ bản, thì animation trong Angular 4 hoạt động như thế. Bạn có thể tham khảo thêm về animation tại link này.
Bài học về animation trong Angular 4 đến đây là hết rồi. Hẹn các bạn trong bài tiếp theo: Material trong angular 4.
